Archives For November 30, 2015

mypaint-icon

Open source painting and drawing software, MyPaint, sees a new stable release after a long time of development.

The developer announced the release of MyPaint 1.2.0 yesterday, along with Ubuntu binaries available in PPA for Ubuntu 16.04, Ubuntu 15.10, Ubuntu 15.04, Ubuntu 14.04, and their derivatives. MyPaint 1.2.0 features:

  • New intuitive Inking tool for smooth strokes.
  • New Flood Fill tool.
  • Automated backups of your working docs, with recovery on startup.
  • Improved symmetry-setting and frame-setting modes.
  • New workspace UI: two sidebars, with dockable tabbed panels.
  • Smoother scrolling and panning.
  • New brush pack.
  • New brush and color history panel.
  • New layer trimming command in frame options.
  • Added layer groups.
  • New layer modes: several masking modes added.
  • Add display filters: greyscale, simulate dichromacy for trichromats.
  • New color wheel options: Red/Yellow/Blue, Red-Green/Blue-Yellow.
  • Uses dark theme variant by default.
  • Clearer icons, prettier freehand cursors.
  • Device prefs allow glitchy devices to be restricted.
  • Eraser mode no longer changes the size of the brush.
  • New vector layers, editable in an external app (Inkscape recommended).
  • New fallback layer types: non-PNG image, data.
  • More kinds of images now work as backgrounds.
  • Improved Windows support
  • Ported to GTK3.
  • Accelerator map editor has moved to preferences.
  • Many other bugfixes, translations, and code quality improvements.

How to Install MyPaint 1.2.0 in Ubuntu:

1. Open terminal from Unity Dash, App Launcher, or via Ctrl+Alt+T shortcut key. When it opens, paste below command and hit run:

sudo add-apt-repository ppa:achadwick/mypaint-testing

It will add the developer’s PPA after you typing password (no visual feedback so just type in mind) when it asks, and hitting Enter to continue.

mypaint-ppa

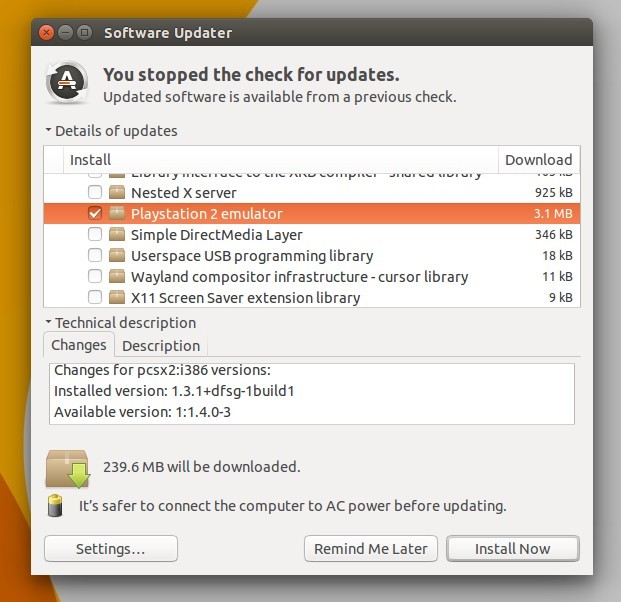
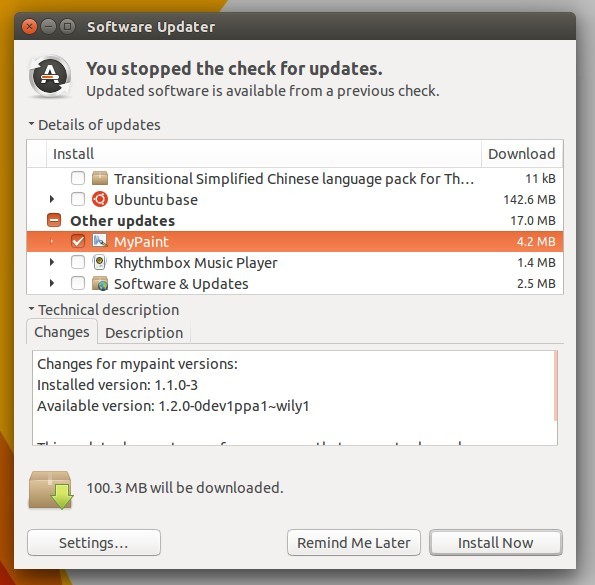
2. Launch Software Updater if you have a previous release installed. After checking for updates, upgrade MyPaint by installing the available updates.

upgrade-mypaint

Or install the software via either Software Center, or commands below:

sudo apt-get update

sudo apt-get install mypaint mypaint-data-extras

3. (Optional), for any reason you want to remove the software, remove PPA by launching Software & Updates and navigate to Other Software tab, and uninstall MyPaint via Software Center.

Scribus 1.4.6

Open source desktop publishing software, Scribus, has reached a new stable release with some new features and various bug-fixes.

Scribus 1.4.6 is a bugfixing and update release, including many corrections backported from the development candidate 1.5.x. It features:

  • supports SVG blend modes
  • improvements to Scribus’s PDF export.
  • improvements to hyphenation
  • four new color palettes, namely CIE LAB and CIE HLC, both available in a CMYK and an sRGB version.
  • bugfixes.

scribus-146

How to Install Scribus 1.4.6:

The new release has been made into official Ubuntu 16.04 repository, so it can be easily installed via Software Center.

For Ubuntu 15.10, Ubuntu 14.04, and their derivatives, you may install the software via third-party PPA:

1. Open terminal from Unity Dash, Application Launcher, or via Ctrl+Alt+T shortcut key. When it opens, paste below command and hit run:

sudo add-apt-repository ppa:ubuntuhandbook1/ppa

type in your password (no visual feedback just type in mind) when it asks, and hit Enter to continue.

scribus-ppa

2. After that, launch Software Updater and upgrade Scribus if you have a previous release installed.

Or, run below commands in terminal to update and install the software:

sudo apt-get update

sudo apt-get install scribus

FOR THOSE WHO DON’T WANT TO ADD PPA, grab .deb packages for scribus and scribus-data from THIS PAGE.

3. Optional To downgrabe Scribus, install ppa-purge and purge the PPA:

sudo apt-get install ppa-purge

sudo ppa-purge ppa:ubuntuhandbook1/ppa

pcsx2-icon

PCSX2 is a PlayStation 2 emulator, a free program that tries to replicate the PlayStation 2 console to enable you to play PS2 games on Windows, Linux.

It features:

  • Custom resolutions, up to 4096×4096, Anti Aliasing and Texture filtering to make your old PS2 games look better than their HD remakes!
  • Unlimited memory cards
  • Save states, enabling you to quick save and load practically anywhere in your game
  • Easy cheating using our pnach patching system
  • Use any controller (PS3,Xbox360 etc) that works on Windows, keyboards and mice
  • Increase or decrease the game speed by using the built-in frame-limiter for fast grinding or passing hard spots by slowing them down
  • Ability to record in full HD with the built-in video recorder (F12 using the GSdx plugin)

How to Install PCSX2 in Ubuntu:

NOTE: The PPA is NO longer updated! You may only install the old versions from it in Ubuntu 12.04, Ubuntu 14.04, Ubuntu 16.04, and Ubuntu 18.04.

The program has been made into official Ubuntu repositories since Ubuntu 15.10 Wily, but Canonical does not provide future update for this program. To get the latest version, you may use the official PCSX2 PPA, available for Ubuntu 16.04, Ubuntu 15.10, Ubuntu 15.04, Ubuntu 14.04, and derivatives.

1. Add PPA.

Open terminal from Unity Dash, Application Launcher, or via Ctrl+Alt+T shortcut key. When it opens, paste below command and hit run:

sudo add-apt-repository ppa:gregory-hainaut/pcsx2.official.ppa

Type in your password (no visual feedback just type in mind) when it asks, and hit enter to continue.

ps2 emulator ppa

2. After that, run below commands one to install the program:

sudo apt-get update

sudo apt-get install pcsx2

Or upgrade it via Software Updater if you have a previous release installed.

upgrade-ps2-emulator

3. To be able to run the emulator, you have to dump the BIOS file from your Playstation 2 console, which is not included with PCSX2 due to Sony copyright. See this forum thread.

Finally start the emulator, follow the first time configuration wizard, and enjoy!

4. (Optional) Uninstall PCSX2 via Software Center, or by running below command:

sudo apt-get remove pcsx2; sudo apt-get autoremove

And remove the PPA by launching Software & Updates, and navigate to Other Software tab.

install Eclipse Ubuntu

This is a rewrite about how to install the latest Eclipse IDE in Ubuntu, since the old tutorial does no longer work after the Eclipse Installer was rolled out. Works on all Ubuntu releases.

Eclipse IDE

1. Install Java.

Don’t have Java installed? Search for and install OpenJDK Java 7 or 8 via Software Center. Or install oracle java by following this post.

2. Download Eclipse from its website.

Check out your OS Type, 32-bit or 64-bit, by going to System Settings -> Details -> Overview, then select download Linux 32-bit or 64-bit of Eclipse Installer.

3. Run the installer wizard.

Decompress the downloaded archive in your file browser and navigate to the result “eclipse-installer” folder, right-click on file eclipse-inst and select Run.

launch Eclipse IDE installer

Don’t see the “Run” option? Go to file browser’s Menu Edit -> Preferences -> Behavior -> check “Run executable text files when they are opened”, and finally log out and back in (or run nautilus -q command in terminal).

When the wizard launches, select install item, then installation folder, and finally click INSTALL button.

Eclipse IDE installer

You may select Advanced Mode from top-right menu to get more options, network proxy settings, etc.

4. Create a launcher shortcut.

Open terminal from Unity Dash, Application Launcher, or via Ctrl+Alt+T shortcut key. When it opens, paste below command and run:

gedit .local/share/applications/eclipse.desktop

The command creates and opens a launcher file, for current user, with gedit text editor. When it opens, paste below content:

[Desktop Entry]
Name=Eclipse
Type=Application
Exec=/home/USERNAME/java-mars/eclipse/eclipse
Terminal=false
Icon=/home/USERNAME/java-mars/eclipse/icon.xpm
Comment=Integrated Development Environment
NoDisplay=false
Categories=Development;IDE;
Name[en]=Eclipse

Depends on your installation folder, check out in file browser, change the value in red.

create Eclipse launcher

How to Install Linux Kernel 4.4 in Ubuntu

Last updated: January 11, 2016

upgrade Linux Kernel

Linus Torvalds finally announced the release of Linux Kernel 4.4 yesterday afternoon. He wrote on LKML:

Nothing untoward happened this week, so Linux-4.4 is out in all the usual places.

The changes since rc8 aren’t big. There’s about one third arch updates, one third drivers, and one third “misc” (mainly some core kernel and networking), But it’s all small. Notable might be unbreaking the x86-32 “sysenter” ABI, when somebody (*cough*android-x86*cough*) misused it by not using the vdso and
instead using the instruction directly.

Full shortlog appended for people who care or are just curious.

And with this, the merge window for 4.5 is obviously open, even if I won’t start actually pulling until tomorrow.

Linux Kernel 4.4 features:

  • initial AMD Stoney APU Support
  • numerous AMD GPU additions for AMD Carrizo, Tonga, or Fiji graphics processor
  • Raspberry Pi KMS driver for kernel mode-setting
  • VirGL VirtIO 3D GPU driver added to Gallium3D
  • many Network, WiFi, and eBPF updates
  • 64-bit ARM updates, nouveau improvements, and much more.

How to Install Kernel 4.4 in Ubuntu:

Ubuntu Kernel Team has made the binaries a few hours ago, available for download at the link below:

Download Linux Kernel 4.4 DEBs

You may first check out your OS type, 32-bit or 64-bit, (also arm, ppc64 packages available) then download and install below packages one by one:

  1. linux-headers-4.4.0-xxx_all.deb
  2. linux-headers-4.4.0-xxx-generic_xxx_i386/amd64.deb
  3. linux-image-4.4.0-xxx-generic_xxx_i386/amd64.deb

If you need a low latency system (e.g. for recording audio) then download & install below packages instead:

  1. linux-headers-4.4.0_xxx_all.deb
  2. linux-headers-4.4.0-xxx-lowlatency_xxx_i386/amd64.deb
  3. linux-image-4.4.0-xxx-lowlatency_xxx_i386/amd64.deb

For Ubuntu Server or those who prefer Linux commands, run below commands one by one to download and install the kernel binaries:

For 64-bit system:

cd /tmp/

wget http://kernel.ubuntu.com/~kernel-ppa/mainline/v4.4-wily/linux-headers-4.4.0-040400_4.4.0-040400.201601101930_all.deb

wget http://kernel.ubuntu.com/~kernel-ppa/mainline/v4.4-wily/linux-headers-4.4.0-040400-generic_4.4.0-040400.201601101930_amd64.deb

wget http://kernel.ubuntu.com/~kernel-ppa/mainline/v4.4-wily/linux-image-4.4.0-040400-generic_4.4.0-040400.201601101930_amd64.deb

sudo dpkg -i *.deb

For 32-bit system:

cd /tmp/

wget http://kernel.ubuntu.com/~kernel-ppa/mainline/v4.4-wily/linux-headers-4.4.0-040400_4.4.0-040400.201601101930_all.deb

wget http://kernel.ubuntu.com/~kernel-ppa/mainline/v4.4-wily/linux-headers-4.4.0-040400-generic_4.4.0-040400.201601101930_i386.deb

wget http://kernel.ubuntu.com/~kernel-ppa/mainline/v4.4-wily/linux-image-4.4.0-040400-generic_4.4.0-040400.201601101930_i386.deb

sudo dpkg -i *.deb

Restart computer after installation.

Uninstall the 4.4 Kernel:

For any reason you want to remove this kernel, restart your computer and select boot with the previous Kernel (under Advanced Options) when you’re at Grub boot menu, after logged in run below command in a terminal:

sudo apt-get remove linux-headers-4.4.0-* linux-image-4.4.0-*; sudo update-grub

variety-icon

Variety, an open-source wallpaper changer, downloader and manager, has been made for Ubuntu 16.04 LTS in its official PPA repository.

Variety is a system tray applet that changes the desktop wallpaper on a regular basis, using user-specified or automatically downloaded images from different online sources such as Imgur and Flickr. It can also automatically apply various fancy filters to the displayed images – charcoal painting, oil painting, heavy blurring, etc.

variety wallpaper changer indicator on panel

variety wallpaper changer indicator on panel

variety wallpaper changer settings window

variety wallpaper changer settings window

How to Install Variety in Ubuntu:

Variety available in the developer’s PPA for all current Ubuntu releases, including Ubuntu 12.04, Ubuntu 14.04, Ubuntu 15.04, Ubuntu 15.10, and the upcoming Ubuntu 16.04 LTS.

To install it, either add the PPA or download .deb binary directly from the below link:

1. Add PPA.

Open terminal from Unity Dash, Application launcher, or via Ctrl+Alt+T shortcut key. When it opens, paste below command and hit run:

sudo add-apt-repository ppa:peterlevi/ppa

Type in your password (no visual feedback just type in mind) when it asks and hit enter to continue.

variety-ppa

2. After that, use Synaptic Package Manager to install the software after clicking Refresh button. Or run below commands one by one in terminal:

sudo apt-get update

sudo apt-get install variety

For those who don’t want to add PPA, grab latest “variety_x.x.x_all.deb” package from THIS PAGE and click to install it via Software Center or Gdebi package manager.

How to Mount The Windows 10 Partition in Ubuntu

Last updated: January 7, 2016

mount windows 10

On Ubuntu and Windows 10 dual boot machine, when trying to mount the Windows system drive from Ubuntu, you may get an error saying “Windows is not fully shutdown” due to the new hybrid boot feature.

mount-error

And below is the how-to-fix steps:

1. Fully shutdown Windows 10, or disable Fast Startup

Ubuntu Linux can’t access Win10 system drive because Windows does not fully shut down (it actually hibernates). So you have to choose:

  1. Do a full shutdown – When you’re in Windows select “Restart” option or hold the SHIFT key when clicking “Shutdown” option.
  2. or Disable Fast Startup – Launch Control Panel and do:
    • navigate to Power Options -> Choose what the power buttons do
    • click the link “Change settings that are currently unavailable” at the top
    • uncheck the “Turn on fast startup” box under Shutdown settings.

2. Add read & write mount permission

After step 1 you should be able to access your Windows system drive in Ubuntu. But to have write permission, you still need to do:

1. Launch Disks utility from Unity Dash or Application Launcher.

2. When it launches, highlight Windows 10 partition (it’ll be a NTFS partition), then click the gear button and select “Edit Mount Options”.

edit-mount-option

3. In next window, disable “Automatic Mount Options” and add remove_hiberfile to the end of the text box, separated by a comma.

add-write-permission

After saving the changes, click mount/remount the Windows 10 partition in your file browser and enjoy!

Ubuntu 16.04 Xenial

The first alpha of Ubuntu 16.04 Xenial Xerus LTS has been released. Features images for Lubuntu, Ubuntu MATE, and UbuntuKylin.

Ubuntu 16.04 Alpha 1 comes with Linux Kernel 4.3. As an alpha pre-release, it is only recommended for developers and those who want to test by finding, reporting, and/or fixing bugs.

xerus

Download links:

For a reminder of upcoming Ubuntu release dates see the table:

January 28th Alpha 2 (for opt-in flavors)
February 25th Beta 1 (for opt-in flavors)
March 24th Final Beta
April 14th FinalFreeze, ReleaseCandidate
April 21st Final release of Ubuntu 16.04

Nuvola Player 3

Linux cloud music player Nuvola Player 3 finally goes stable. Its official repository is ready for Ubuntu 15.10, Ubuntu 15.04, Ubuntu 14.04, and derivatives.

Nuvola Player 3 supports various services such as Google Play Music, 8tracks, Amazon Cloud Player, Bandcamp, Deezer, Jango, KEXP Live Stream, Logitech Media Server, Mixcloud, Plex Music, Spotify, TuneIn, Yandex Music.

Nuvola Player 3 supported services

The new release has been rewritten from scratch and contains plenty of improvements over Nuvola Player 2. It features:

  • built on top of WebKit2Gtk+ so it doesn’t need any hacks to support Flash plugin
  • run multiple services side-by-side, the software creates a desktop application shortcut when a particular service starts
  • official repositories for Debian, Ubuntu, Fedora.
  • GTK header bar, client-side-decorations in Gnome.
  • and more at the release page.

How to Install Nuvola Player 3 in Ubuntu:

Open terminal from Unity Dash, Application Launcher, or via Ctrl+Alt+T shortcut key. When it opens, run below command one by one.

1. Add the official repository.

Paste below command in terminal and hit run:

sudo sh -c 'echo "deb https://tiliado.eu/nuvolaplayer/repository/deb/ wily stable" >> /etc/apt/sources.list.d/tiliado-nuvolaplayer.list'

Type in your password (no visual feedback so just type in mind) when it asks and hit enter.
nuvola-player-repository

Here you may replace wily in the code with:

  • wily — for Ubuntu 15.10 Wily Werewolf
  • vivid — for Ubuntu 15.04 Vivid Vervet
  • trusty — for Ubuntu 14.04 LTS, Linux Mint 17.x, Elementary OS Freya, etc.

2. Add GPG key to trust the repository packages.

sudo apt-key adv --keyserver hkp://keyserver.ubuntu.com:80 --recv-keys 40554B8FA5FE6F6A

3. Finally install Nuvola Player 3 via either Synaptic Package Manager after clicking Refresh, or below commands one by one:

sudo apt-get update

sudo apt-get install nuvolaplayer3

For those who hate Linux commands, try the graphics installer available at this page.

peazip 5.2.0

PeaZip file manager and file archiver has reached the 5.9.1 release recently. Here’s a quick tip for you how to install it in 64-bit Ubuntu.

PeaZip website provides the .deb binaries for Debian/Ubuntu based systems, but the software does not launch after installing it on 64-bit Ubuntu. The workaround is to simply install the 32-bit dependency libraries.

PeaZip File Archiver in Ubuntu

1. Go to link below:

PeaZip download archive

select download

  • peazip_x.x.x.LINUX.GTK2-2_i386.deb for 32-bit Ubuntu
  • peazip_x.x.x.LINUX.GTK2-2_all.deb for 64-bit Ubuntu

2. For 32-bit machine just install the package and you’re done.

The 64-bit package requires ia-32 libs, which is no available in Ubuntu since Ubuntu 13.10. The “fix” is to simply install the 32bit dependency libraries on 64bit Ubuntu, and that’s how multiarch works.

So first open terminal from Unity Dash, App Launcher, or via Ctrl+Alt+T shortcut key. When it opens, paste below command and run to install dependencies:

sudo apt-get install libatk1.0-0:i386 libc6:i386 libcairo2:i386 libgdk-pixbuf2.0-0:i386 libglib2.0-0:i386 libgtk2.0-0:i386 libpango1.0-0:i386 libx11-6:i386 libcanberra-gtk-module:i386

Then click to open and install downloaded PeaZip binary via Software Center or Gdebi.

3. You may right-click on one of your RAR, ZIP, TAR, etc. files, go to the Properties -> Open With tab. Finally select PeaZip as the default application to open these file formats.

openas-peazip