Archives For November 30, 1999

Shotwell Photo Manager

While the default Shotwell photo organizer is old in Ubuntu 20.04, here’s how to install the latest stable 0.30.10 via PPA repository.

Changes from the pre-installed Shotwell 0.30.8 to Shotwell 0.30.10 include:

  • Modify web publishing authentication to comply with Google’s requirements
  • Fix YouTube OAuth scope
  • New and updated translations.

For those who want to upgrade to the latest stable Shotwell 0.30.10, the unofficial PPA has made the package for Ubuntu 20.04 LTS.

1.) Open terminal either by pressing Ctrl+Alt+T on keyboard, or by searching for ‘terminal’ from ‘Show Applications’ menu. When terminal opens, run command:

sudo add-apt-repository ppa:sicklylife/shotwell

Type user password (no asterisk feedback) for sudo prompts and hit Enter to continue.

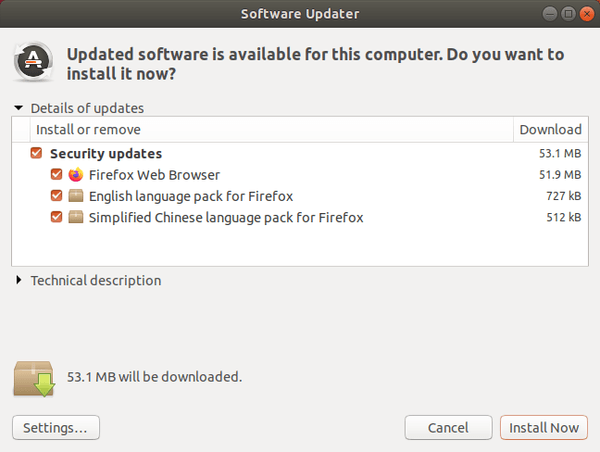
2.) Then either upgrade Shotwell via Software Updater (Update Manager).

Or run command to install the new photo organizer package:

sudo apt install shotwell

(Optional) For any issue, you can purge the PPA to revert back the stock Shotwell 0.30.8 by running command:

sudo apt install ppa-purge && sudo ppa-purge ppa:sicklylife/shotwell

Open source low latency and high quality voice chat application Mumble 1.3.1 was released a few days ago. Here’s how to install it via PPA in Ubuntu.

Mumble 1.3.1 is the first bug-fix release for the 1.3 series after 9 months of development. There’s a security fix that safeguards from potential attacks against OCB2.

Other changes include fixes to crash on multiple monitors, high CPU usage for update-check, OpenSSL error, manual placement plugin improvement, and more. See release note for details.

How to Install Mumble 1.3.0 in Ubuntu:

No Ubuntu 20.04 support at the moment of writing. Check the following PPA link, or install Snap / Flatpak instead.

Mumble Team PPA has built the new release package for Ubuntu 16.04, Ubuntu 18.04, Ubuntu 19.10, and even Ubuntu 14.04.

1. Open terminal either from application menu or by pressing Ctrl+Alt+T on keyboard. When it opens, paste below command and hit Enter:

sudo add-apt-repository ppa:mumble/release

Type user password (no asterisk feedback) when it prompts and hit Enter to continue adding the PPA.

2. If an old release was installed, simply upgrade Mumble via Software Updater:

Or run commands one by one in terminal to check updates and install the chat utility for gamer:

sudo apt-get update

sudo apt-get install mumble mumble-server

Uninstall Mumble:

You can purge the PPA which also downgrade the VoIP chat app to the stock version via command:

sudo apt-get install ppa-purge && sudo ppa-purge ppa:mumble/release

To simply remove mumble, either use system package manager or run command in terminal:

sudo apt-get remove mumble mumble-server

KDE Plasma 5.16

KDE Plasma 5.19 was released today with many new features, stability improvements, and better Wayland support.

KDE Plasma 5.19 release highlights:

  • New wallpaper
  • New collection of user avatars.
  • Consistent system tray applets.
  • Rewritten system monitor widgets.
  • New configurable file indexing options for individual directories
  • New option to configure mouse / touchpad scroll speed on Wayland.
  • Overhaul system settings pages
  • Redesigned info center, added information about graphics hardware.
  • KWin Window Manager improvements
  • Discover now displays app version and easy to remove Flatpak repositories.
  • Updated KSysGuard that support systems with more than 12 CPU cores
  • Screen rotation for tablets and convertible laptops works on Wayland.

Download / Install Plasma 5.19:

The new release packages will be made into Kubuntu Backports PPA in a few days.

For live images, source tarball, go to KDE Plasma 5.19 release note.

Free DJ mixing software Mixxx 2.3 beta was released. Here’s how to install it in Ubuntu 18.04, Ubuntu 19.10, Ubuntu 20.04.

See what’s new in this beta for next major Mixxx 2.3 series:

  • Hotcue colors and custom labels
  • Serato, Rekordbox metadata import.
  • Intro/Outro cues and silence detection
  • Add deck cloning (also known as “instant doubles”) by dragging and dropping between decks
  • Revamped LateNight skin
  • Multi-threaded analysis
  • Add FFmpeg audio decoder, bringing support for ALAC
  • And many other changes!

How to Install Mixxx 2.3 Beta in Ubuntu:

NOTE the beta release is for testing purpose. Don’t use it for live performances

1.) Open terminal from system application menu. When it opens, run command to add the Beta PPA.

sudo add-apt-repository ppa:mixxx/mixxxbetas

Type user password (no asterisk feedback) when it prompts and hit Enter to continue.

2.) Then either upgrade Mixxx using Software Updater (Update Manager), or run command:

sudo apt install mixxx

Uninstall Mixxx Beta:

You can purge the PPA repository to remove the beta package and back to stable series by running command:

sudo apt install ppa-purge && sudo ppa-purge ppa:mixxx/mixxxbetas

This simple tutorial shows how to hide / disable the Grub boot menu while booting Ubuntu.

You can do the job easily via Grub-Customizer (available in Ubuntu Software) under General Settings tab. However, you need to also disable “look for other operating systems” option.
Any time you want to show the Grub menu, press ESC while booting up will NO longer show dual-boot (multi-boot) systems other than Ubuntu.

NOT OK with Grub-Customizer settings? Re-enable “show menu” and “look for other operating systems” options, save changes, and do following steps one by one.

Hide boot menu by manually editing the config file:

In most Linux including Ubuntu, you can edit the /etc/default/grub file along with scripts under /etc/grub.d to control how the Grub boot menu works.
1.) Firstly, open terminal from system app launcher. Run command to edit the configuration file:

sudo -H gedit /etc/default/grub

For Ubuntu flavors / Linux Mint, replace gedit with your favorite text editor.

When the file opens, you need to set following lines:

  • GRUB_TIMEOUT_STYLE=hidden – Hide the boot menu. Though it still wait a few seconds you set by GRUB_TIMEOUT.
  • GRUB_TIMEOUT_STYLE=countdown – Hide boot menu and show countdown. Even set GRUB_TIMEOUT=0. It counts 3,2,1.
  • GRUB_TIMEOUT = 0 – It will boot the default OS immediately. However, you may set it to 3 or 5 so you can press ESC (F4 or hold Shift) during the time to show the boot menu if need.
  • GRUB_DISABLE_OS_PROBER=true – Disable “/etc/grub.d/30_os-prober” because it overwrite the value of GRUB_TIMEOUT_STYLE. However, it will no longer find other OSes other than Ubuntu.
  • GRUB_RECORDFAIL_TIMEOUT=0 – Set timeout if last boot failed. Without the key, it will show and stop at boot menu waiting user action.

2.) Step 1. will do the job after applying changes. However, it will no longer display other operating systems if any in your machine.

In case you want to boot other OS once in a while. Modify 30_os-prober file instead of disable it via “GRUB_DISABLE_OS_PROBER=true”.

To do so, run command:

sudo gedit /etc/grub.d/30_os-prober

And set quick_boot=”0″. So it will no longer overwrite “GRUB_TIMEOUT_STYLE” value you set in step 1, while also find other OSes on your machine.

3.) Finally apply changes via command:

sudo update-grub

How to restore:

Just undo what you did in step 1 and / or 2 and apply change by running command sudo update-grub.

CoBang is a new QR code scanner for Linux, which is written with Python 3 and GTK+ and support Wayland session.

The name is “Cỏ bàng” (Lepironia articulata), in Vietnamese. Compare to QtQR, Qt QR code generator and decoder, CoBang features:

  • Work in both X and Wayland.
  • Scan from webcam (embedded webcam video).
  • Scan from image:
    • drag and drop support.
    • copy and paste image into app window
    • open remote image (http, ftp)
    • open via file browser.

It is however lacks the feature to generate QR code so far.

How to Install CoBang in Ubuntu:

For Ubuntu 18.04 and higher, the tool is available as Flatpak package in Flathub repository.

For Ubuntu 20.04 only, the developer has made the package into the PPA repository.

1.) Open terminal (Ctrl+Alt+T) from ‘Show Applications’ menu. When it opens, run command to add the PPA:

sudo add-apt-repository ppa:ng-hong-quan/ppa

Type user password (no asterisk feedback) when it prompts and hit Enter to continue.

2.) Then install the QR code scanner via command:

sudo apt install cobang

Uninstall CoBang:

To remove the PPA, either open Software & Updates and remove repository line under Other Software tab, or run command:

sudo add-apt-repository --remove ppa:ng-hong-quan/ppa

And remove the scanner via command:

sudo apt remove --autoremove cobang

Want to change the ‘Show Applications’ dot grid icon in the dock panel of Ubuntu 20.04 Gnome Desktop?

The start menu dot grid icon relies on the view-app-grid-symbolic.svg icon. For default Yaru icon theme, it’s located in /usr/share/icons/Yaru/scalable/actions.

To replace the icon, open terminal by pressing Ctrl+Alt+T on keyboard, then do following steps one by one.

1.) Make a backup of the original icon file:

cd /usr/share/icons/Yaru/scalable/actions/ && sudo cp view-app-grid-symbolic.svg view-app-grid-symbolic.svg.bak

2.) Grab a SVG icon from web. In the case, I downloaded this ubuntu logo svg.

NOTE: it must be a .svg icon file.

3.) Copy (or move) your .svg to replace the start menu icon:

sudo cp /path/to/your/svg /usr/share/icons/Yaru/scalable/actions/view-app-grid-symbolic.svg

In my case the command is:

sudo cp ~/Downloads/ubuntu-icon.svg /usr/share/icons/Yaru/scalable/actions/view-app-grid-symbolic.svg

4.) Finally apply changes by pressing Alt+F2, type r in pup-up ‘Run a command’ box, and hit Enter to restart Gnome.

To restore changes, simply copy back the backup file you did in step 1 by running command:

cd /usr/share/icons/Yaru/scalable/actions/ && sudo cp view-app-grid-symbolic.svg.bak view-app-grid-symbolic.svg

Blender 2.79

Blender 2.83 was released a few days ago. It’s marked as the first LTS (Long Term Support) release with 2-year support with critical fixes.

Blender is the third and final update of the Blender 2.8 series, the new release features:

This release focuses on performance improvements – faster undo, higher performance for the Grease Pencil toolset, and adaptive sampling in the Cycles render engine – enabling artists to increase the complexity of their scenes. It also delivers brand-new sculpting tools such as the physics-enabled Cloth Brush and Face Sets. The Nvidia RTX AI-accelerated denoiser is now available in the viewport, greatly speeding up render previews. For a full list of updates, check the release notes at blender.org.

How to Install Blender 2.83 in Ubuntu:

The Blender Snap package (runs in sandbox) powered by Blender Foundation can be directly installed from Ubuntu Software.

For those prefer apt repository, Thomas Schiex’s PPA has made the packages for Ubuntu 18.04, Ubuntu 19.10, and Ubuntu 20.04.

The PPA is abandoned, see this tutorial instead.

1.) Open terminal either by pressing Ctrl+Alt+T on keyboard or by searching for ‘terminal’ from ‘show applications’ menu.

When terminal opens, run command to add the PPA:

sudo add-apt-repository ppa:thomas-schiex/blender

Type your password (no asterisk feedback) for sudo prompt and hit Enter to continue.

2.) Then run commands to install Blender 2.83 .deb package:

sudo apt update

sudo apt install blender

Uninstall:

To remove the PPA repository, launch Software & Updates utility and remove repository line under Other Software tab.

To remove Blender .deb package, run command:

sudo apt remove --autoremove blender

Sometimes after disconnected from a VPN network in Ubuntu 20.04, wireless does no longer work and even shows ‘No Adapter Found’ in the settings. If you have the same problem, this tutorial may help.

Without restarting your computer, you can try following steps to make the wireless work again.

1.) Restart Wifi network via system menu.

Try turn off wireless network from system tray menu, and turn it on again.

This works in the case when I disconnected from PPTP VPN server.

2.) Restart Wifi network via nmcli.

The previous step may not work sometimes. If so, try running commands in terminal (Ctrl+Alt+T) to restart networking:

nmcli networking off 

nmcli networking on

And this works in the case when I disconnected from a ExpressVPN server.

3.) Restart Wireless interface via ifconfig

You may also run following 2 commands to restart the wireless network:

sudo ifconfig wlo1 down

sudo ifconfig wlo1 up

NOTE you need to replace wlo1 to your wifi network name (usually wlan0). Check it via ifconfig command.

4.) If none of the previous steps works, you may try to reload the wireless kernel module.

Open terminal (Ctrl+Alt+T) from system application menu and run command to check your wireless driver:

sudo lshw -C network 2>&1 | grep wireless | grep driver

As the picture shows, it’s rtw_pci in my case.

Then run command to reload the kernel module:

sudo modprobe -r MODULE_NAME && sudo modprobe MODULE_NAME

In my case the command is (rtwpci did work though it should be rtw_pci):

sudo modprobe -r rtwpci && sudo modprobe rtwpci

Audacious music player

Audacious music player 4.0.4 was released 2 days ago with further improvements to the new Qt5 UI. Ubuntu PPA updated for all current Ubuntu releases.

Changes in the Qt interface include:

  • Add keyboard shortcuts for Open/Add Folder
  • Fix files being moved instead of copied when dragged to a file manager

For the Qt Winamp interface, some old features are added back:

  • Enable window snapping to screen edges
  • dragging files from file manager

There are also translation updates and more bug-fixes, see Audacious 4.0.4 release note.

How to Install Audacious 4.0.4 in Ubuntu:

The unofficial PPA contains the latest packages for Ubuntu 16.04, Ubuntu 18.04, Ubuntu 19.10, and Ubuntu 20.04.

1. Open terminal by either pressing Ctrl+Alt+T on keyboard or searching for ‘terminal’ from application menu. When it opens, run command to add the PPA:

sudo add-apt-repository ppa:ubuntuhandbook1/apps

Type your password (no asterisk feedback) when it prompts and hit Enter to continue.

2. Then run commands one by one in terminal to install or upgrade the audio player:

sudo apt update

sudo apt install audacious audacious-plugins

Uninstall:

You can easily remove the PPA either by going to Software & Updates utility -> Other Software tab, or by running command:

sudo add-apt-repository --remove ppa:ubuntuhandbook1/apps

To remove audacious, either use your system package manager or run command:

sudo apt remove --autoremove audacious audacious-plugins