I rarely use headphones on my Ubuntu laptop. But when I plugged in ones today, sound was coming from both headphones and speakers in Ubuntu 14.04.
This is a very old bug with alsamixer. If you happen to have this issue on Ubuntu 14.04, you may try below steps to fix it:
1. Launch a terminal window from the Dash, App launcher, or via Ctrl+Alt+T shortcut key. When it opens, run below command and hit enter:
alsamixer
When you see following screen, use Left/Right arrow key to navigate and choose Auto-Mute, then enable it via Up/Down arrow key.

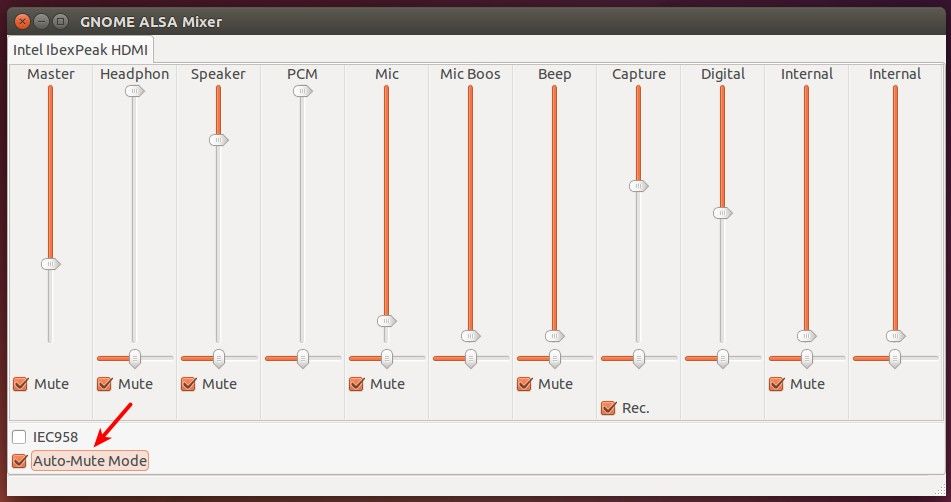
2. If it does not work, try GNOME ALSA Mixer which can be installed from Ubuntu Software Center or by running below command in terminal:
sudo apt-get install gnome-alsamixer
Then start it from the Dash or via gnome-alsamixer command and enable Auto-Mute Mode
3. Does not work? Well, here is how to install the latest ALSA driver for a “HDA Intel” sound card in Ubuntu 14.04, which fixed the issue for me.
First make sure you have dkms package installed. Install it either from Ubuntu Software Center or via below command in terminal:
sudo apt-get install dkms
Then select download the latest ALSA driver from THIS PAGE.
Depends on your Kernel version, check it out via uname -r command,

select download:
- oem-audio-hda-daily-dkms_xxx.deb for 3.13 kernel
- oem-audio-hda-daily-lts-utopic-dkms_xxx.deb for 3.16 kernel
- oem-audio-hda-daily-lts-vivid-dkms_xxx.deb for 3.19 kernel
After you installed the .deb package, restart you computer and plug / re-plug in headphones to see results.