Archives For November 30, 1999

Audacious 3.4.1 Released, Install it in Ubuntu

Last updated: September 6, 2013

audacious logoThe Audacious music player has released version 3.4.1. It mainly fixed below bugs:

  • no gapless playing with ALSA output #314
  • .minipsf looks for .psflib one directory level up #316
  • Tray icon missing after restarting xfce4-panel #317
  • Neon plugin fails to play stream over proxy with authentication. # 319
  • Buffer size too small for HVSC songlengths db #326
  • no metadata display for opus files #329
  • metadata updating failed and other weird tag issues #332
  • file writer flac does not write tags #334
  • Fix skinned ui not being drawn properly with gtk-3 >= 3.9 #336

Install Audacious in Ubuntu:

The Webupd8 Team PPA has updated the packages for Ubuntu 13.10, Ubuntu 13.04, Ubuntu 12.10, Ubuntu 12.04 and their derivatives, such as Linux Mint and Elementary OS.

To install it, press Ctrl+Alt+T on your keyboard to open terminal. When it opens, run below command to add the ppa:

sudo add-apt-repository ppa:nilarimogard/webupd8

Then install / upgrade Audacious via:

sudo apt-get update; sudo apt-get install audacious audacious-plugins

That’s it. Enjoy!

The Choqok micro-blogging client has updated to version 1.4 which brings back the Twitter support. Identi.ca support has been removed from StatusNet plugin.

choqok 1.4

The developer announced in the official website:

Sometimes ago we had two bad news, Identi.ca service switched to pump.io software and dropped it’s API, so Choqok is no longer support Identi.ca service, but it still supports StatusNet websites, because StatusNet is not died. About Identi.ca support, right now there’s no one working on pump.io support as I know, so unfortunately there’s no promise on supporting it again.
And in Twitter land, they turned off support for API v1.0 which Choqok was using, and so with this update Twitter support is back to Choqok.

other changes:

  • Support for Twitter API v1.1 (Thanks to Daniel Kreuter for his effort on it)
  • “mark timeline as read” menu item added to tabs context menu (Lim Yuen Hoe)
  • Show “in reply to” in twitter search timelines (Lim Yuen Hoe)
  • Identi.ca support removed from StatusNet plugin, we still support StatusNet
  • And some other minor fixes

Install Choqok 1.4 in Ubuntu:

Press Ctrl+Alt+T on your keyboard to open terminal. When it opens, run below commands to install the client in Ubuntu 13.10, Ubuntu 13.04, Ubuntu 12.10, Ubuntu 12.04 and their derivatives.

sudo add-apt-repository ppa:adilson/experimental

sudo apt-get update

sudo apt-get install choqok

This tutorial shows how to install Light Table IDE in Ubuntu 13.10, Ubuntu 13.04,12.10, 12.04 and manually create launcher for Unity Desktop.

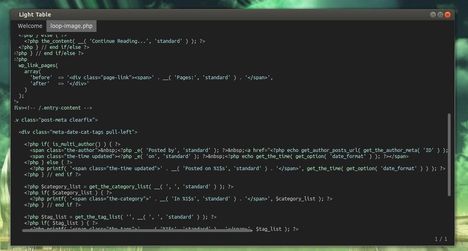
As you may know, Light Table is a new interactive IDE that lets you modify running programs and embed anything from websites to games. It provides the real time feedback we need to not only answer questions about our code, but to understand how our programs really work.

LightTable IDE Ubuntu

Install Light Table IDE:

1.) Download Light Table from its homepage

2.) For global use, extract the download package and put the result folder to /opt/.

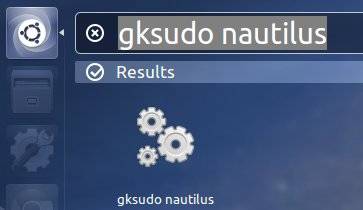
3.) You need to open Nautilus file browser as root to copy and paste Light Table Folder to /opt/. To do so, press Alt+F2 on your keyboard and type to run gksudo nautilus

open nautilus as root

Once done, you can open the IDE via command terminal:

/opt/LightTable/LightTable

NOTE: If you have problem launching it in Ubuntu 13.04 Raring Ringtail, run below command to fix:

  • for 32-bit:
    sudo ln -sf /lib/i386-linux-gnu/libudev.so.1 /lib/i386-linux-gnu/libudev.so.0
  • for 64-bit:
    sudo ln -sf /lib/x86_64-linux-gnu/libudev.so.1 /lib/x86_64-linux-gnu/libudev.so.0

Create Launcher for Light Table

1.) Press Ctrl+Alt+T on your keyboard to open terminal. When it opens, run below commands to install required package:

sudo apt-get install gnome-panel --no-install-recommends

2.) Bring up the ‘Create Launcher’ dialog via below command:

sudo gnome-desktop-item-edit /usr/share/applications/ --create-new

Type in:

Name: Light Table
command: /opt/LightTable/LightTable
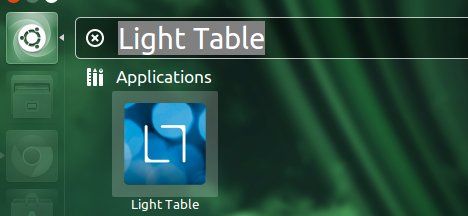
choose icon from /opt/LightTable/core/img/lticon.png

Light Table in Ubuntu unity

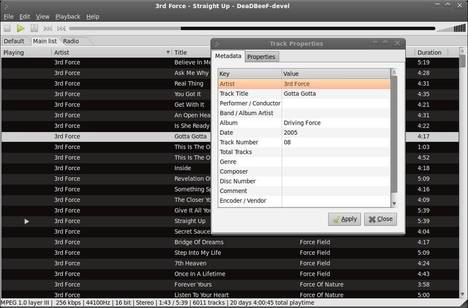
DeadBeef Music PlayerIf you would like to install DeadBeef audio player in Ubuntu and its derivatives such as Linux Mint, Elementary OS. This tutorial will tell you how to do it easily

As you may kown, DeaDBeeF is a lightweight audio player for GNU/Linux systems with X11 written in C and C++. It has below features:

  • plays mp3, ogg, flac/oga, ape, wav, wv/iso.wv, aac/m4a, alac, mpc/mpp/mp+, tta, wma, shn, sid, nsf, mod, s3m, vtx, vgm/vgz, psf, midi, audio cds, all formats supported by ffmpeg, dumb, gme, libsndfile, adplug, and more!
  • light on memory and CPU use
  • expandable through plugins
  • supports cuesheets (from .cue files, and embedded), reading and writing m3u and pls playlists
  • plays internet radio (shoutcast, icecast, mms), as well as normal mp3 files over http and ftp (e.g. from podcasts)
  • global hot-keys
  • reads and writes id3v1, id3v2, apev2, vorbiscomment tags to/from all relevant formats; read-only mp4 itunes tags
  • can detect charset of bad (non-unicode) id3 tags, as well as charsets in metadata from tracker modules and chiptunes
  • user-customizable playlist columns with title-formatting
  • high quality resampling using libsamplerate
  • playback using ALSA, OSS and PulseAudio
  • last.fm/libre.fm scrobbler
  • sample-accurate seeking and gapless playback support for many formats
  • multiple playlists organized in tabs
  • album art display, fetching covers from music folders, id3v2 and apev2 tags, last.fm and albumart.org
  • 18-band equalizer with presets, with importing of fb2k eq presets
  • track grouping using title-formatting
  • album art display in playlist
  • customizable OSD notifications with album covers
  • configurable converter/transcoder
  • replay gain (playback only)
  • playing files directly from zip archives
  • supports tagging of files with custom fields, including editing custom fields added by other taggers/players
  • multichannel playback, support for integer 8, 16, 24, 32 and float 32 bit sound output
  • localized into many languages

Download & Install DeadBeef:

The easiest way to install the DeadBeef is using the DEB package. Just download and double-click to install the package from below link. You may check your OS type (32-bit or 64-bit) by System Settings -> Details

DeadBeef Ubuntu Deb 32-bit

DeadBeef Ubuntu Deb 64-bit

You can also use the PPA which supports Ubuntu 13.04, Ubuntu 12.10, Ubuntu 12.04:

sudo add-apt-repository ppa:starws-box/deadbeef-player

sudo apt-get update

sudo apt-get install deadbeef

deadbeef ubuntu 13.10

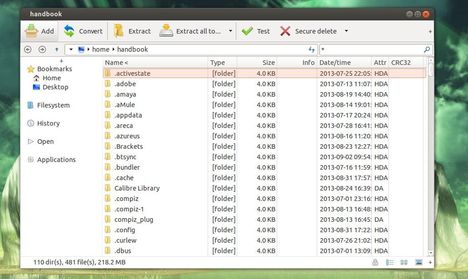
peazip-logoThis tutorial shows how to install PeaZip 5.1 in Ubuntu 13.04 and fix the dependency problem. PeaZip depends on libgmp3c2, but it’s no longer available in Ubuntu 13.04 Raring and Ubuntu 13.10 Saucy.

As you may know, PeaZip is a free Zip files utility which supports 150+ archive formats. With it, you can compress, convert, split, encrypt, secure delete, open RAR TAR 7Z ZIP ZIPX CAB ISO files.

To get started, first download and install the libgmp3c2 package from the below links. You may check 32-bit or 64-bit by System Settings -> Details.

libgmp3c2 32-bit deb

libgmp3c2 64-bit deb

NOTE: I don’t know why this package is removed from Ubuntu repository. It may conflict with other packages on your system and cause problem. Use it at your own risk!

Now, download and install the peazip_5.1.0.LINUX.GTK2-2_all.deb from Sourceforge.net

peazip ubuntu

You may need a restart to see the PeaZip icon in Unity Dash.

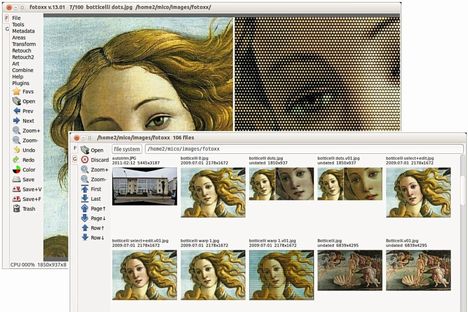
As you may know, the digital photo editor Fotoxx updates every month. Here I’ll show you how to install and keep the latest version in Ubuntu 13.04 Raring, Ubuntu 12.04 Precise and their derivatives via PPA.

So far, the latest release is 13.09. With it, you can edit photos and manage a large collection. Includes thumbnail image browser and navigator, RAW file import, a comprehensive set of edit functions working in deep color, fast full-image feedback, multiple undo/redo, select/copy/paste, file versioning, batch transforms, HDR and panorama composites, metadata edit, fast search and display, named image subsets (views). Read the changelog.

fotoxx ubuntu

Install Latest Fotoxx:

The getdeb repository provides Fotoxx packages for Ubuntu 12.04 and Ubuntu 13.04. You can add the repository by downloading and installing the Debs from the below link:

download gedeb package

After that, you can install fotoxx and receive updates by Synaptic Package Manager or by running below commands in terminal (Ctrl+Alt+T):

sudo apt-get update; sudo apt-get install fotoxx

For other Ubuntu editions, such as Ubuntu 13.10, Ubuntu 12.10, Ubuntu 10.04, etc. Download the deb packages from the official site.

This tutorial will show you how to install SmartGit/HG easily via PPA in Ubuntu 13.10, Ubuntu 13.04, Ubuntu 12.04, Ubuntu 12.10 and Linux Mint.

As you may know, SmartGit/Hg is a graphical Git and Mercurial client which can also connect to SVN repositories. SmartGit/Hg runs on Linux, Mac OS X (10.5 or newer) and Windows (XP or newer). Git and Mercurial (Hg) are distributed version control system (DVCS). Read Smartgit documentation

smartgit/hg ubuntu

SmartGit/Hg depends on Java Runtime Environment. So before get started, install OpenJDK from Ubuntu Software Center or install Oracle Java via PPA.

UPDATE-2015: For Ubuntu 14.04, 14.10, 15.04 and their derivatives, run below commands instead:

sudo add-apt-repository ppa:eugenesan/ppa

sudo apt-get update

sudo apt-get install smartgit

Once Java properly installed, press Ctrl+Alt+T on your keyboard to open terminal. When it opens, run below commands one by one to install the git client:

sudo add-apt-repository ppa:eugenesan/ppa

sudo apt-get update

sudo apt-get install smartgithg

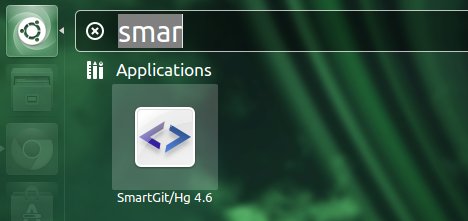
smartgit/hg ubunt unity

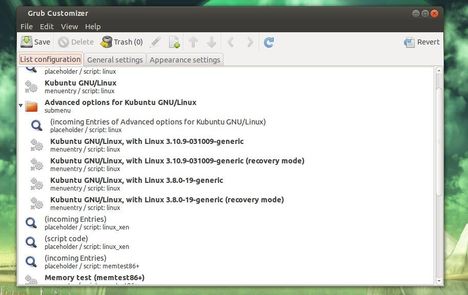
The Grub Customizer PPA now is available for Ubuntu 13.10 Saucy Salamander and its derivatives.

grub customizer

As you may know, Grub Customizer is a graphical interface to configure the GRUB2/BURG settings and menu entries. It allows to move, remove, rename and edit the bootloader menu entries, set the default operating system, reinstallation of the bootloader to MBR, etc.

Install Grub Customizer:

Press Ctrl+Alt+T on your keyboard to open terminal. When it opens, run below command to add the PPA:

sudo add-apt-repository ppa:danielrichter2007/grub-customizer

add grub customizer ppa

Then update package lists and install grub-customizer:

sudo apt-get update; sudo apt-get install grub-customizer

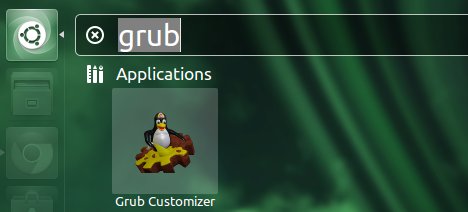
Once installed, open it from Unity Dash and enjoy!

grub customizer ubuntu

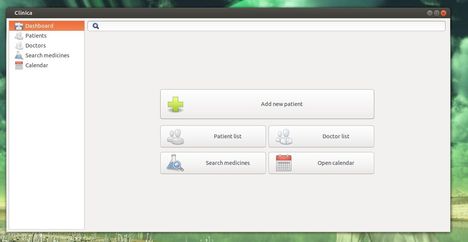
The simple Medical Records Manager Clinica released version 0.3 with backup import/export functionality, network sharing service, as well as other improvements and bug fixes.

clinica medical manager

As you may know, Clinica is a simple tool for the desktop to mantain medical records. With it, you can:

  • Search, edit and save patients
  • Manage doctors associated with them
  • Keep track of your scheduled visits and various events using the builtin calendar
  • Search for medicines online and many more with the plugins

The new release Clinica 0.3 add below changes:

  • Reworked the UI to fix some usability issues
  • Moved the CMake build system
  • Added an abstraction to the DataProvider to allow integration with external data sources.
  • Added a Network service to share data across LAN
  • Added a DBus service to ease integration in the desktop environment.
  • Added Backup and Import/Export functionality
  • Gtk+-3.0 only
  • Various fixes
  • Added integration of files in the visits
  • Added a local medicine database
  • Allow to search medicines in more than one database

Install Clinica

For Windows user, download Clinica from Launchpad page.

For Ubuntu 13.10, Ubuntu 13.04, Ubuntu 12.10, Ubuntu 12.04 and Linux Mint. Press Ctrl+Alt+T to open terminal, run below commands one by one to install it from PPA:

sudo add-apt-repository ppa:phcteam/clinica

sudo apt-get update

sudo apt-get install clinica

Once installed, you can open it from Unity Dash home. Enjoy!

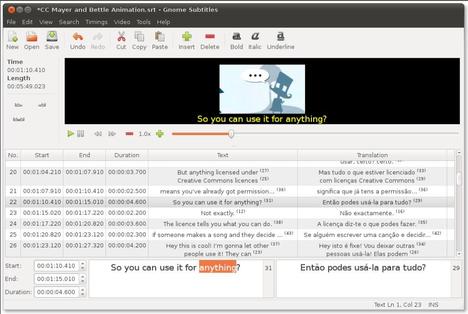
Gnome Subtitles is a subtitle editor for the GNOME desktop (also works in Unity). It supports the most common text-based subtitle formats, video previewing, timings synchronization and subtitle translation.

Some supported subtitle formats are: Advanced Sub Station Alpha, FAB Subtitler, MicroDVD, Mplayer 1/2, MPSub, SubRip, SubViewer 1/2.

Gnome Subtitles

The latest version has reached 1.3 which allows to set the gap between subtitles, to be used when inserting or splitting subtitles. Also there are a lot of bug fixes and other improvements.

Install Gnome Subtitles 1.3 via PPA

For Ubuntu 13.04, Ubuntu 12.04, Ubuntu 12.10 and their derivatives, such as Linux Mint and Elementary OS. Press Ctrl+Alt+T and run below commands one by one in pop-up terminal:

sudo add-apt-repository ppa:pedrocastro/ppa

sudo apt-get update

sudo apt-get install gnome-subtitles

For Ubuntu 13.10 Saucy, run below commands instead:

sudo add-apt-repository ppa:nilarimogard/webupd8

sudo apt-get update

sudo apt-get install gnome-subtitles

Once installed, open it from Unity Dash and Enjoy!