Archives For November 30, 1999

install bluefish in Ubuntu via ppa

Bluefish, a powerful editor targeted towards programmers and webdevelopers has reached version 2.2.5. Here’s how to install it in Ubuntu 13.10, Ubuntu 12.04, Ubuntu 12.10, Linux Mint and their derivatives.

According to the changelog:

Bluefish 2.2.5 is a minor bug fix release but has also quite some new features. The syntax scanning engine is faster after small changes to the text. The filebrowser is also much faster with less memory usage, with various fixes and new features. Projects now store the active document and active line numbers. Indenting is improved in auto-completion and the smart indenting. Bookmarks and paste special also have been improved. On OSX there are many improvements, such as Mavericks support, Retina display support, working system hotkeys, native input methods (Japanese, Chinese, etc.), opening files from the finder and Widget bindings on MacOSX are moved to Cmd+C|V|X|A and working. Furthermore almost all syntax highlighting has been improved, most notable jquery in javascript, HTML5, and HTML5 in PHP files. There are also many bug fixes, such as in wrap text on right margin, in the replace engine, the jsmin licence, the split lines feature, the auto-recovery and many obscure bugs. Last bluefish now has an appdata file.

Install Bluefish Ubuntu

Install Bluefish:

Press Ctrl+Alt+T on your keyboard to open the terminal. When it opens, run the commands below one by one to install Bluefish from PPA:

sudo add-apt-repository ppa:klaus-vormweg/bluefish

sudo apt-get update

sudo apt-get install bluefish

You can also install Bluefish compiled against GTK2:

sudo add-apt-repository ppa:klaus-vormweg/bluefish-gtk2

sudo apt-get update

sudo apt-get install bluefish

install the latest filezilla ubuntu

This simple tutorial shows you how to install the latest FileZilla Client in all versions of Ubuntu currently supported on the desktop. So far, they are Ubuntu 14.04, Ubuntu 13.10, Ubuntu 12.10, and Ubuntu 12.04.

The current FileZilla release is version 3.7.4. It comes with below new features and bug fixes:

  • Added SOCKS4 support
  • Added Corsican and Kabyle translations
  • SFTP now supports the hmac-sha2-256 algorithm
  • Additional bugfix for site-specific bookmarks
  • Improve compatibility with servers sending directory listings in Polish language or in EBCDIC encoding
  • Handle set user id bit when populating permissions dialog.
  • MSW: Show local timestamps for old files using the correct daylight saving time (DST) offset.
  • Fix loading of transfer queue if starting FileZilla while another instance is in the process of shutting down
  • Fix interaction between site-specific bookmarks and multiple tabs
  • Don’t resume uploads when there’s zero octets left to transfer
  • Improve symbolic link detection when using MLSD
  • If processing a queue with files queued on multiple servers and not storing passwords, the password was not always asked prior to switching servers
  • Use the correct name element when importing sites
  • MSW: Show actual Windows version in about dialog regardless of app-compat settings

Install FileZilla:

If you don’t like PPAs, you can always follow the steps below to install the latest FileZilla Client in Ubuntu.

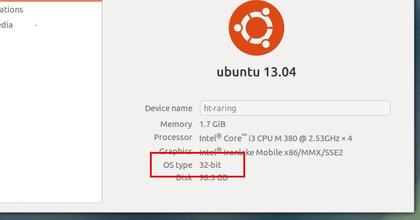
1. First go to System Settings -> Details and check out your OS type: 32 bit or 64 bit

System-type-32bit-64-bit

2. Download FileZilla from the official download page.

  • 32 bit system download the “FileZilla_x.x.x_i586-linux-gnu.tar.bz2”
  • 64 bit system download the “FileZilla_x.x.x_x86_64-linux-gnu.tar.bz2”

3. Press Ctrl+Alt+T on your keyboard to open the terminal. When it opens, run the command below to extract FilaZilla to /opt/.

cd /opt/ && sudo tar jvxf FileZilla_*-linux-gnu.tar.bz2

In the code, you may replace the file name to yours!

4. Change the ownership of extracted folder:

cd /opt/ && sudo chown -R root:root FileZill*

5. Now, you’re able to launch FileZilla Client via the command below:

/opt/FileZill*/bin/filezilla

6. To create a launcher. Run the command below to edit the config file:

sudo gedit /usr/share/applications/filezilla.desktop

Copy and paste below lines into the file and save it.

[Desktop Entry]
Name=FileZilla
GenericName=FTP client
GenericName[de]=FTP-Client
GenericName[fr]=Client FTP
Comment=Download and upload files via FTP, FTPS and SFTP
Comment[de]=Dateien über FTP, FTPS und SFTP übertragen
Comment[fr]=Transférer des fichiers via FTP, FTPS et SFTP
Exec=/opt/FileZilla3/bin/filezilla
Terminal=false
Icon=filezilla
Type=Application
Categories=Network;FileTransfer;
Version=1.0

Change the FileZilla3 to the exact folder name and done.

Pidgin PPA Ubuntu

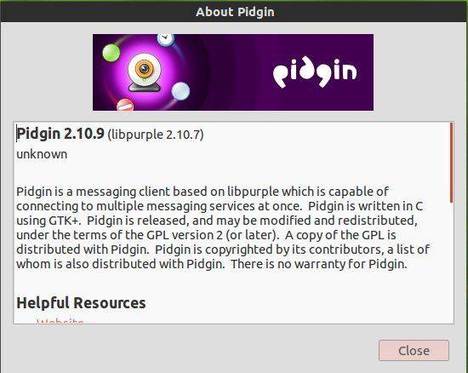
The instant messaging program Pidgin 2.10.9 has been released recently. It mainly fixed problems logging into some servers including jabber.org and chat.facebook.com.

The default Pidgin versions in Ubuntu universe repositories are quite old (See Pidgin changelog history). The Pidgin Developers PPA provides the most recent version of Pidgin for Ubuntu 14.04, Ubuntu 13.10, Ubuntu 12.10, and Ubuntu 12.04. Here’s how to add the PPA and install / upgrade your Pidgin from it.

Install the latest Pidgin Release in Ubuntu

To get started, press Ctrl+Alt+T on your keyboard to open the terminal. When it opens, run the command below to add Pidgin PPA to your system:

sudo add-apt-repository -y ppa:pidgin-developers/ppa

After that, update your system package lists and then you’re able to install packages from the PPA:

sudo apt-get update

Now install the Pidgin:

sudo apt-get install pidgin

That’s it. Enjoy!

For the Off-the-Record (OTR) plug-in, which is designed for use with Pidgin ensures authenticated and secure communications between Pidgin users, just search for and install pidgin-otr from Ubuntu Software Center. Finally enable the plugin from Pidgin menu Tools -> Plugins.

VLC 2.1.2 Ubuntu 12.04

 
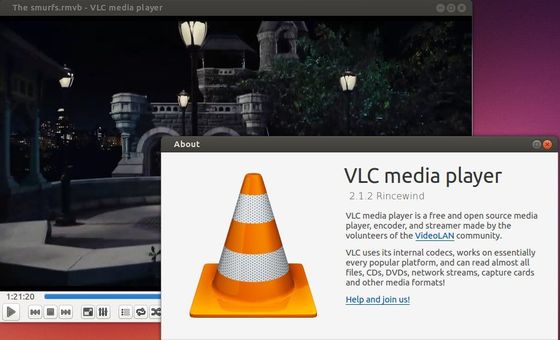
The popular VLC media player has reached version 2.1.x with some fantastic new features, bug fixes and performance improvements. However, the official PPA for Ubuntu 13.10 and earlier is stuck at version 2.0.8.

There’s now a third-party PPA that provides the most recent build of VLC (it’s 2.1.2 so far) to Ubuntu 12.04, Ubuntu 12.10, Ubuntu 13.04, and Ubuntu 13.10 users. The PPA is maintained by djcj

install vlc 2.1.2 ubuntu 13.10

The PPA is not officially endorsed, supported or otherwise backed by the Videolan team. Use it at your own risk!

Press Ctrl+Alt+T on your keyboard to open the terminal. When it opens, run the commands below to add the PPA and install VLC.

sudo add-apt-repository ppa:djcj/vlc-stable

sudo apt-get update

sudo apt-get install vlc

If you don’t like the PPAs, directly download & install the DEBs from the launchpad page.

Ubuntu 12.04.4 LTS Released, How to Upgrade

Last updated: February 7, 2014

Ubuntu 12.04.4

Ubuntu 12.04.4 LTS has been finally released on Feb 6, 2014. Here’s how to upgrade from previous Ubuntu 12.04 releases.

Colin Watson announced in lists.ubuntu.com:

The Ubuntu team is pleased to announce the release of Ubuntu 12.04.4 LTS (Long-Term Support) for its Desktop, Server, Cloud, and Core products, as well as other flavours of Ubuntu with long-term support.

As with 12.04.3, 12.04.4 contains an updated kernel and X stack for new installations on x86 architectures.

As usual, this point release includes many updates, and updated installation media has been provided so that fewer updates will need to be downloaded after installation. These include security updates and corrections for other high-impact bugs, with a focus on maintaining stability and compatibility with Ubuntu 12.04 LTS.

How to upgrade to Ubuntu 12.04.4: (Thanks to h1repp from askubuntu)

The normal software updates will bring your system up to 12.04.4, but the Hardware Enablement Stack (HWE; the *-lts-saucy packages) is not part of those updates (by policy).

You can install the HWE packages manually, but there are some caveats.

To upgrade use this command line only (press Ctrl+Alt+T to open the terminal):

sudo apt-get install --install-recommends linux-generic-lts-saucy xserver-xorg-lts-saucy libgl1-mesa-glx-lts-saucy

The –install-recommends is important. It makes sure that the xserver will install completely. Without it, xserver will only install partly, and apt will remove most of your system.

When you upgrade like this you may notice that there are configurations left over, among others those of the original xserver-xorg. You can purge them (I always do), but beware: this will remove the symlink /etc/X11/X that is used to start the XServer, so on next boot it won’t start. To prevent this, after purging left over configurations, do the following before the next boot:

sudo dpkg-reconfigure xserver-xorg-lts-saucy

This will recreate the necessary symlink and everything is fine again.

You can also download Ubuntu 12.04.4 iso with the new Saucy HWE stack at:

releases.ubuntu.com/precise

charging ipad air

If you have an Apple mobile device and want to charge it through the USB port in Ubuntu Linux machine, you’ll find a little app called ipad_charge which was originally developed by Ondrej Zary from Rainbow-Software.

This simple app supports following devices:

  • iPad / iPad2 / iPad3 / iPad4 / iPad Mini
  • iPod Touch 2G/3G/4G
  • iPhone 3GS/4/4s/5

The developer of super-wingpanel has done a little tweak on the code so that iPad air is supported now. This build has been made into PPA for Ubuntu 14.04, Ubuntu 13.10, Ubuntu 12.10, Ubuntu 12.04, Linux Mint and their derivatives.

Install ipad-charge:

Press Ctrl+Alt+T on keyboard to open the terminal. When it opens, run below commands one by one:

sudo apt-add-repository ppa:heathbar/ipad-charge

sudo apt-get update

sudo apt-get install libusb-1.0-0 ipad-charge

After that, your iPad should be automatically detected and charging enabled when you plug it in. However, if it’s not you may have to troubleshoot.

Troubleshooting:

If the udev rules are not automatically enabling charging when you plug in your device, you can run the program manually.

ipad-charge

If your iPad is still not charging you can find the device IDs of all Apple products with this command.

ipad-charge -l

If more than one is listed, you may have to run it with your iPad unplugged, then plugged in to find the correct ID. Once you determine the ID, report the ID to the links below.

via: ipad_charge on github

Qupzilla browser Ubuntu

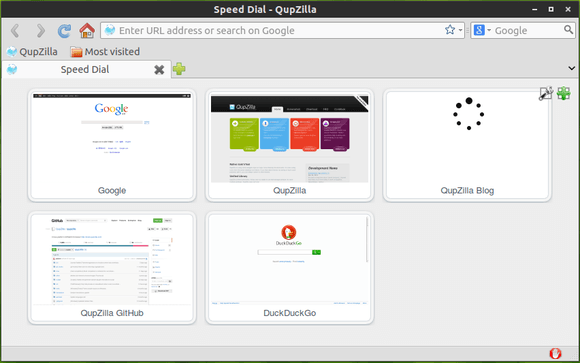
QupZilla is a lightweight and very fast QtWebKit browser. It has been originally started only for educational purposes. But from its start, QupZilla has grown into a feature-rich browser.

The latest version 1.6.1 added option to enable tab switching using the mouse scroll wheel; a toggle to disable inline URL completion in the address bar; and the ability to launch full-screen mode using the command line.

There are also other changes and a few bug fixes in QupZilla 1.6.1:

  • added undo/redo context menu actions in editable web elements
  • speedup loading rules from subscriptions in AdBlock dialog
  • fixed speed dial with disabled javascript
  • fixed showing tooltips on tabs when tab previews are disabled
  • fixed search shortcuts longer than one character in locationbar
  • fixed building issues on OS X and OS/2
  • fixed disabling tab previews from preferences
  • fixed building new Gnome/KDE keyring passwords
  • fixed building StatusBarIcons plugin on Windows
  • win: add new jumplist option to open private window

qupzilla web browser

Install QupZilla in Ubuntu:

Press Ctrl+Alt+T on your keyboard to open the terminal. When it opens, run the commands below one by one:

sudo add-apt-repository ppa:nowrep/qupzilla

sudo apt-get update

sudo apt-get install qupzilla

These commands will install the QupZilla from its official PPA. Supports Ubuntu 14.04, Ubuntu 13.10, Ubuntu 12.10, Ubuntu 12.04, Linux Mint and their derivatives.

BTW: The developer announced in the release note that:

QupZilla will in future be ported to QtWebEngine, which will (amongst other improvements) bring multi-process architecture.
With QtWebEngine comes dependency on Qt 5, which means older platforms may not be supported.
QupZilla on QtWebEngine will be new major version 2.x.x and I hope it will be ready with Qt 5.3 (or Qt 5.4), depending on Qt devs.

Qupzilla browser Ubuntu

QtWebKit browser QupZilla 1.6.0 has been released a few days ago. Here’s how to install it via PPA in Ubuntu 13.10, Ubuntu 13.04, Ubuntu 12.10, Ubuntu 12.04, Linux Mint and their derivatives.

This release comes with new TabBar implementation that supports scrolling through all tabs when tabs don’t fit at all into TabBar. So it means, no more overflowing of tabs!

LocationBar received new completion feature – inline completion. You can now write only first letter and the most used domain will be completed. Once you see the completion, you can just press Enter and load the site.

qupzilla inline completion

For details, see the changelog:

  • added support for Proxy Auto-Config (PAC)
  • added option to open another private window from private window
  • added option to detach tabs from window
  • added delete action in edit context menu on page
  • added possibility to remove EasyList from AdBlock
  • added inline domain completion to urlbar
  • added KWallet password backend plugin
  • added Gnome-Keyring password backend plugin
  • added StatusBar Icons plugin that adds extra icons to statusbar
  • added support for POST method in search engines manager
  • added context menu for translating webpage
  • added possibility to export bookmarks to html file
  • great performance improvement for matching basic rules in AdBlock
  • themes can now be loaded from profile directories
  • pagescreen can now save output into number of formats, including PDF
  • proxy exceptions now supports wildcards (*, ?)
  • cancel upload when trying to upload non-readable files
  • select previous / next engines with ctrl+up/down in websearchbar
  • ask user first before closing all but the current tab from tabbar
  • last 2 sessions are now backuped in profile directory
  • always show tab previews after a small delay
  • GreaseMonkey: added icon in statusbar
  • GreaseMonkey: added support for GM_Settings
  • GreaseMonkey: fixed userscripts when first loading plugin
  • GreaseMonkey: run userscripts in all frames on page
  • oxygen: set rounded corners for tooltips
  • oxygen: workaround for transparent background of tooltips
  • X11: Set correct WM_CLASS property to windows
  • fixed: size of preferences dialog on low-res screens
  • fixed: loading plugins with relative paths in portable build
  • fixed: displaying a lot of RSS feeds in RSS widget in locationbar
  • fixed: enabling disabled rules in AdBlock now works everytime
  • fixed: parsing OpenSearch files with XML declaration
  • fixed: don’t show urls multiple times in url completer
  • fixed: drag & drop moving folders under bookmarks toolbar
  • fixed: files with relative paths can now be opened from command line
  • fixed: issues with overflowing tabs, it is now possible scroll through all tabs

Install QupZilla Browser:

Press Ctrl+Alt+T on keyboard to open terminal. When it opens, run commands below one by one:

sudo add-apt-repository ppa:nowrep/qupzilla

sudo apt-get update

sudo apt-get install qupzilla

For Ubuntu 14.04 Trusty, the latest version is available in Ubuntu Software Center.

latest gmusicbrowser ubuntu

Gmusicbrowser is an open-source jukebox for large collections of mp3/ogg/flac/mpc/ape files. This tutorial will show you how to install the latest version, so far it’s gmusicbrowser 1.1.11, in Ubuntu via PPA.

Gmusicbrowser 1.1.11 was released a few days ago, and here’s the changelog:

  • improve search responsiveness (improve responsiveness of SimpleSearch)
  • add auto-update mode that keeps browser lists sorted and filtered (on by default, can be disabled in the songlist/songtree option menu)
  • picture finder plugin: update google image, add bing and yahoo, various small changes
  • albuminfo plugin: update and fix parsing of Allmusic’s pages
  • various improvements to song properties and mass-tagging dialogs
  • gstreamer : add option to monitor pulseaudio’s volume, off by default as it is unstable due to thread problems with the libraries
  • close-to-tray option no longer depends on the use-tray option
  • various improvements and small fixes to error dialogs asking to retry
  • fix default filters “added today” and “played today” doing the opposite of what they say (only fixed for new users, if you were affected you have to edit them to fix it)
  • add a new-page button on TabbedLists/Context/NB (can be disabled with newbutton=0)
  • better handling of vertical scripts in vertical tabs
  • fix combo boxes for setting artist options in the misc tab of preferences
  • fix dialog for selecting label icons up-scaling small icons
  • dbus API: make CurrentSong output more fields
  • songtree: add $discname group variable
  • translation updates: Chinese(Taiwan), Finnish, German, Korean, Russian, Spanish

Install gmusicbrowser in Ubuntu:

Press Ctrl+Alt+T on keyboard to open terminal. When it opens, run below commands one by one. It will always install the latest packages from launchpad PPA:

sudo add-apt-repository ppa:andreas-boettger/gmusicbrowser-daily

sudo apt-get update

sudo apt-get install gmusicbrowser

Currently the PPA supports Ubuntu 13.10, Ubuntu 13.04, Ubuntu 12.10, Ubuntu 12.04, Linux Mint and their derivatives.

If you don’t like PPAs, download & install the .deb package from launchpad page

manage flickr image in Ubuntu

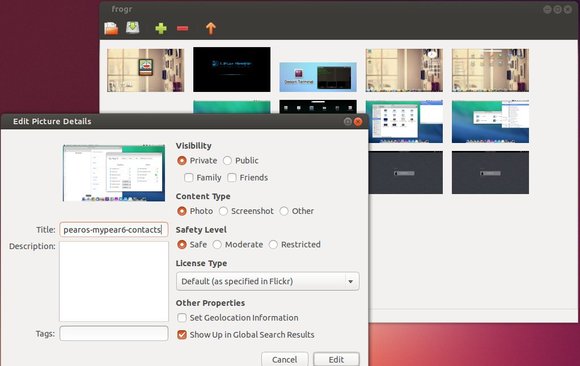
Frogr is a Gnome app allows to manage your accounts in the Flickr image hosting website. It supports all the basic Flickr features, including uploading pictures, adding descriptions, setting tags and managing sets and groups pools.

flickr management Ubuntu

You see, the GUI is simple and very easy to use. Right click on an image file allows you to edit the picture details.

How to Install Frogr:

Frogr is available in Ubuntu Software Center by default, but the default versions are old. To install the latest version, press Ctrl+Alt+T to open terminal. When it opens, run below commands one by one:

sudo add-apt-repository ppa:mariospr/frogr 

sudo apt-get update

sudo apt-get install frogr

This will install the app from its official PPA. So far, it supports Ubuntu 13.10, Ubuntu 13.04, Ubuntu 12.10, Ubuntu 12.04, Linux Mint, Elementary OS Luna.