Archives For November 30, 1999

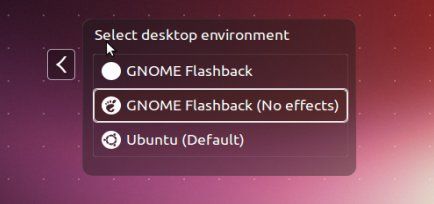
gnome classic This quick tip is going to show you how to install the Classic Gnome Desktop Environment in Ubuntu 13.10 Saucy Salamander.

It’s quite easy to do it, just install the Gnome fallback session package and then you get the Gnome Classic in Login menu at next time.

To install the package, press Ctrl+Alt+T on your keyboard to open terminal. When it opens, run below commands in terminal:

sudo apt-get install gnome-session-fallback

Or you can search for and install gnome-session-fallback in Ubuntu Software Center.

After that, log out and select the Classic session to log back.

gnome classic session

As you may know, Brackets is an open-source editor for web design and development built on top of web technologies such as HTML, CSS and JavaScript. The project was created and is maintained by Adobe, and is released under an MIT License.

brackets in ubuntu

What makes Brackets different from other web code editors?

  • Tools shouldn’t get in your way. Instead of cluttering up your coding environment with lots of panels and icons, the Quick Edit UI in Brackets puts context-specific code and tools inline.
  • Brackets is in sync with your browser. With Live Development, Brackets works directly with your browser to push code edits instantly and jump back and forth between your real source code and the browser view.
  • Do it yourself. Because Brackets is open source, and built with HTML, CSS and JavaScript, you can help build the best code editor for the web.
  • Try out Brackets:

    The official download page provides the DEB packages for Debian / Ubuntu and their derivatives, such as Linux Mint, Elementary OS, and so forth.

    Just download and double click the DEB to bring up Ubuntu Software Center and install it. Or run below commands instead once downloaded:

    sudo dpkg -i ~/Downloads/brackets-sprint-*.deb; sudo apt-get -f install

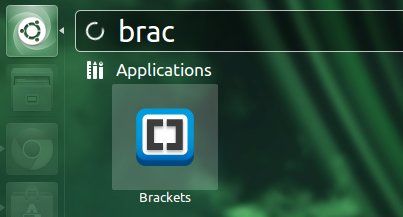
    Once installed, you can find it in Unity Dash.

    brackets in ubuntu unity

    Microsoft Silverlight in UbuntuPipelight is a special browser plugin allows to run your favorite Silverlight application directly inside your Linux browser. The project combines the effort by Erich E. Hoover with a new browser plugin that embeds Silverlight directly in any Linux browser supporting the Netscape Plugin API.

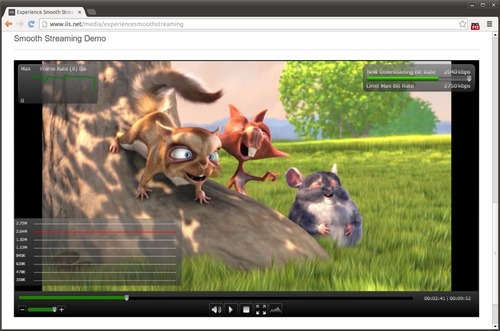
    Pipelight consists out of two parts: A Linux library which is loaded into the browser and a Windows program started in Wine. The Windows program, called pluginloader.exe, simply simulates a browser and loads the Silverlight DLLs. When you open a page with a Silverlight application the library will send all commands from the browser through a pipe to the Windows process and act like a bridge between your browser and Silverlight. The used pipes do not have any big impact on the speed of the rendered video since all the video and audio data is not send through the pipe. Only the initialization parameters and (sometimes) the network traffic is send through them. As a user you will not notice anything from that “magic” and you can simply use Silverlight the same way as on Windows, like you can see on the following screenshot:

    silverlight chrome ubuntu

    Install Pipelight on Ubuntu

    Warning: Before you continue the installation you should note that:

  • It is strongly recommended to close your browser before installing! Some browsers try immediately to load the plugin which might fail or crash the browser when the installation is not complete!
  • Silverlight might contain (like all other browser plugins) security issues – You may want to enable click-to-play for this plugin to prevent an undesired start of Silverlight.
  • Pipelight needs to start Wine to execute the pluginloader. This may slow down the start of your browser.
  • The Pipelight PPA is available for Ubuntu 13.10, Ubuntu 13.04, Ubuntu 12.10, Ubuntu 12.04 and their derivatives. You can easily install it by running below commands in terminal (Ctrl+Alt+T) one by one:

    sudo add-apt-repository ppa:pipelight/stable
    sudo apt-get update
    sudo apt-get install pipelight

    You may need to accept a license agreement for a set of fonts during the installation. After it’s done just start your browser, type about:plugins in the addressbar and hit enter – if the installation went well you should now see Silverlight in your plugin list and everything is ready to run! Pipelight will install Silverlight on the first start of your browser, this may freeze the interface for several minutes (and you may just see a blank page without any progress). There might appear some dialog asking if Mono or Gecko should be installed during the Silverlight installation – you can safely choose no, as this is not necessary to get Pipelight running. After this step, the overall performance of your browser shouldn’t be affected any more.

    More at Pipelight Homepage

    BeatBox has gone, use Noise Music Player instead

    Last updated: August 19, 2013

    beatbox and noise logoTry to install BeatBox music player in Ubuntu? Well, I’m here to tell you Beatbox has gone! The developer announced that he won’t take much attention on it due to lack of time. If you prefer this music player, you may go to noise.

    “I’m sorry to say that BeatBox will not be seeing much attention from me at this point due to lack of time.

    I’ve added elementary to the BeatBox team, which means they can merge, pull, push, whatever they want to the project. I’ve recommended that they merge parts of BeatBox. Its core and plugin API could be very useful to them, but whether or not that merge happens is up to them.” — Scott Ringwelski

    BeatBox was the default music player for Elementary OS, and now it is Noise. Though there is not much of differences between Beatbox and Noise, both only differs by: Music view, Search bar, and the name of course

    Install Noise in Ubuntu and Linux Mint

    Due to the dependency problem, BeatBox is not working now. So here’s how to install Noise music player in Ubuntu 13.10, Ubuntu 13.04, Ubuntu 12.04 and Linux Mint 13, 15, 16.

    Press Ctrl+Alt+T to open terminal. When it opens, run below commands to add the Elementary daily build PPA:

    sudo add-apt-repository ppa:elementary-os/daily

    Then you can update and install Noise:

    sudo apt-get update; sudo apt-get install noise

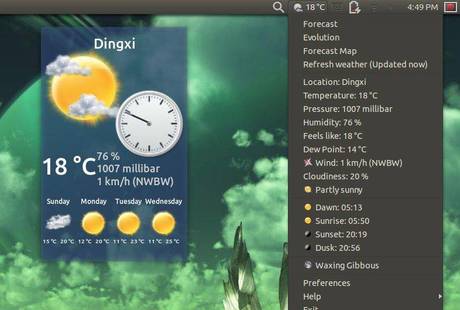
    My Weather Indicator is a simple applet that displays weather information on panel and widget on desktop. Here’s how to install in Ubuntu 13.10, Elementary OS, Linux Mint 16 via PPA.

    my weather indicator ubuntu

    The supported weather services are Open Weather Map, wunderground.com, YAHOO!, world weather online. My Weather Indicator supports two locations and displays temperature, pressure, visibility, wind velocity, rain gauge, snow gauge, and local time. It also displays a widget on your desktop.

    Install My Weather Indicator:

    You can install My Weather Indicator in Ubuntu 13.10, Ubuntu 13.04, Ubuntu 12.10, Ubuntu 12.04, Ubuntu 10.04 and their derivatives.

    Press Ctrl+Alt+T to open terminal. When it opens, run below command to add the ppa:

    sudo add-apt-repository ppa:atareao/atareao

    add my weather indicator ppa

    Then update and install the indicator:

    sudo apt-get update; sudo apt-get install my-weather-indicator

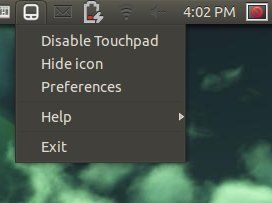
    Touchpad Indicator Ubuntu 13.10The touchpad indicator applet, which shows the status of the touchpad, and to enable and disable the touchpad, now is available in Ubuntu 13.10 Saucy. Here I’ll show you how to install it in Ubuntu, Linux Mint, and Elementary OS using the developer’s PPA repository.

    So far, the PPA provides the latest packages for Ubuntu 13.10, Ubuntu 13.04, Ubuntu 12.04, Ubuntu 12.10 and the derivatives. Also there are old versions for Ubuntu 10.04, Ubuntu 11.04, Ubuntu 11.10 and derivatives.

    Tutotiral Objectives

    • Install Touchpad Indicator in Ubuntu 13.10 Saucy
    • Enjoy!

    To get started, press Ctrl+Alt+T to open terminal. When it opens, run below commands to add the Touchpad Indicator PPA:

    sudo add-apt-repository ppa:atareao/atareao

    add touchpad indicator ppa

    Then you can install the indicator via below commands:

    sudo apt-get update; sudo apt-get install touchpad-indicator

    install-touchpad-indicator

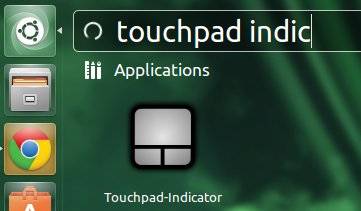
    Once installed, search for and open it from Unity Dash.

    touchpad indicator in ubuntu unity

    Ubuntu boot Nvidia logoAfter properly installed Nvidia drives in Ubuntu, you may get the Nvidia Logo while booting up your machine. If you find it’s annoying to have this screen, this tutorial will show you how to easily disable it by two ways.

    One command to disable Nvidia logo

    The easiest way to do this is running below command in terminal (press Ctrl+Alt+T):

    sudo nvidia-xconfig --no-logo

    After that, you won’t see the logo in bootup any longer.

    The other way is to manually edit the Nvidia config file. Edit the /etc/X11/xorg.conf by running below command:

    sudo gedit /etc/X11/xorg.conf

    add Option “NoLogo” to Section “Device”, make it look like this:

    Section “Device”
    Identifier “Device0”
    Driver “nvidia”
    Option “NoLogo”
    VendorName “NVIDIA Corporation”
    BoardName “GeForce 9600 GT”
    EndSection

    After that, save the file and reboot.

    Install Latest XnView 0.61 in Ubuntu and Linux Mint

    Last updated: September 1, 2013

    XnView UbuntuXnView MP has reached version 0.61. Since the default is version 0.51 in Ubuntu Software Center, the latest XnView brings a lot of bug fixes and improvements. With this tutorial, you can always get the latest version of XnView in Ubuntu and Linux Mint.

    Changes since XnView MP 0.51:

  • Batch convert: Watermark, stretch image
  • remember item selection in information panel
  • 8bf 64bits plugin can be used with XnViewMP 64bits version
  • XMP-photoshop:Location not more written
  • JPEG arithmetic decoding support
  • Change timestamp can create EXIF date
  • Show always selection information
  • JPEG2000 Export
  • Print in view mode
  • Clean DB can remove files with categories
  • Database has been improved, PLEASE make an backup of it before to install this version
  • Linux, better way to delete files/folders
  • Fix XMP/IPTC import problem
  • Download & Install XnView MP:

    First you may check OS type 32-bit or 64-bit by System Settings -> Details.

    Then press Ctrl+Alt+T to open terminal:

    For 32-bit system, download and install XnView via below 2 commands:

    wget http://download.xnview.com/XnViewMP-linux.deb
    
    sudo dpkg -i XnViewMP-linux.deb; sudo apt-get -f install

    For 64-bit system, run blow commands instead:

    wget http://download.xnview.com/XnViewMP-linux-x64.deb
    
    sudo dpkg -i XnViewMP-linux-x64.deb; sudo apt-get -f install

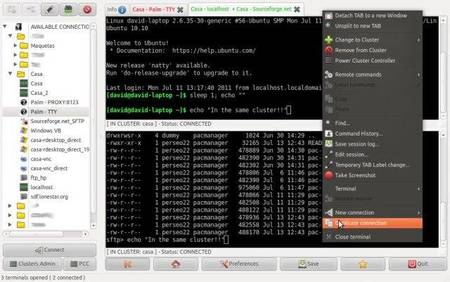
    PAC is a free alternative to SecureCRT and Putty. It provides a GUI to configure connections: users, passwords, EXPECT regular expressions, macros, etc.

    PAC manager in ubuntu

    PAC Manager works on Debian/Ubuntu, and RPM based linux platforms. All you need to do is download and install the installer package and fix denpendencies.

    Features:

  • Unique linux app to implement SecureCRT’s functionality (more or less!)
  • Remote and local macros
  • Remotely send commands with EXPECT regexp
  • Cluster connections!! Connections on same cluster share keystrokes!!
  • Scripting support! (vía Perl code)
  • Serial/tty connection via cu/tip/remote-tty connections!!
  • Pre/post connections local executions
  • TABS OR WINDOWS for connections!!
  • Proxy support
  • KeePass integration!
  • Wake On LAN capabilities
  • Possibility to split terminals in the same TAB!
  • Quick acces to configured connections via tray menu icon
  • Best linux GUI for ssh, telnet, sftp, rdesktop, vnc, cu, remote-tty, ftp, etc
  • DEB, RPM & .TAR.GZ packages available!!
  • More to come (ASA I find time!)
  • FREE (GNU GPLv3)
  • To get started, download the .deb package from SourceForge.

    Then press Ctrl+Alt+T to open terminal. When it opens, run blow commands to install the package:

    sudo dpkg -i ~/Downloads/pac-*all.deb

    Fix dependency problem if any:

    sudo apt-get -f install

    Install the indicator support for Unity Desktop:

    sudo apt-get install libgtk2-appindicator-perl

    When everything is done, open PAC Manager from the Unity Dash.

    install transmission ubuntuTransmission is a lightweight Bittorrent Client comes by default with Ubuntu. While Canonical only provides critical updates, here I’ll show you how to install / upgrade the latest Transmission in Ubuntu via its PPA. Supports Ubuntu 13.10 Saucy, Ubuntu 13.04 Raring, Ubuntu 12.04 Precise and Ubuntu 12.10 Quantal.

    UPDATE 2024: The tutorial is outdated! If you’re looking for most recent Transmission PPA, see this one instead.

    At the moment of writing this tutorial, the latest release is Transmission 2.8.2. It brings a lot of bug fixes and a few improvements.

    • Fix webseed crash
    • Fix crash when adding UDP trackers whose host’s canonical name couldn’t be found
    • Fix crash when sending handshakes to some peers immediately after adding a magnet link
    • Fix crash when parsing incoming encrypted handshakes when the user is removing the related torrent
    • Add safeguard to prevent zombie processes after running a script when a torrent finishes downloading
    • Fix “bad file descriptor” error
    • Queued torrents no longer show up as paused after exiting & restarting
    • Fix 2.81 compilation error on OpenBSD
    • Don’t misidentify Tixati as BitTornado?
    • Fix bug that had slow download speeds until editing preferences for Mac Client
    • Fix crash that occurred in some cases after using Torrent > Set Location
    • Fix crash where on_app_exit() got called twice in a row
    • Fix 2.81 compilation error on older versions of glib
    • Can now open folders that have a ‘#’ in their names
    • Silence gobject warning when updating a blocklist from URL
    • Add Qt5 support

    To get started, press Ctrl+Alt+T to open terminal. When it opens, run below command to add the Bittorrent PPA:

    sudo add-apt-repository ppa:transmissionbt/ppa

    After that, run blow command to install Bittorrent. Or use Synaptic Package Manager to upgrade the package.

    sudo apt-get update; sudo apt-get install transmission

    That’s it. Enjoy!