![]()
This quick tutorial shows how to pin your application launcher icons to the Gnome Desktop in Ubuntu 19.04.
In Ubuntu 19.04 Gnome 3.32, instead of Nautilus file browser the desktop icons are now handled by Gnome Shell extension. This makes some difference on the settings.
To create desktop shortcut icons for installed applications, do following steps one by one.
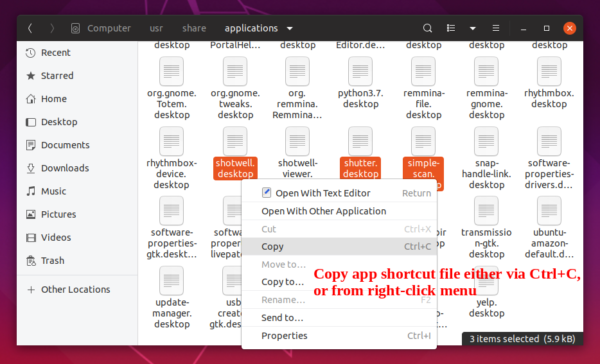
1. Open file browser, navigate to Other Locations -> Computer, then go to directory usr -> share -> applications.
Then select the .desktop files of which you want to pin to desktop. Copy them either via Ctrl+C or by choosing ‘Copy’ from right-click menu.
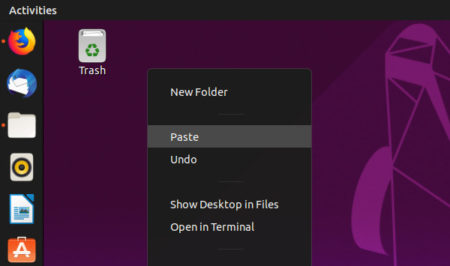
2. Click on the blank area on your desktop. Right-click and choose ‘Paste’ (or Ctrl+V) to paste them to the desktop.
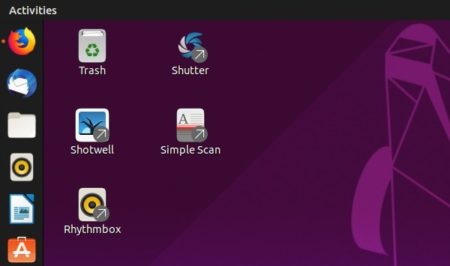
3. Finally right-click on each desktop file, and choose “Allow Launching“.
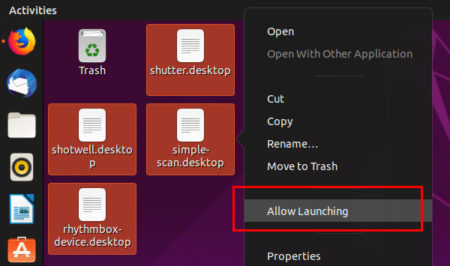
Now you’re able to click these icons to launch corresponding applications. And simply remove an icon if you don’t want it any more.