![]()
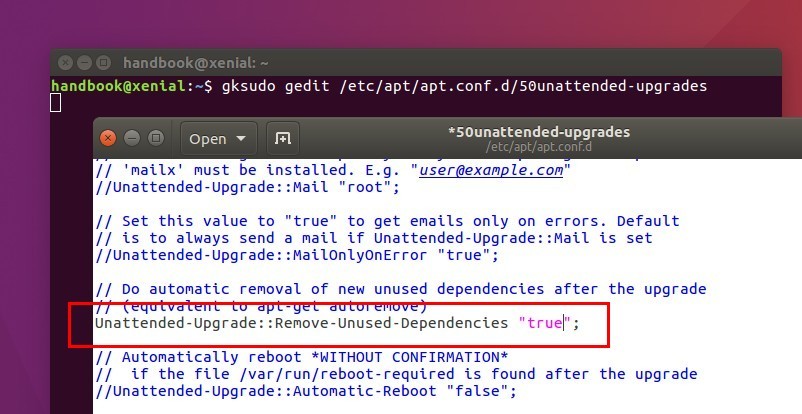
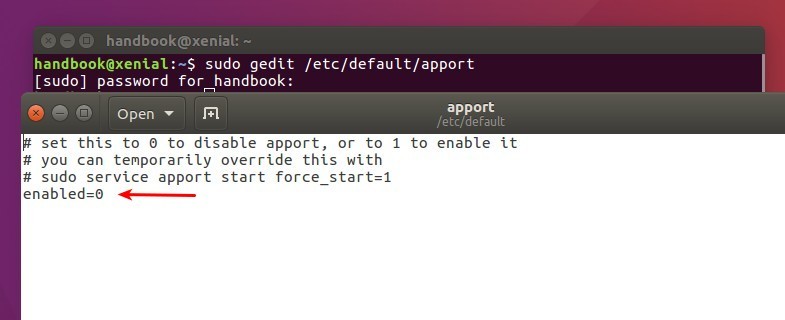
A patched version of Notify OSD with some extra features to Ubuntu’s on-screen-display notifications is available in Leolik’s PPA.
With the patch and a graphical Notify OSD configuration tool, you can easily tweak the notification bubbles by:
- Close notification bubble on click
- Stop fading out when mouse cursor hovers on it.
- Change notification display timeout.
- Change notification bubble location
- Edit the bubble size, background, transparency, etc.
- Edit the text size, color, etc.
1. Install the patched version of Notify OSD:
Open terminal (Ctrl+Alt+T) and run the commands below one by one to get it from PPA:
sudo add-apt-repository ppa:leolik/leolik

sudo apt update

sudo apt install notify-osd
Or grab the .deb installer from the link below:
Download Notify OSD with Extra Features(.deb)
Select download and install the latest version of:
notify-osd_x.x.x+16.04.x.x.x-0ubuntu1-leolik~ppa0_i386.debfor 32-bit Ubuntu 16.04notify-osd_x.x.x+16.04.x.x.x-0ubuntu1-leolik~ppa0_amd64.debfor 64-bit Ubuntu 16.04
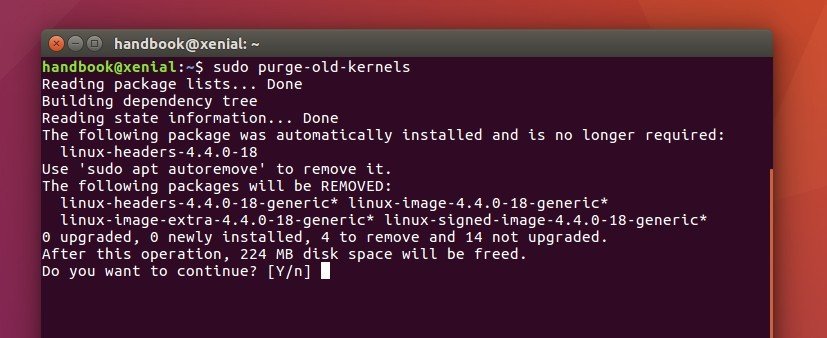
2. Restart notify-osd daemon by running the command below in terminal:
pkill notify-osd

Just close the terminal after running the command since there’s no terminal output.
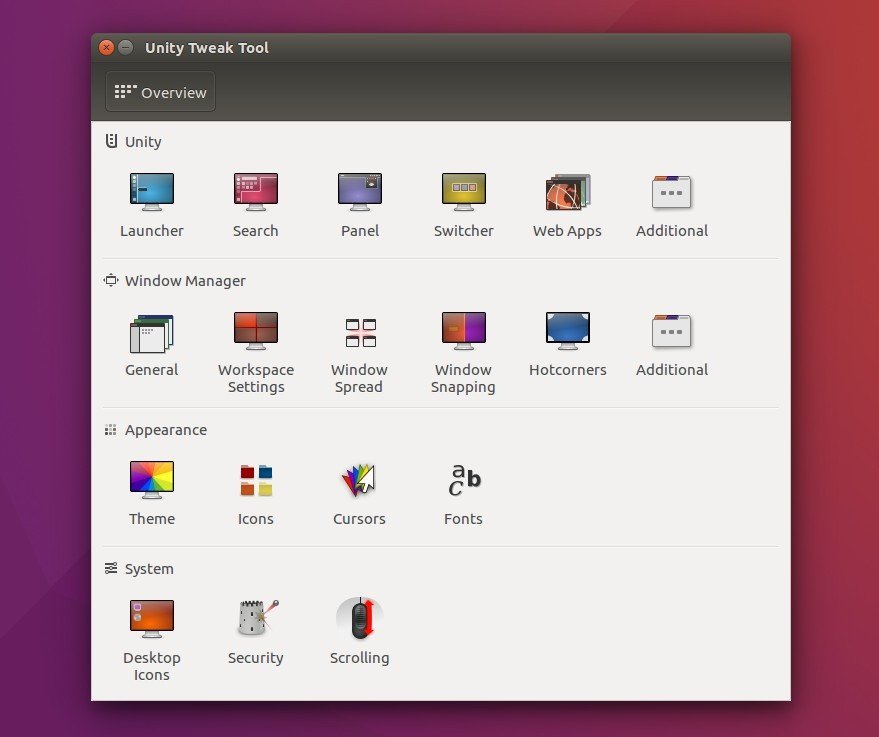
3. Install a graphical configuration tool for NotifyOSD:
Open terminal (Ctrl+Alt+T) and run the commands below one by one to get it from Webupd8 PPA:
sudo add-apt-repository ppa:nilarimogard/webupd8

sudo apt update

sudo apt install notifyosdconfig
Or grab the .deb installer from the link below:
Download Notify OSD Graphical Configuration Tool (.deb)
Select download and install the latest version of:
notifyosdconfig_x.x+xxx~ubuntu16.04.1_i386.debfor 32-bit Ubuntu 16.04notifyosdconfig_x.x+xxx~ubuntu16.04.1_amd64.debfor 64-bit Ubuntu 16.04
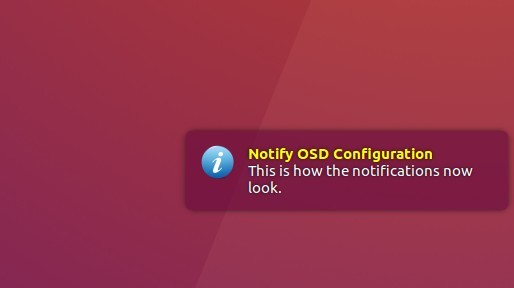
4. Finally launch the configuration tool and enjoy customizing your on-screen notifications: