Opera web browser 62 was released today with improved dark mode, design updates. Here’s how to install it in Ubuntu.
Opera 62 release highlights:
- Improved Dark Mode and support for Windows dark theme
- Add bigger tiles option in EasySetup panel
- Task Completer, connect browser’s history to Speed Dial
- Bring back start-page preload service
- And numerous other changes. See the release note.
How to Install Opera 62 in Ubuntu:
The Opera team offers snap package (containerised software package), which is always up-to-date (auto-updates itself). You can simply install it in Ubuntu Software:

Also traditional Opera binary package for Ubuntu is available for download at the link below:
To receive future updates through Software Updater, add the official Opera apt repository via following steps:
1. Open terminal (Ctrl+Alt+T) and run command to add the opera repository:
sudo sh -c 'echo "deb http://deb.opera.com/opera-stable/ stable non-free" >> /etc/apt/sources.list.d/opera.list'

2. Get the key:
wget -O - http://deb.opera.com/archive.key | sudo apt-key add -
Finally either install Opera via following command or upgrade the browser via Software Updater:
sudo apt update

sudo apt install opera-stable
Uninstall:
For the Opera snap package, simply remove it from Ubuntu Software.
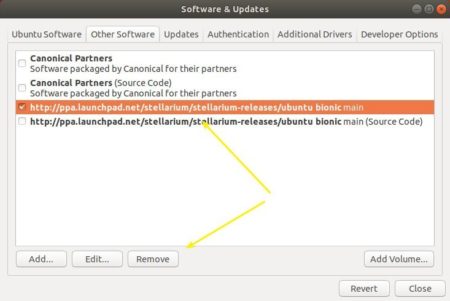
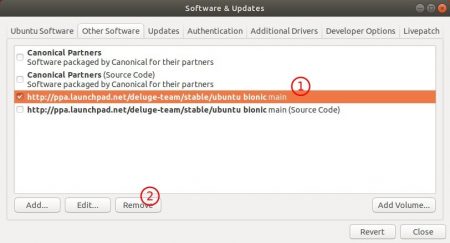
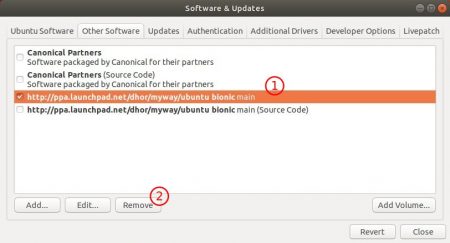
For the Opera apt repository, launch Software & Updates and navigate to Other Software tab.
To remove traditional opera package, either use your system package manager or run command in terminal:
sudo apt remove --autoremove opera-stable