![]()
This tutorial shows how to easily set your video playback as animated desktop wallpaper in Ubuntu and other Linux!
I’ve written about how to do the job in Ubuntu using Komorebi and Gpu Video Wallpaper. However, both seems no longer being actively development.
So here I’m going to introduce you Hidamari, a free open-source video wallpaper application written in Python. Which, provides an easy to use interface to play local video, steam online video (e.g., YouTube), or set a web page as desktop wallpaper.
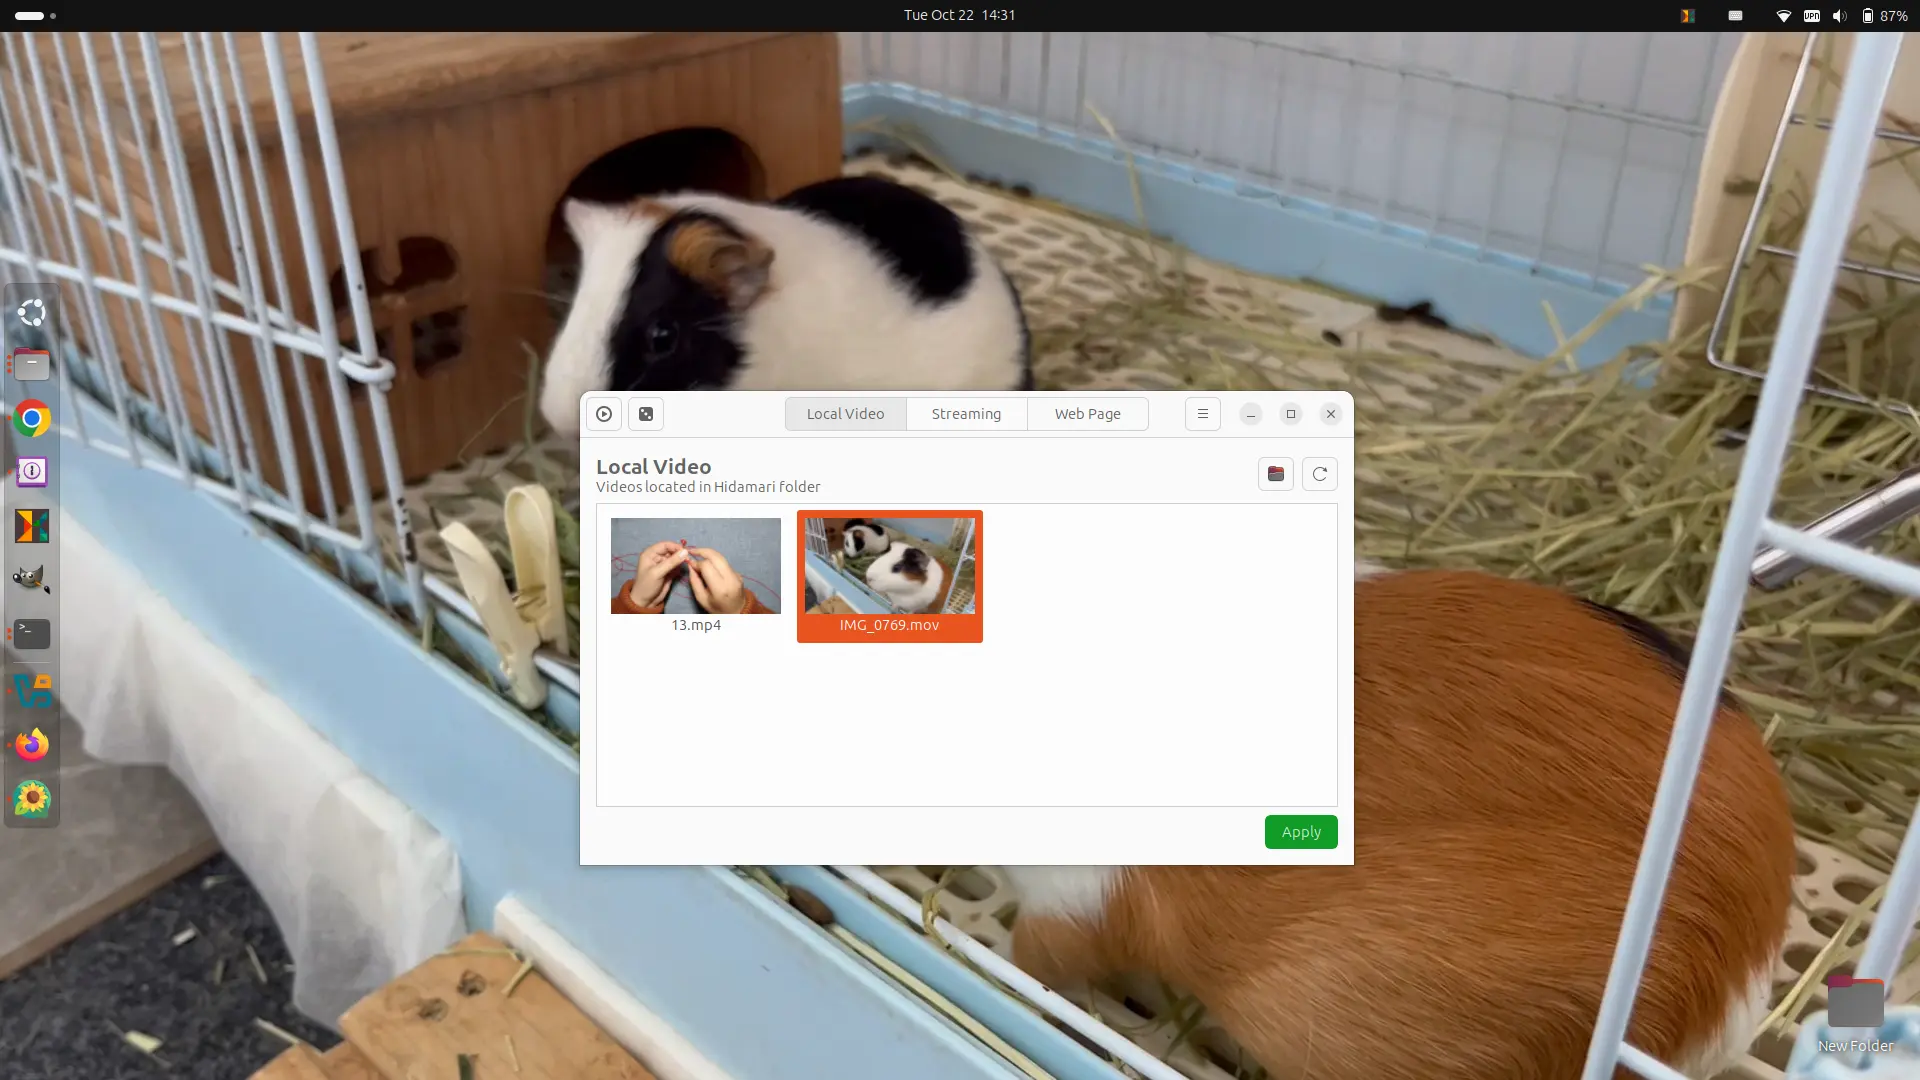
play local video as wallpaper in Ubuntu