Archives For Howtos

Adobe Brackets 1.12 Released! How to Install

Last updated: January 30, 2018

brackets code editor

Adobe Brackets code editor 1.12 was released hours ago. Here’s how you can install it in Ubuntu desktop.

With Brackets 1.12, you can easily restructure JavaScript code using Refactor capabilities in Brackets. You can also rename, wrap in Try/Catch or Condition, Extract to Variable or Function, and Create Getters/Setters – all at the click of a button (or two!).

Other changes in Brackets 1.12:

  • Upgraded codemirror version to 5.30.0
  • Update CSS at-rule hints
  • Update CSS pseudo-selector hints
  • Findbar search string retention
  • And a list of bug-fixes. See release note for details.

How to Install Brackets 1.12 in Ubuntu:

The official .deb binaries for both 32-bit and 64-bit system are available in the link below:

Download Brackets (.deb)

Just grab the .deb that matches your OS, then click install via Ubuntu Software or Gdebi package manager. Or run command to install the downloaded package:

sudo dpkg -i ~/Downloads/Brackets.Release.1.12*.deb; sudo apt-get -f install

Linux Kernel

After 9 release candidates, Linux Kernel 4.15 stable was finally announced earlier today. Kernel 4.15 is the first to be fully patched against the Meltdown and Spectre security vulnerabilities.

After a release cycle that was unusual in so many (bad) ways, this last week was really pleasant. Quiet and small, and no last-minutepanics, just small fixes for various issues. I never got a feeling that I’d need to extend things by yet another week, and 4.15 looks fine to me.“, Linus Torvalds announced.

What’s new in Kernel 4.15:

  • support for the RISC-V architecture
  • support for AMD Secure Encrypted Virtualization
  • support for the User-Mode Instruction Prevention feature on Intel CPUs
  • DRM leasing support for benefiting VR use-cases on Linux.
  • The HTC Vive VR headset treated “Non-Desktop”
  • Intel Coffee Lake graphics are now considered stable
  • Nouveau driver adds support for GeForce GTX 1000 “Pascal” temperature monitoring.

How to Install Kernel 4.15 in Ubuntu:

Other than using a graphical tool UKUU to install the latest mainline kernel packages, following steps will tell you how to manually download and install it in all current Ubuntu releases.

The mainline kernels do not include any Ubuntu-provided drivers or patches. They are not supported and are not appropriate for production use.

The mainline kernel PPA has made the new kernel binaries for Ubuntu, available for download at the link below:

Download Kernel 4.15 (.deb)

Depends on your OS type, download and install the packages in turns:

  1. linux-headers-4.15.0-xxxxxx_all.deb
  2. linux-headers-4.15.0-xxx-generic(/lowlatency)_xxx_amd64(/i386).deb
  3. linux-image-4.15.0-xxx-generic(/lowlatency)_xxx_amd64(/i386).deb

Select generic for common system, and lowlatency for a low latency system (e.g. for recording audio), amd64 for 64bit system, i386 for 32bit system, or armhf, arm64, etc for other OS types.

To get the Kernel 4.15 from the command console, run the commands below one by one:

For 64-bit OS:

cd /tmp/

wget http://kernel.ubuntu.com/~kernel-ppa/mainline/v4.15/linux-headers-4.15.0-041500_4.15.0-041500.201801282230_all.deb

wget http://kernel.ubuntu.com/~kernel-ppa/mainline/v4.15/linux-headers-4.15.0-041500-generic_4.15.0-041500.201801282230_amd64.deb

wget http://kernel.ubuntu.com/~kernel-ppa/mainline/v4.15/linux-image-4.15.0-041500-generic_4.15.0-041500.201801282230_amd64.deb

sudo dpkg -i *.deb

for 32-bit OS:

cd /tmp/

wget http://kernel.ubuntu.com/~kernel-ppa/mainline/v4.15/linux-headers-4.15.0-041500_4.15.0-041500.201801282230_all.deb

wget http://kernel.ubuntu.com/~kernel-ppa/mainline/v4.15/linux-headers-4.15.0-041500-generic_4.15.0-041500.201801282230_i386.deb

wget http://kernel.ubuntu.com/~kernel-ppa/mainline/v4.15/linux-image-4.15.0-041500-generic_4.15.0-041500.201801282230_i386.deb

sudo dpkg -i *.deb

After installed these .debs, restart and enjoy!

Uninstall Linux Kernel 4.15:

Start/restart your machine and select boot with the previous kernel in Grub2 -> Advanced menu. Then use Ubuntu Tweak, or other system tool to remove the Kernel 4.15, or you may see this how to remove old kernels tutorial.

Advanced Rhythm Game StepMania 5.1 Beta Released

Last updated: January 27, 2018

StepMania icon

StepMania, free dance and rhythm game, reached first beta of new major 5.1 series a day ago.

Due to the amount of remaining work needed, the scope of changes, and in response to feedback about difficulty with new systems: StepMania 5.1 is now going to be postponed to 5.2, and to bring some of 5.2’s less invasive and more demanded features to people we’re going to be backporting things onto 5.0 for version 5.1.

Features planned for 5.1 include:

  • Loading songs from profiles on USB drives
  • PacDrive support
  • Updated default theme
  • Profile improvements (including switching stats XML to an SQLite database)
  • Mouse support for all platforms (may not be used in the default theme – but available for others)
  • Stencil-based masking by default instead of zbuffer masking, so masking 3D objects behaves better without resorting to render to texture.

As the first beta release it brings following changes:

  • A new high-resolution (720P) default theme: Lambda
  • The DirectInput handler for Windows now supports XInput.
  • Songs can be loaded from profiles on USB drives.(For Linux, StepMania must run as root to save USB profile scores)
  • And many other changes, see release page for details.

StepMania 5.0.6 in Ubuntu 14.10

How to Install StepMania 5.1 Beta in Ubuntu:

The launchpad build farm is kinda busy, my unofficial StepMania binaries are waiting to build for 24 hours. I’ll updated the tutorial once they are available.

UPDATE: To install StepMania 5.1 Beta in Ubuntu 14.04, Ubuntu 16.04, Ubuntu 17.10, and Ubuntu 18.04, do following steps one by one:

1. Open terminal (Ctrl+Alt+T) and run the command below to add PPA:

sudo add-apt-repository ppa:ubuntuhandbook1/stepmania

Type in your password when it asks and hit Enter.

stepmania-ppa-1604

2. Update package index and install the game:

sudo apt update && sudo apt install stepmania

Note that minimaid disabled in Ubuntu 17.10, 18.04 due to bug. And please ignore wrong version number in game screen because I forgot to remove old patch in v5.0.12.

Uninstall:

To remove the game, simply run command:

sudo apt-get remove --autoremove stepmania

And remove the PPA via “Software & Updates” utility under “Other Software” tab.

SMplayer

SMPlayer 18.2, the second release of the free media player in 2018, was available one day ago with two new features.

Changes in SMPlayer 18.2 include:

  • Now it’s possible to use a priority list of preferred languages for the audio and subtitles.
  • Now there’s support for YouTube playlists. In the playlist window, click in the Load/save icon, select “Load playlist from URL” and paste the URL of the YouTube playlist.

SMPlayer with Mac skin

How to Install SMPlayer 18.2 in Ubuntu:

For Ubuntu 14.04, Ubuntu 16.04, Ubuntu 17.10, Ubuntu 18.04, and derivatives, the latest SMPlayer packages are available in the PPA repository (check the link before getting start following steps).

1. Search for and launch “terminal” from application launcher. When it opens, run command:

sudo add-apt-repository ppa:rvm/smplayer

Input your password (no visual feedback while typing) when it asks and hit Enter.

Smplayer PPA

2. Then upgrade SMPlayer using Software Updater (or Update Manager):

upgrade smplayer

or run commands in terminal to install (or upgrade) the media player:

sudo apt-get update

sudo apt-get install smplayer smtube smplayer-themes

Uninstall:

To remove SMPlayer, run command in terminal:

sudo apt-get remove --autoremove smplayer smtube smplayer-*

And remove the PPA via “Software & Updates” utility under Other Software tab.

Quick Tip: No Sound from HDMI Display / TV

Last updated: January 21, 2018

My laptop display was broken last night by accident. Now I connect my Ubuntu laptop to home TV using a HDMI cable for temporary use.

However, there’s no sound output from HDMI device (TV in my case) by default. So here’s the quick tutorial show you how.

1. Open terminal either via Ctrl+Alt+T or by searching for “terminal” from application launcher. When it opens, run command:

alsamixer

Then you’ll see something similar in following picture:

Here you need to make sure S/PDIF, S/PDIF 1, S/PDIF 2 are no muted.

  • use Left/Right keys to choose item.
  • press M to mute/unmute (00 means unmuted)

2. If sound is not muted via sound card mixer, launch “System Settings” and go to “Sound”:

Select HDMI device as sound output and unmute output volume.

wireshark

Wireshark network analyzer 2.4.4 was released a week ago. Now it’s finally available in PPA repository for Ubuntu 14.04, Ubuntu 16.04, Ubuntu 17.10.

Wireshark 2.4.4 is a small release with mainly bug-fixes and updated protocol support. Bug-fixes in the release include:

  • Multiple dissectors could crash.
  • The IxVeriWave file parser could crash.
  • The WCP dissector could crash.
  • Disabled the Linux kernel’s BPF JIT compiler due to security vulnerable.
  • Some keyboard shortcut mix-up has been resolved
  • Remote interfaces are not saved.
  • Wireshark & Tshark 2.4.2 core dumps with segmentation fault.
  • SSH remote capture promiscuous mode.
  • For more, see the release note.

How to Install Wireshark 2.4.3 in Ubuntu:

Wireshark has a stable PPA with the latest packages for Ubuntu 14.04, Ubuntu 16.04, and Ubuntu 17.10.

1. To add the PPA, open terminal from Unity Dash / App Launcher, or via Ctrl+Alt+T shortcut keys, and then run command:

sudo add-apt-repository ppa:wireshark-dev/stable

Type in your password (no visual feedback due to security reason) when it asks and hit Enter.

wireshark-official-ppa

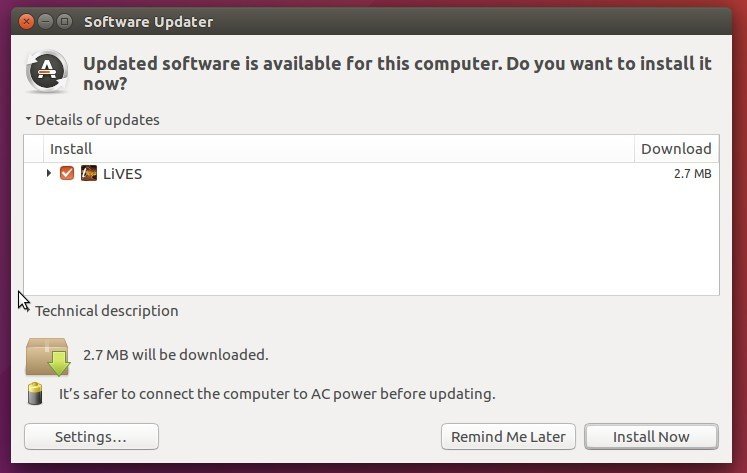
2. For those who have a previous release installed, launch Software Updater (or Update Manager) to upgrade it to the latest:

upgrade wireshark

Or run the commands below in terminal to install / upgrade wireshark:

sudo apt-get update

sudo apt-get install wireshark

How to restore:

To restore to the stock version of Wireshark in Ubuntu main repositories, purge the PPA via ppa-purge tool:

sudo apt-get install ppa-purge && sudo ppa-purge ppa:wireshark-dev/stable

Wine 3.0 Released with Direct3D 10 and 11 Support

Last updated: January 25, 2019

Wine Stable

The Wine team announced the new stable release Wine 3.0 a day ago a large number of improvements and following great changes:

  • Direct3D 10 and 11 support.
  • The Direct3D command stream.
  • The Android graphics driver.
  • Improved DirectWrite and Direct2D support.

“because of the annual release schedule, a number of features that are being worked on have been deferred to the next development cycle. This includes in particular Direct3D 12 and Vulkan support, as well as OpenGL ES support to enable Direct3D on Android.”, the Wine team announced.

For detailed changes, read the announcement.

Wine running windows app in Linux

How to Install Wine 3.0 in Ubuntu:

Wine has an official apt repository contains packages for Ubuntu 14.04, Ubuntu 16.04, Ubuntu 17.10.

Wine 3.0 binary packages are in the process of being built. Once it’s published in apt repository, do following steps to install it:

1. Open terminal via Ctrl+Alt+T or by searching it from app launcher. When it opens, run command to add the repository key:

wget -nc https://dl.winehq.org/wine-builds/winehq.key && sudo apt-key add winehq.key

Type your password (no visual feedback while typing due to security reason) when it asks and hit Enter.

2. Add wine repository via command:

sudo apt-add-repository https://dl.winehq.org/wine-builds/ubuntu/

For Linux Mint 18.x, use following command instead (replace xenial with trusty for 17.x):

sudo apt-add-repository 'deb https://dl.winehq.org/wine-builds/ubuntu/ xenial main'

3. Finally check updates and install wine stable packages:

sudo apt-get update

sudo apt-get install --install-recommends winehq-stable

NOTE: If you get the unmet dependencies issue while installing Wine 3.0, try aptitude instead via command:

sudo aptitude install winehq-stable

The command tells you which packages broke the installation. This usually caused by wrong dependency versions. You can then manually fix the dependencies via Synaptic package manager.

For more details, see the official documentation.

Uninstall:

To remove wine-stable package, run command in terminal:

sudo apt-get remove --autoremove wine-stable wine-stable-amd64

To remove Wine repository, launch Software & Updates utility and navigate to Other Software tab.

MKVToolNix, free and open-source Matroska software, reached 20.0.0 release a day ago. Here’s how to install it in Ubuntu 16.04, Ubuntu 17.10.

MKVToolNix 20.0.0 fixed quite a number of bugs in mkvmerge, and removed those options and features deprecated a year ago. An important change was the near complete rewrite of mkvinfo’s internals.

Important notes in the announcement:

  • Feature removal: several deprecated features have been removed:
    • mkvmerge: the deprecated options --identify-verbose (and its counterpart -I), --identify-for-gui, --identify-for-mmg and --identification-format verbose-text
    • support for the deprecated, old, proprietary format used for option files
    • support for passing command line options via the deprecated environment variables MKVTOOLNIX_OPTIONS, MKVEXTRACT_OPTIONS, MKVINFO_OPTIONS, MKVMERGE_OPTIONS and MKVPROPEDIT_OPTIONS
  • mkvinfo: most of its code was re-written in order to lay the groundwork for including its functionality in MKVToolNix GUI but with more features than the existing mkvinfo GUI. Changes include but aren’t limited to:
    • Several element names are a bit clearer (e.g. Maximum cache instead of MaxCache).
    • All timestamps and durations are now output as nanoseconds in formatted form (e.g. 01:23:45.67890123). All additional formats (e.g. floating point numbers output in seconds or milliseconds) were removed.
    • Element names for chapters and tags are now translated if a translation is available.
    • Elements located in wrong positions within the Matroska document are handled better.

How to Install MKVToolNix 20.0.0 in Ubuntu:

The official apt repository offers the latest packages for Ubuntu 16.04, Ubuntu 17.04, Ubuntu 17.10 so far.

Open terminal via Ctrl+Alt+T or by searching it from app launcher. When it opens, do following steps:

1. Run command to add the repository:

sudo sh -c 'echo "deb https://mkvtoolnix.download/ubuntu/ $(lsb_release -sc) main" >> /etc/apt/sources.list.d/bunkus.org.list'

Replace $(lsb_release -sc) with xenial for Linux Mint 18.x. And input your password (no visual feedback while typing) when it prompts and hit Enter.

2. Then install the key:

wget -q -O - https://mkvtoolnix.download/gpg-pub-moritzbunkus.txt | sudo apt-key add -

3. Finally either upgrade the software via Software Updater (Update Manager):

or run command to install the software packages:

sudo apt-get update

sudo apt-get install mkvtoolnix mkvtoolnix-gui

Uninstall:

To remove the repository, launch Software & Updates utility and navigate to Other Software tab.

To remove MKVToolNix, use Synaptic Package Manager or run following command:

sudo apt-get remove --autoremove mkvtoolnix mkvtoolnix-gui

Kxstitch cross stitch

KXStitch 2.1.0, free and open-source cross stitch pattern software, was released a day ago. Here’s how to install it in Ubuntu via PPA.

KXStitch is a cross stitch pattern editor by KDE. The software features:

  • Importing images
  • Multiple floss palettes
  • Multiple stitch types
  • Pattern libraries
  • Reads PCStitch files
  • Flexible printing options

The latest KXStitch 2.1.0 was released silently. No announcement, no changelog. If you want to know what changed, look over the project commits on github page.

KX Stitch PPA for Ubuntu

How to Install KXStitch 2.1.0 in Ubuntu:

For Ubuntu 16.04, Ubuntu 17.10, Ubuntu 18.04 users, it can be easily installed via the unofficial PPA.

1. Open terminal either via Ctrl+Alt+T or by searching for ‘terminal’ from app launcher. When it opens, run command:

sudo add-apt-repository ppa:ubuntuhandbook1/kxstitch

Input your password (no visual feedback while typing) when it prompts and hit Enter to add the PPA.

2. Then check updates and install the software either via Synaptic Package Manager or by running commands:

sudo apt-get update

sudo apt-get install kxstitch

Uninstall:

To remove KXStitch cross stitch software, either use Synaptic or run command in terminal:

sudo apt-get remove --autoremove kxstitch

The PPA can be removed via “Software & Updates” utility under “Other Software” tab.

uGet download manager

uGet download manager has reached the new stable 2.2 release series. The new release features ability to download from Youtube.

“uGet respects the YouTube Policies so depending on the individual settings of a video it may not be possible to download video from YouTube. The vast majority of videos will be available for use in uGet. The reason this was done instead of using something youtube-dl is because this method allows uGet for Android to also download YouTube videos as well as not have to worry about the ever changing APIs of YouTube that consistently break alternative methods of downloading.” uGet team announced.

The “uGet Chrome Wrapper” browser extension is compatible with Firefox, Chromium, Google Chrome, Opera, and Vivaldi. It will be renamed in the near future to better reflect the functionality.

uGet 2.2.0 features:

  • Support for downloading from YouTube
  • Support for downloading from MEGA
  • Batch Downloading up to 3 Wildcard Ranges
  • Better support for Wayland
  • New Browser Extension: uGet Chrome Wrapper

How to Install uGet 2.2.0 in Ubuntu:

The new release has been made into uGet Stable PPA, available for Ubuntu 14.04, Ubuntu 16.04, Ubuntu 17.10, and Ubuntu 18.04.

1. Open terminal via Ctrl+Alt+T or from app launcher, and then run command to add the PPA:

sudo add-apt-repository ppa:plushuang-tw/uget-stable

Input your password (no visual feedback while typing) when it prompts and hit Enter.

uGet Stable PPA

2. Then upgrade the download manager from an existing release via Software Updater:

or you can run following 2 commands to check updates and install / upgrade uGet:

sudo apt-get update 

sudo apt-get install uget

How to Remove:

Run following command in terminal will remove the PPA and also downgrade to the stock version of uGet in your Ubuntu system:

sudo apt-get install ppa-purge && sudo ppa-purge ppa:plushuang-tw/uget-stable

If you want to remove uGet download manager, simply search for and remove it via “Ubuntu Software” utility.