Archives For Howtos

frostwire

This simple tutorial will show you how to install the FrostWire on Ubuntu 24.04 Noble, Ubuntu 22.04 Jammy, and Ubuntu 20.04 Focal.

FrostWire is a free and open-source BitTorrent client forked from LimeWire, and was previously a hybrid Gnutella and BitTorrent client. Unlike most other BitTorrent clients, FrostWire is able to search for, and download torrents from many major trackers.

The app is written in Java, and works in Windows, macOS, Linux and Android. For Ubuntu, it so far only works on x86_64 platform meaning for AMD/Intel CPUs.

Download & Install FrostWire

1. To install the app, first download the official .deb package, through the official download link below:

2. After downloading the package, press Ctrl+Alt+T on keyboard to open up a terminal window. Then, run the command below to install it:

sudo apt install ~/Downloads/frostwire*.deb

Instead of typing ~/Downloads/frostwire*.deb, you can drag’n’drop the file into terminal instead to insert path to the package. Then, hit enter, type your password (no visual feedback, just type in mind) to start installing it.

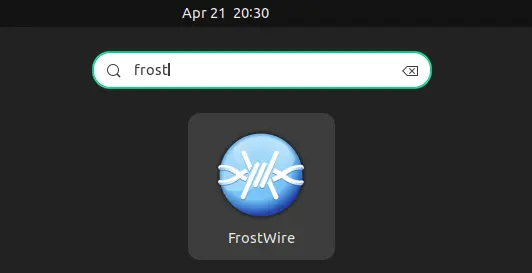
3. Once installed, search for and launch the app either from start menu or GNOME overview depends on your desktop environment and enjoy! Though, on first launch, you need to follow the wizard to accept license and setup some basic settings.

How to Uninstall/Remove Frostwire

To remove the app, simply open terminal (Ctrl+Alt+T) and run command:

sudo apt remove --autoremove frostwire

That’s all. Enjoy!

Install RSSOwl Feed Reader on Ubuntu From PPA

Last updated: April 21, 2024

RSSOwl

RSSOwl is a reader for RSS, PDF, Atom News. Since Google Reader is no longer running, RSSOwl added the option to synchronize with Google.

UPDATE: RSSOwl discontinued since 2014!! And, this tutorial does not work anymore.

This simple and brief tutorial will show you how to install the latest RSSOwl on Ubuntu 13.04 Raring, 12.10 Quantal, 12.04 Precise from GetDeb repository.

To get started, press Ctrl+Alt+T to open terminal, then follow the below steps:

1.) Copy and paste this command and run in terminal to download getdeb package:

wget http://archive.getdeb.net/install_deb/getdeb-repository_0.1-1~getdeb1_all.deb

2.) Install the downloaded package to add the repository:

sudo dpkg -i getdeb-repository_0.1-1~getdeb1_all.deb

3.) Update:

sudo apt-get update

4.) Install the reader:

sudo apt-get install rssowl

How to Disable Ping Response on Ubuntu Server

Last updated: April 21, 2024

This simple and brief tutorial is going to show you how to disable ping response on Ubuntu Server to make it more secure.

To get started, you need to first run command below to get the root privilege:

sudo su

Then, you can disable ping for IPv4 using the command below to set config file value to 1:

echo  1  > /proc/sys/net/ipv4/icmp_echo_ignore_all

For IPv6, you may use the command below instead:

echo 1 > /proc/sys/net/ipv6/icmp/echo_ignore_all

Or, you can use iptables command instead to do the same job. Though, you need to replace eth0 to yours network interface name (run ip -4 address to tell).

iptables  -I  INPUT  -i  eth0  -p   icmp  -s  0/0  -d  0/0   -j  DROP

To re-enable ping response, use commands:

echo  0  > /proc/sys/net/ipv4/icmp_echo_ignore_all
echo 1 > /proc/sys/net/ipv6/icmp/echo_ignore_all

or

iptables  -I  INPUT  -i  eth0  -p   icmp  -s  0/0  -d  0/0   -j  ACCEPT

To make it permanently, edit the “/etc/sysctl.conf” file and add the link below, so that the setting gets picked up at boot time.

net.ipv4.icmp_echo_ignore_all=1

This simple tutorial is going to show you how to install StarDict and set up dictionaries on Ubuntu System. It’s useful for students and others.

NOTE: StarDict does NOT launch in current Ubuntu 22.04 due to this bug. So this tutorial does no longer work until the bug is fixed!

StarDict is a free dictionary lookup program. Works on Windows, Linux and Mac, off-line or international.

Stardict-dirtionary

Install StarDict in Ubuntu:

StarDict is available in system repositories for all current Ubuntu versions. Simply launch Ubuntu Software or App Center, then just search and install the ‘stardict’ package:

For choice, you can press Ctrl+Alt+T on keyboard to open terminal, then run the command below instead to install it:

sudo apt install stardict

Download and install dictionaries:

You can download Babylon (.bgl) dictionaries from: tuxor1337.frama.io/firedict/dictionaries.html. If instead of .bgl files you are getting .exe installers, use 7Zip to extract them.

To setup dictionaries for StarDict, extract the downloaded packages and move them into /usr/share/stardict/dic/.

Press Alt+F2, type and run gksudo nautilus to open file browser as root, then do the previous copy and paste things.

Enjoy!

Google-Music-Manager

This simple tutorial will show you how to install Google Play Music Manager on Ubuntu 13.10, 13.04, 12.04 from Google official repository.

UPDATE: Google Music Manager is NO longer available due to favor of YouTube Music!!!

Press Ctrl+Alt+T to open terminal and get started with below steps:

  1. Copy and paste this command and hit run to add the Google repository:
    sudo sh -c 'echo "deb http://dl.google.com/linux/musicmanager/deb/ stable main" >> /etc/apt/sources.list.d/google-musicmanager.list'
  2. Download and install the key:
    wget -q -O - https://dl-ssl.google.com/linux/linux_signing_key.pub | sudo apt-key add -
  3. Update:
    sudo apt-get update
  4. Finally install Google Music Manager, so far it’s still in beta:
    sudo apt-get install google-musicmanager-beta

Enjoy!

This tutorial shows how to install Cinelerra video editor in current Ubuntu 22.04 and Ubuntu 24.04.

Cinelerra is a free open-source video editor for Linux. It supports advanced composition operations such as keying and mattes, and many other professional functions depending on the variant.

Cinelerra has a few variants, including GG, CV, HV. The GG variant, which supports up to 8K video, and can also create DVDs and Blu-rays, is presently under active development and the only one that works in my case in current Ubuntu releases.

Download & Install Cinelerra GG

The GG edition now provides the official binary package for AppImage package.

1. Ubuntu does not support AppImage out-of-the-box since 22.04. To enable it, press Ctrl+Alt+T on keyboard to open terminal, then run command:

sudo apt install libfuse2

2. Then, select download the latest version of the AppImage from its website:

Scroll down in that page and click download the latest package. At the moment of writing, it’s “CinGG-20240229-x86_64.AppImage” (for modern Intel/AMD CPUs).

3. After downloaded the package, right-click on it in file manager, then click go to its “Properties” dialog.

Next, navigate to Permissions tab and click enable “Allow executing file as program”. Finally, click Run the AppImage file to launch the video editor:

4. Create an App icon for Cinelerra.

If you want to launch the video editor from start menu or Gnome ‘Show Apps’ screen just like other normal apps. Then, click launch text editor first.

When text editor opens, create a new empty file (if it does not open a new one), then write following lines into it:

[Desktop Entry]
Name=Cinelerra GG
Comment=MultiMedia Editor
Categories=AudioVideo;AudioVideoEditing;
Encoding=UTF-8
Exec=/home/ji/Apps/CinGG-20240229-x86_64.AppImage
Icon=Cinelerra
Terminal=false
Type=Application

IMPORTANT: In the lines above, you need to replace the value for “Exec”! In my case, I moved the AppImage file into my custom “Apps” folder in user home. So, it’s “/home/username/Apps/file-name.AppImage”. You have to change it to yours!

And for icon, you need to download one from web. Either .png or .svg file. Re-name to Cinelerra.png (or Cinelerra.svg depends on image type), and put it to “.local/share/icons” directory.

When done editing the text file, click “save” (or save as), then select save the file to .local/share/applications directory, whatever name as you want with “.desktop” extension.

If everything’s done properly, you’re able to search for and launch the video editor from menu a few moments later.

Uninstall Cinelerra GG

To uninstall the video editor, just delete the .AppImage file from your file manager. Then, also remove the .desktop file from ‘.local/share/applications’ directory, as well as the icon file from ‘.local/share/icons’.

This simple and brief tutorial is going to show you how to create a bootable Ubuntu live USB. Other than Ubuntu CD, Live USB may be a good choice for installing Ubuntu on your computer.

Preparation:

To get started:

First insert your USB disk, then launch Unetbootin executable. Check “Diskimage” and choose the Ubuntu iso file. You USB drive should be selected automatically.

Unetbootin

Click OK to start creating Live USB.

Unetbootin-in-process

Once finished, you’ll see this:

Unetbootin-finish

Insert the USB drive in target computer and boot up, then you might want a step by step guide how to install Ubuntu