Archives For Gnome

How to hide top-bar, remove left dock and ‘Activities’, as well as toggle visibility of a few other Gnome Panel items are often asked questions. I used to use a few extensions to do the jobs until met ‘Just Perfection’.

Just Perfection includes a list of options to toggle visibility of GNOME UI Elements, customize panel size, padding, and change the behavior.

Its settings page starts with a portrait of an old man (Sorry for my poor cultural knowledge, I don’t know who is he).
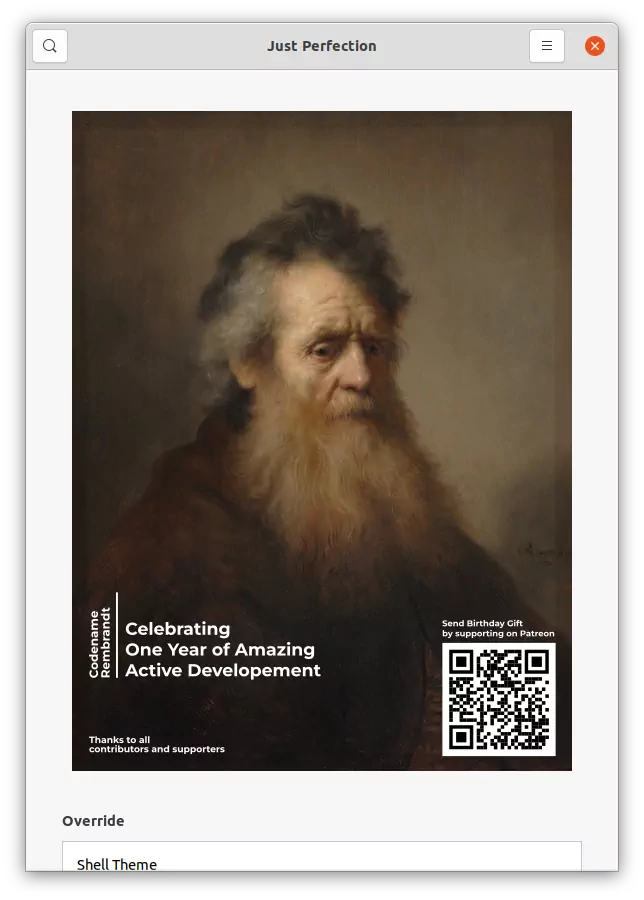
An old man in Just Perfection settings

Just scroll down, and you’ll see the options to:

  • override Gnome Shell theme to create a minimal desktop.
  • Hide top-bar.
  • Hide top-bar in overview screen.
  • Remove top left “Activities” button.
  • Disable (the focused) app-menu, clock, system tray menu (Aggregate menu).
  • Remove search box, workspace picker, close button & caption of selected app in overview
  • Disable the dock launcher, on screen display (when changing volume/brightness via Fn key).
  • Disable hot corner watermark animation.
  • Turn on/off icons for top-bar items.
  • Remove panel arrow (little triangle behind app-menu and battery icon).
  • Toggle hot corner, app gesture, type to search.
  • Customize panel position (top or bottom), clock position, panel size and button padding, animation speed, etc.

How to Install Just Perfection Extension:

The extension so far supports Gnome from v3.36 to v41, so Ubuntu 20.04 and higher may install it via following steps:

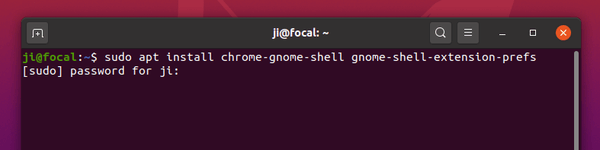
1.) Firstly, press Ctrl+Alt+T on keyboard to open terminal. When it opens, run command to install required libraries:

sudo apt install chrome-gnome-shell gnome-shell-extension-prefs
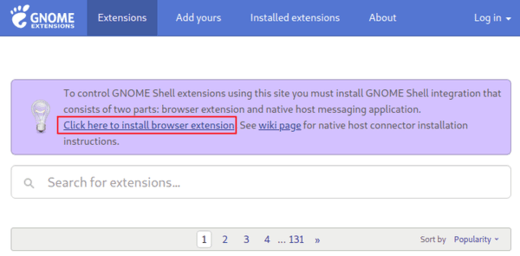
2.) Next, go to the extension web page and turn on the toggle icon to install it:

If you don’t see the toggle icon, click the link in the top to install browser extension and refresh the web page.

(NOTE: the default Firefox in Ubuntu 21.10 is a Snap app that does not support for installing Gnome Extensions.)
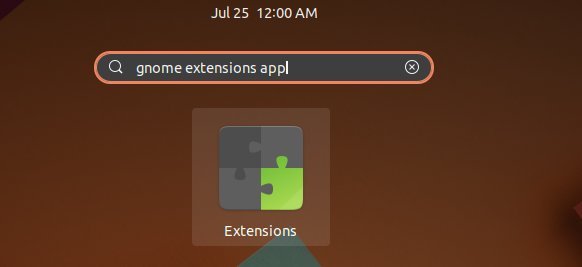
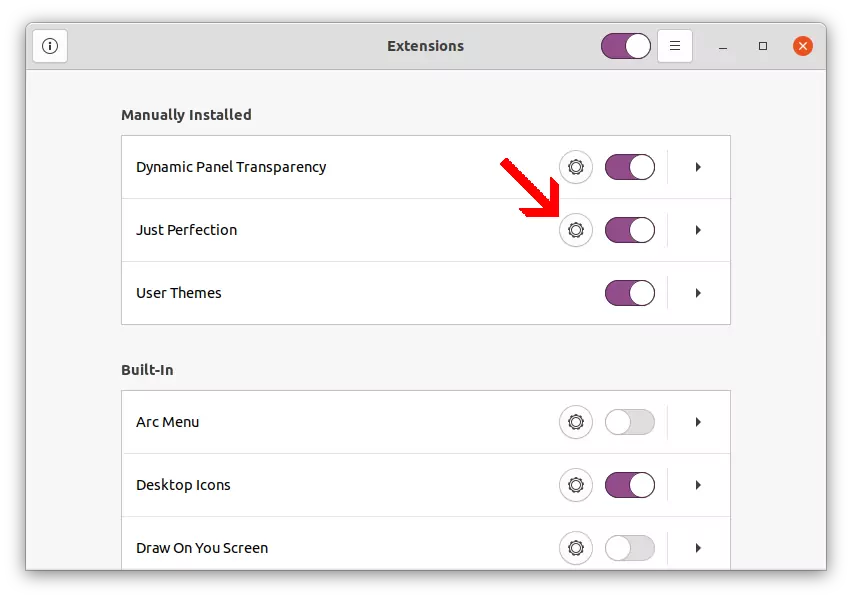
After installation, search for and open ‘Gnome Extensions‘ app from Activities overview screen and click the setting wheel for the extension to customize GNOME UI:
How to Type Unusual Characters and Symbols in Ubuntu GNOME

Published: November 15, 2021 — Last updated: November 15, 2021


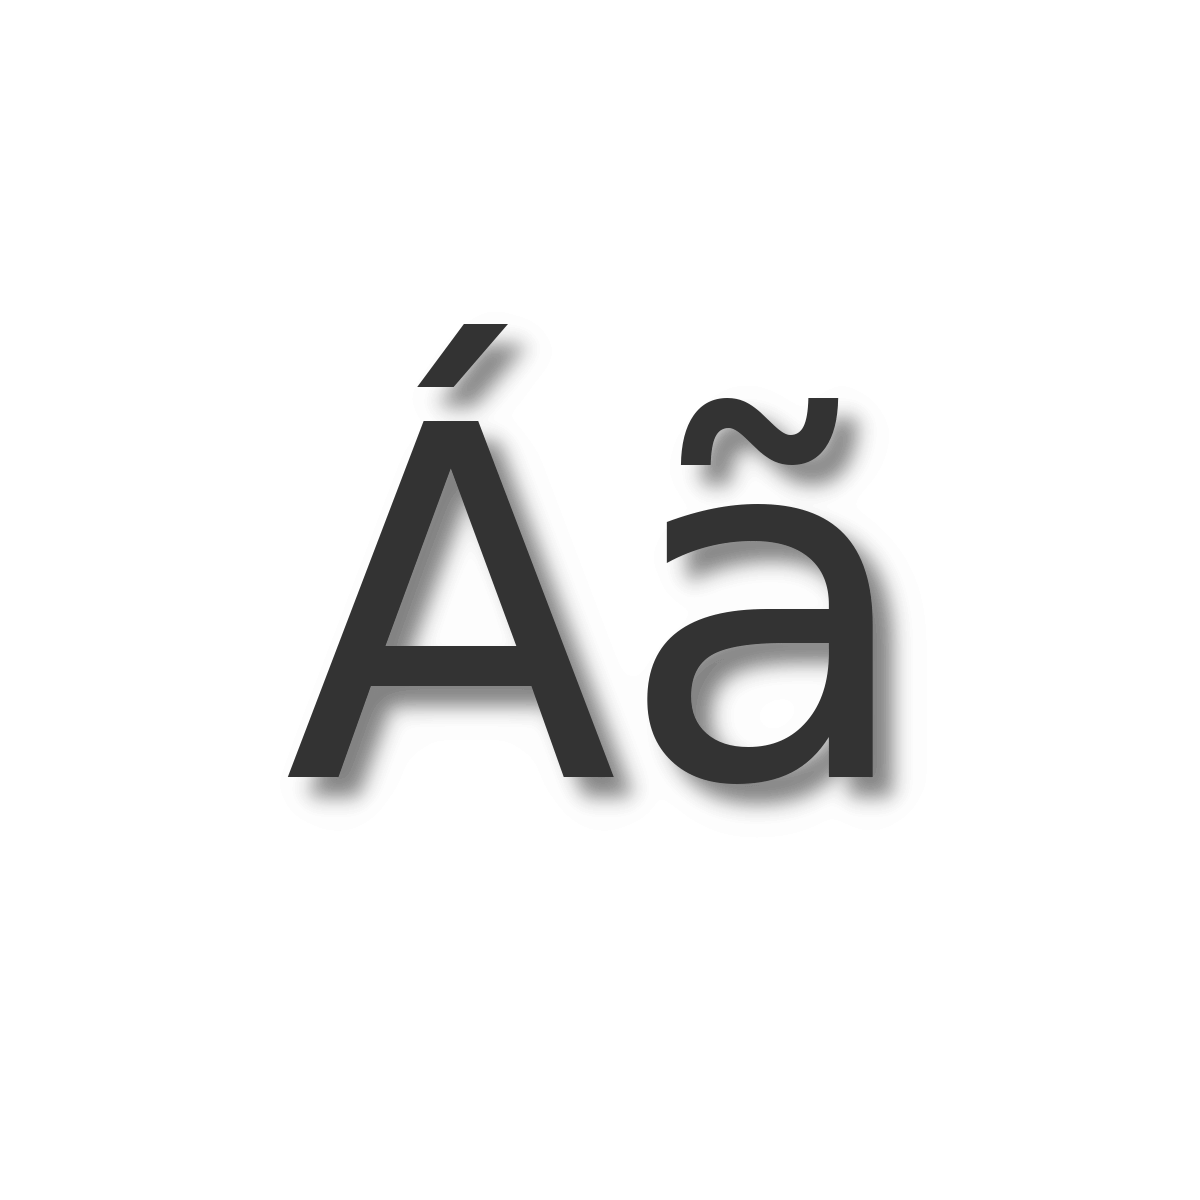
For Ubuntu, Fedora, and other Linux with GNOME desktop, here’s how to type unusual characters (e.g., Ẽ, ©, ™, ¼, €, etc) using the standard QWERTY computer keyboard.

Without using a virtual keyboard, the standard physical keyboard supports for inserting alternate characters and symbols using the Compose key in Linux. Here’s how to enable and use the key in Ubuntu 18.04, Ubuntu 20.04, Ubuntu 21.10 & higher with default GNOME desktop.

Enable Compose key in GNOME:

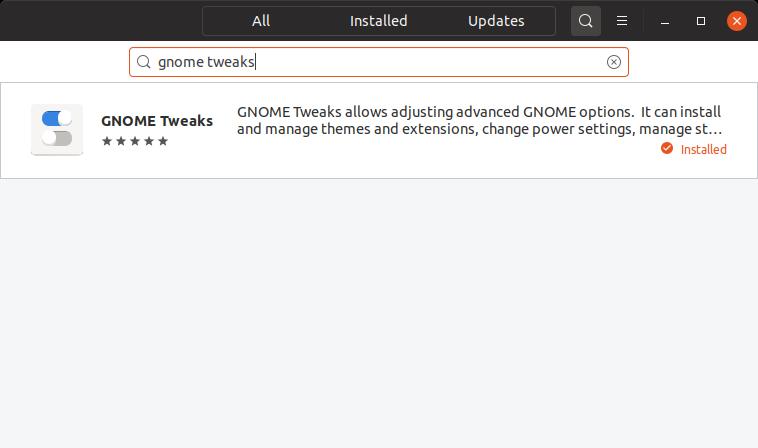
1. Firstly, search for and install “Gnome Tweaks” configuration tool via Ubuntu Software.

For those familiar with Linux commands may also press Ctrl+Alt+T on keyboard to open terminal and run command to install the tool:

sudo apt install gnome-tweaks

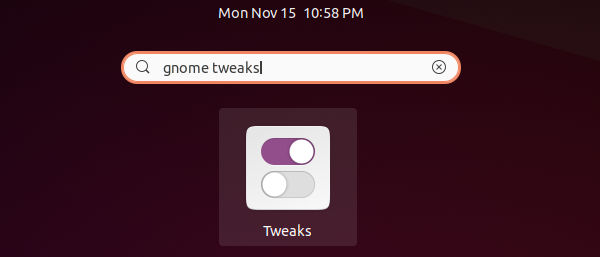
2. Secondly, open ‘Activities’ overview screen, search for and open ‘GNOME Tweaks’:

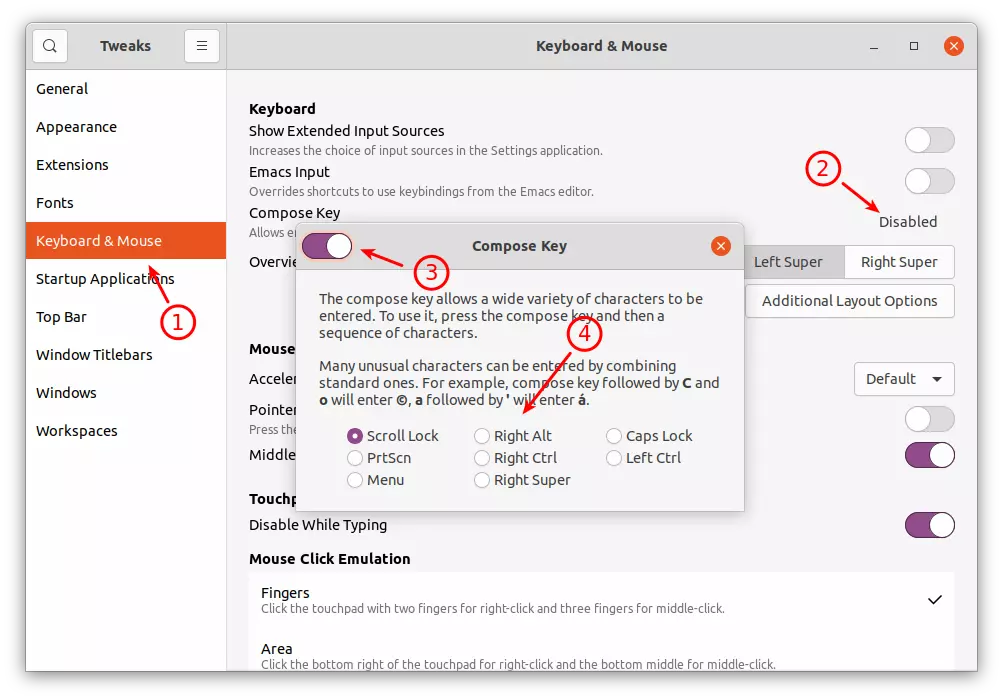
3. When the configuration tool opens, do:

  • Go to “Keyboard & Mouse” in the left pane.
  • Click on ‘Disable‘ area in the right side after the Compose Key setting.
  • Turn on the toggle in pop-up dialog.
  • Finally choose a key to use as compose key.

Type unusual characters via Compose Key:

After enabled the functions, you may now press Compose key, then start typing the keys below one by one to insert a character. For example, type Compose key then ~ finally u will input ũ. No need to hold the compose key, though you have to hit the key combination in a short time period in Ubuntu 21.10. For Ubuntu 20.04, it even works 1 min after the compose key is pressed.

Common Compose Key combinations via Wikipedia. In first column, you may replace a with most uppercase and lowercase vowels:

PressForPressForPressForPressFor
‘ + aáa + eæ< + <«– + L£
” + aäA + EÆ> + >»^ + 0⁰
` + aào + eœ/ + /\^ + 1¹
~ + aãO + EŒ/ + C₡^ + 2²
^ + aâd + hð/ + oø^ + 3³
c + aǎD + HÐ/ + OØ^ + _ + aª
< + sšo + o°? + ?¿^ + _ + oº
o + aåo + x¤‘ + <‘_ + 0₀
– + aāo + c©‘ + >’_ + 1₁
, + aąo + r®, + cç_ +2₂
b + aăs + o§. + CÇ_ + 3₃
? + aảs + sß” + <“~ + nñ
. + aȧS + Sẞ” + >”| + c¢
. + ^·t + hþ! + !¡= + y¥
– + DĐT + HÞ– + – + – —= + c€
t + m™– + – + .–1 + 2½
x + x×– + :÷1 + 4¼
. + .…– + dđ3 + 4¾

Show Day of Week in Top bar in Ubuntu 24.04 | 22.04

Published: November 13, 2021 — Last updated: July 1, 2024

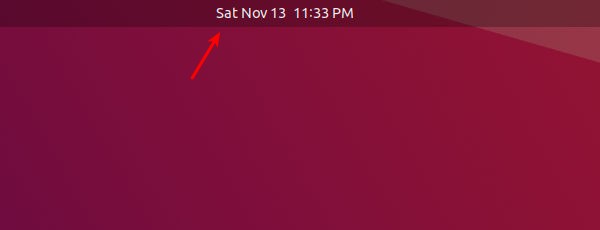
Ubuntu by default displays only date and time in the center of top-bar. Users have to click on it to see which day is today in drop-down calendar.

To make life easier, you may configure the GNOME desktop to show the day of week in top-bar. And, here’s how to do the trick in Ubuntu 20.04, Ubuntu 22.04, and Ubuntu 24.04.

Option 1: Single command to Display Weekday in Top bar:

For those who are familiar with Linux commands, it can be done by running a single gsettings command.

To do so, press Ctrl+Alt+T on keyboard to open up a terminal window. When it opens, paste the command below and hit run:

gsettings set org.gnome.desktop.interface clock-show-weekday true

After that, it shows the weekday name in short (e.g., Sat and Sun) immediately.

Option 2: Use System Settings (for Ubuntu 24.04)

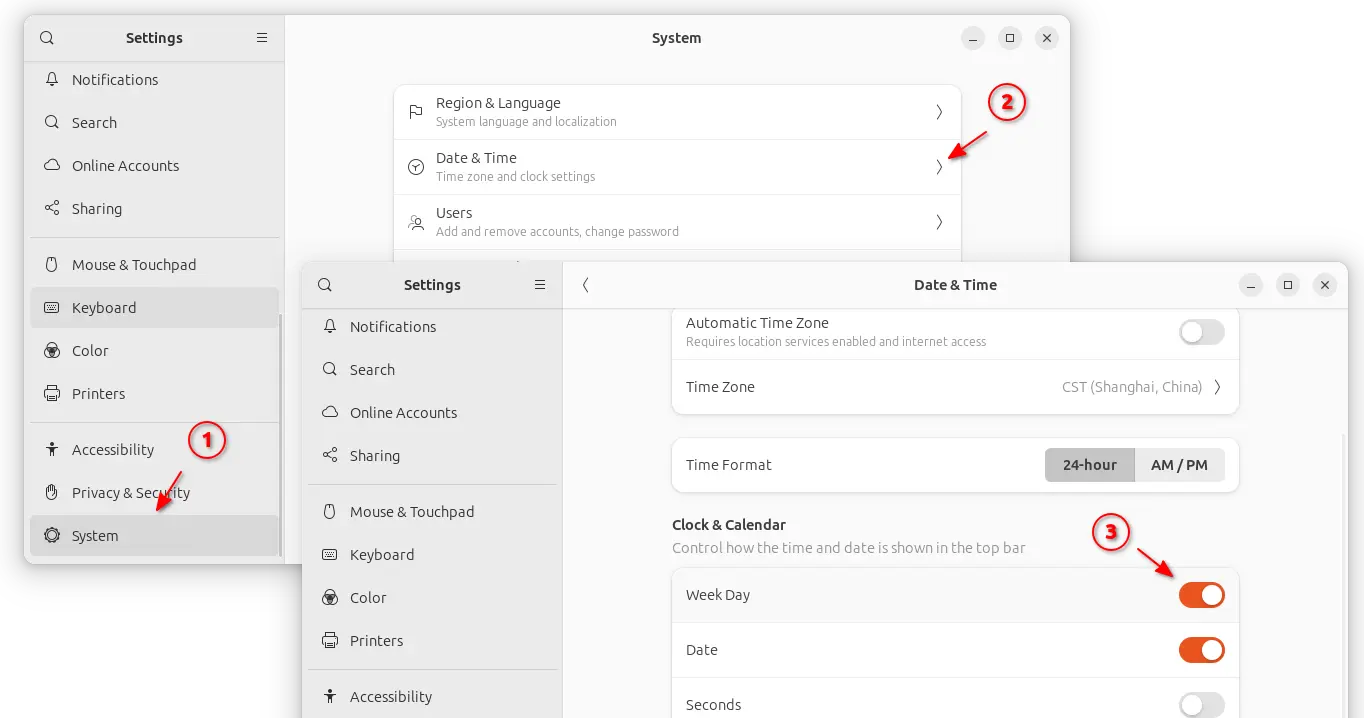
For Ubuntu 24.04 with GNOME 46, system settings (aka Gnome Control Center) has include a toggle option to show/hide the weekday in top-bar.

First, press Super (Windows logo key) + S to open system status menu (Quick Settings), then click launch “Settings”. When it opens, navigate to System in left, then go to Date & Time, finally turn on the option for “Week Day” to enable this feature.

Option 3: Toggle Weekday Display via Gnome Tweaks

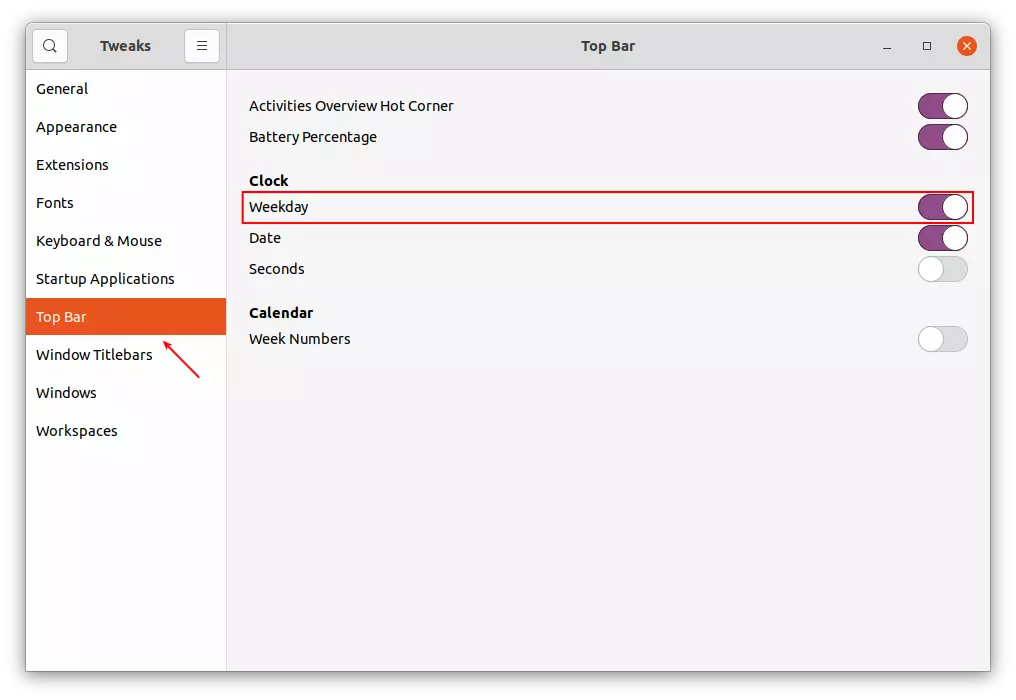
For Ubuntu 22.04 and Ubuntu 20.04, the must have GNOME configuration tool ‘Gnome Tweaks’ provides the toggle option for those hate Linux commands. If you don’t have it, search for and install via Ubuntu Software:

Next, press Super/Windows key to bring up activities overview screen. Then search for and launch Gnome Tweaks. Navigate to “Top Bar” from left pane, and then you’ll see the option to toggle “Weekday”.

Option 4: Use Dconf Editor

As you may know, the advanced configuration tool “Dconf Editor” also provides a graphical option to toggle this function.

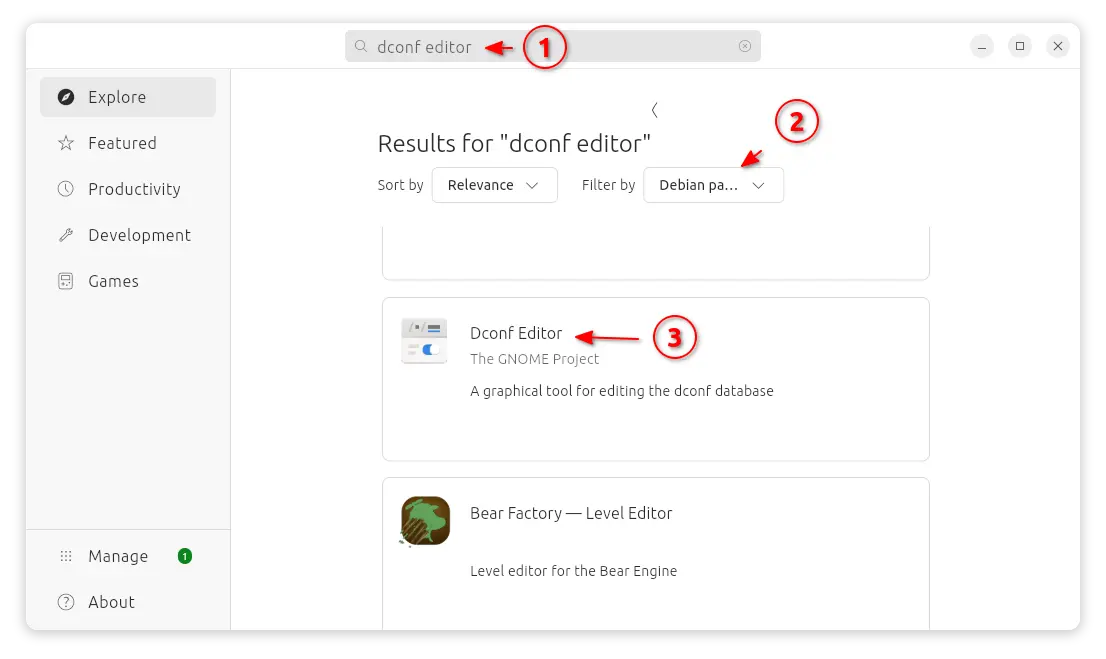
First, search for and install ‘Dconf Editor’ from either Ubuntu Software or App Center.

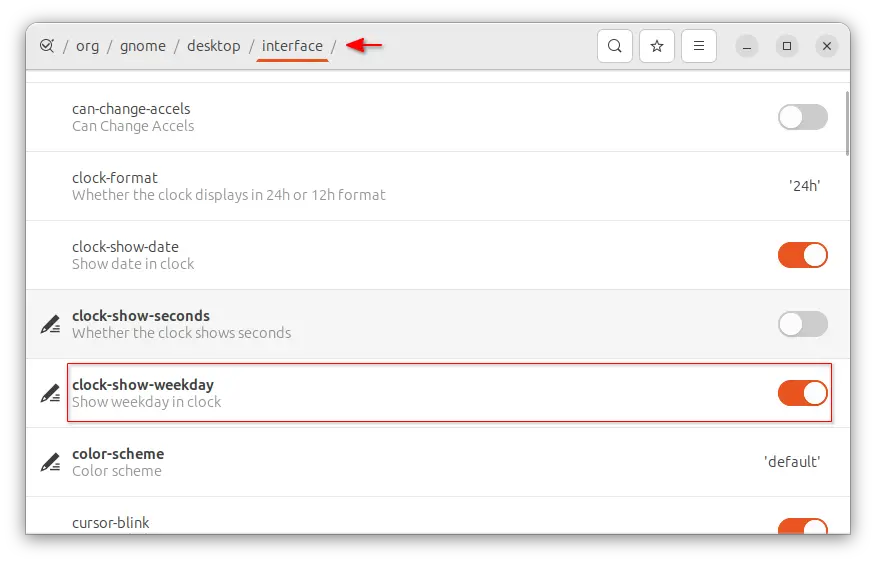
Then, launch the tool and navigate to “org/gnome/desktop/interface“. Finally, find out and turn on the option for “clock-show-weekday”:

As you see, the tool also provides tons of other configure options. Use them as you want and enjoy!

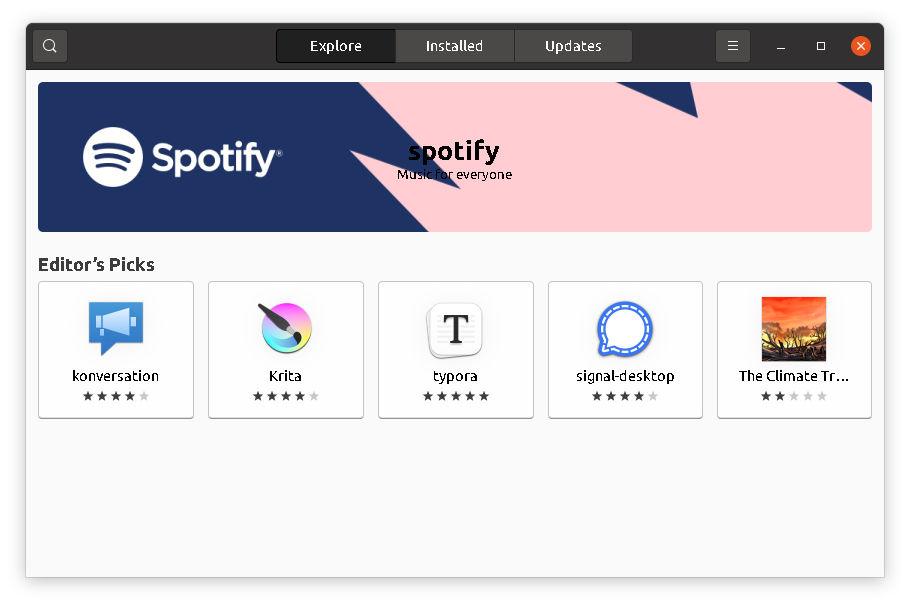
The Ubuntu Software app in Ubuntu 21.10 Impish has an ugly font rendering on default Wayland. The text in the app looks a bit pixelated.

I found the issue firstly when Impish was in beta stage. The issue was reported to also affect LibreOffice, Chromium, and other Snap apps, though most of them has been updated with it fixed.

Ubuntu Software with Bad Font

According to Daniel van Vugt, this issue is caused by a few key settings change. The following keys has been removed in Ubuntu 21.10:

org.gnome.settings-daemon.plugins.xsettings antialiasing
org.gnome.settings-daemon.plugins.xsettings hinting
org.gnome.settings-daemon.plugins.xsettings rgba-order

And, following ones take the places instead:

org.gnome.desktop.interface font-antialiasing
org.gnome.desktop.interface font-hinting
org.gnome.desktop.interface font-rgba-order

Not only Snap apps, but also font-manager and Gnome Tweaks are affected by this change. And, Ubuntu Software (aka “Snap Store”) has fixed the issue in via the current beta release.

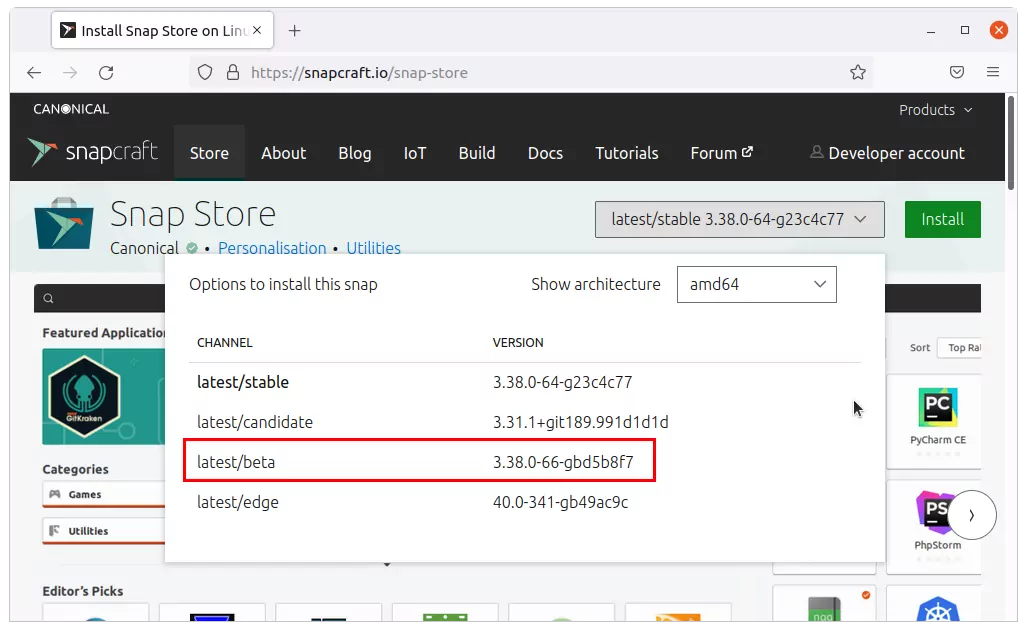
Snap Store Beta

Upgrade Snap Store via Beta Channel:

So the solution is either wait until Canonical published the update, or update Snap Store (Ubuntu Software) through beta channel if you use it regularly.

To do so, simply press Ctrl+Alt+T on keyboard to open terminal, and then run command:

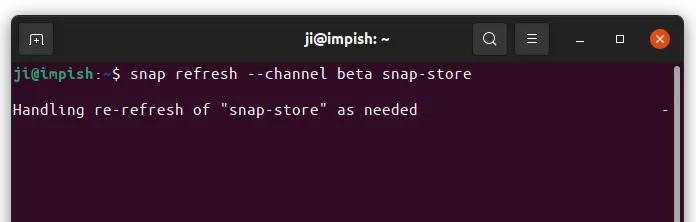
snap refresh --channel beta snap-store

After that, font will be properly loaded next boot.

If you’ve found that Snap Store in stable channel has been updated to version higher than “3.38.0-66”. You may revert back by running command:

snap refresh --channel stable snap-store

That’s it. Enjoy!

How to Remove Trash Icon From Left Dock Panel in Ubuntu 24.04

Published: October 19, 2021 — Last updated: May 4, 2024

This simple tutorial shows how to remove the trash icon from the dock in Ubuntu 24.04 Noble Numbat.

Different to the previous releases, Ubuntu 24.04 puts the trash icon on left dock instead of the desktop. However, I don’t use the trash icon in either location. Instead, I removes files using right-click menu options, and go to trash via file manager left sidebar.

If you also find it useless, then here’s how to remove it either via a single command or by a graphical configuration tool.


Continue Reading…

Shorten Dock Panel & Move ‘Show Applications’ to Top in Ubuntu 24.04 | 22.04

Published: October 12, 2021 — Last updated: May 5, 2024

After installed the new Ubuntu 22.04 and Ubuntu 24.04, one of the top things to do is tweaking the left dock panel.

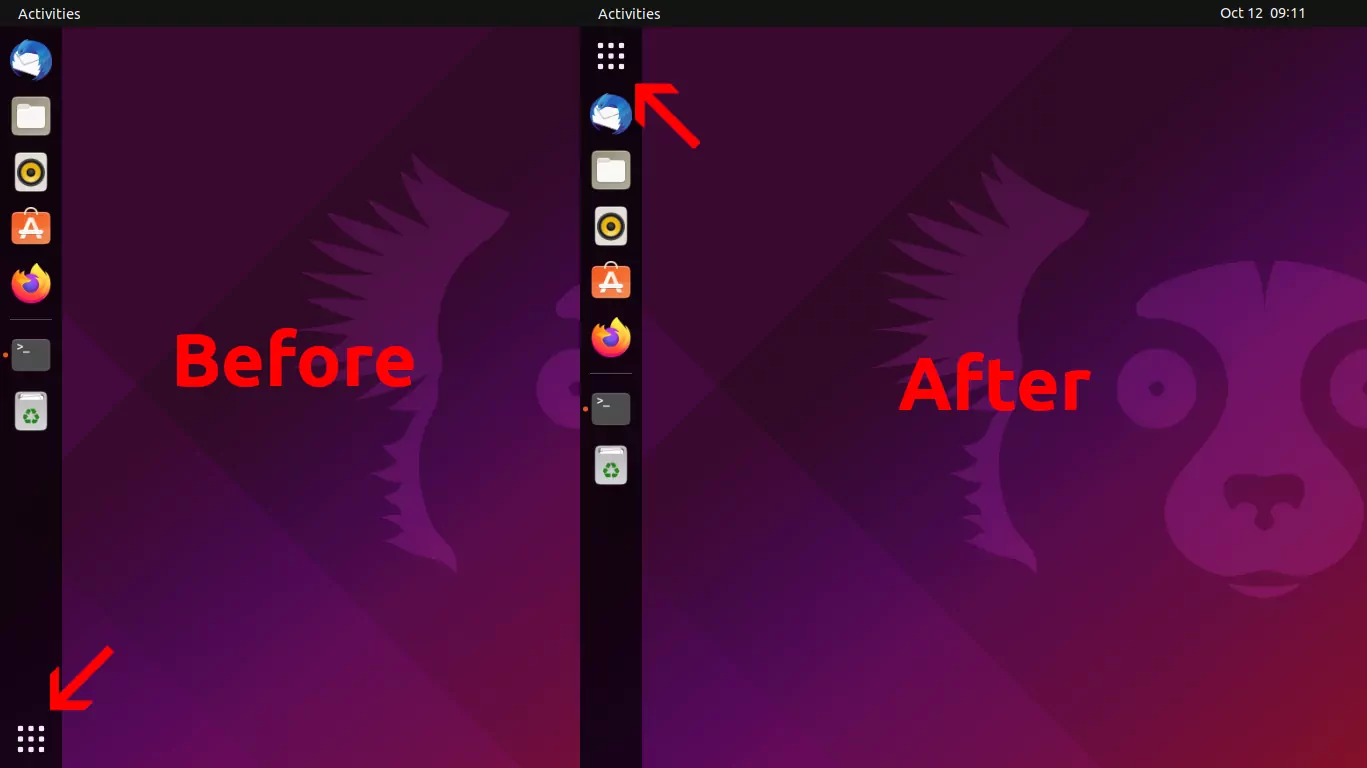
Via “System Settings -> Appearance”, you may change the panel position to bottom, adjust icon size, and enable auto-hide. However, the 9 dots ‘Show Applications’ (or ‘Show Apps’) icon sticks to the bottom which is not movable.

Move ‘Show Applications’ button to the Top:

Though you can not drag moving the icon, Ubuntu has hidden option to change the position. And you may run single command in terminal to do the trick.

Press Ctrl+Alt+T on keyboard to open terminal. When it opens, paste the command below and hit Enter:

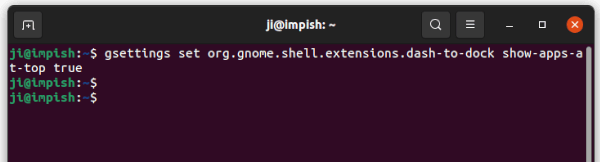
gsettings set org.gnome.shell.extensions.dash-to-dock show-apps-at-top true

The icon goes to top (or left if you moved dock to bottom) immediately after running the command. So it will look like:

Shorten the Dock Panel:

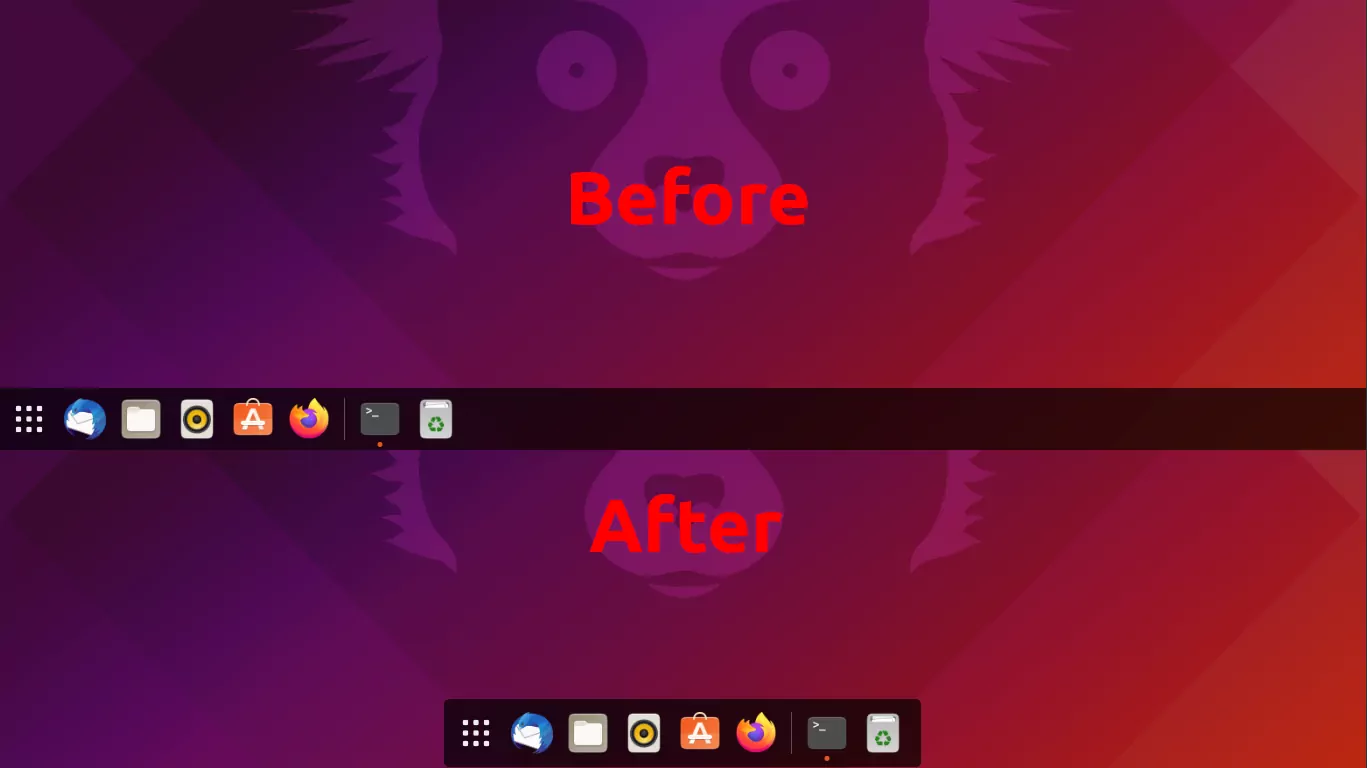
The dock launcher is easy to move to the bottom, but Appearance setting does not has option to make it compact, so to have Mac OS style short bottom panel.

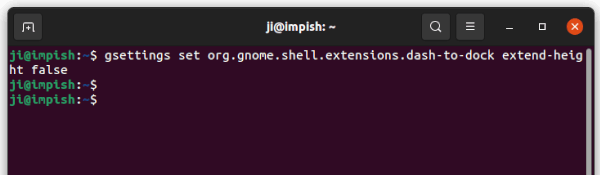
To shorten Ubuntu Dock, press Ctrl+Alt+T to open terminal and run command:

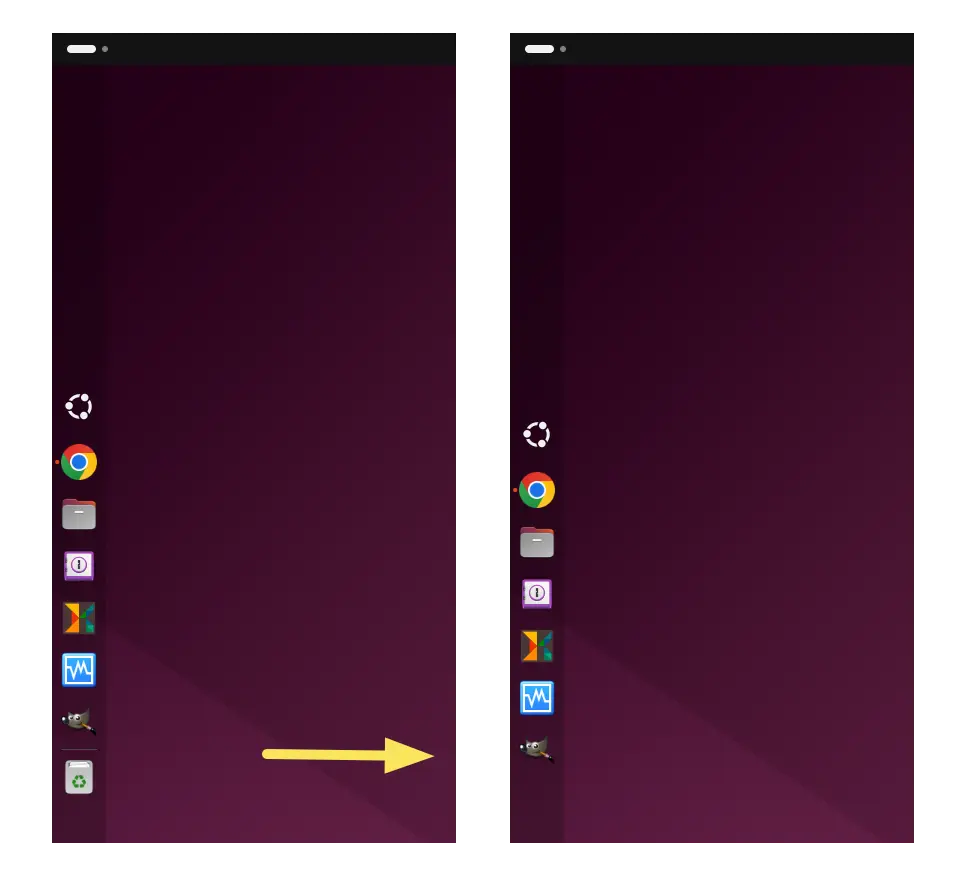
gsettings set org.gnome.shell.extensions.dash-to-dock extend-height false

After that, it will look like:

Configure Ubuntu Dock via Dconf Editor:

For those hate Linux commands, there’s an advanced configuration tool ‘Dconf Editor’ available to do the trick.

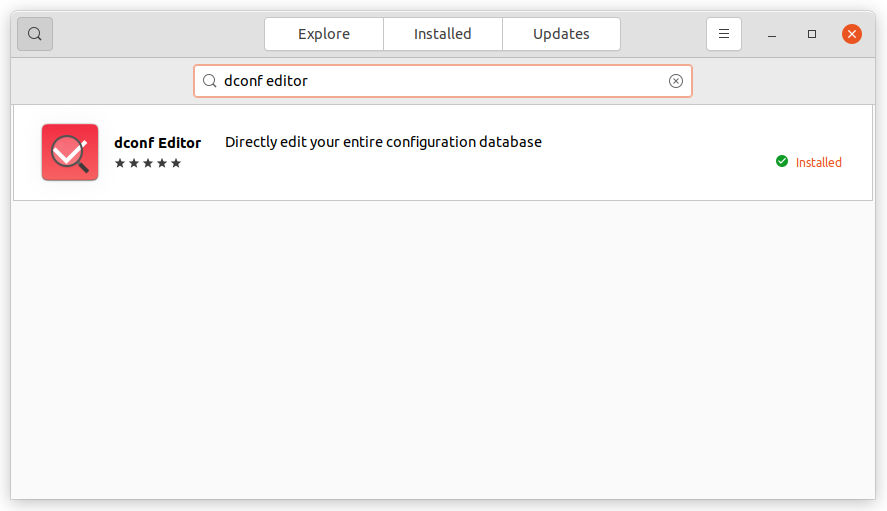
Search for and install the tool from Ubuntu Software if you don’t have it.

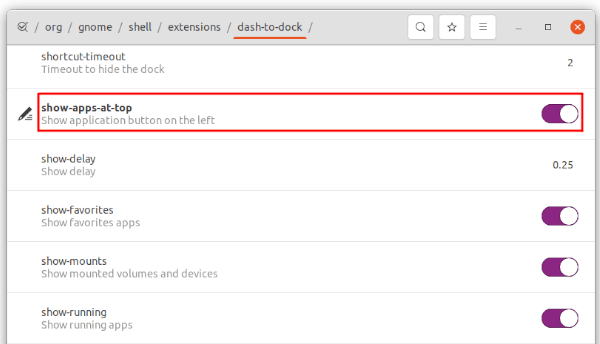
Next, open Dconf Editor by searching from activities overview screen. Then navigate to “org/gnome/shell/extensions/dash-to-dock“. There you’ll see a list of options to configure the dock panel, including moving ‘Show Applications’, ‘extend-height’, ‘click to minimize’, and more.

That’s all. Enjoy!

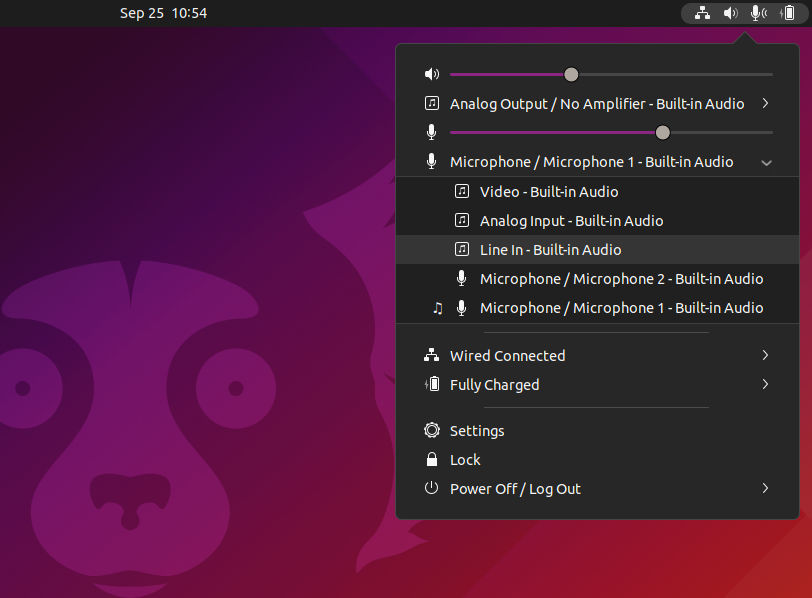
For laptop and desktop PC with more than one audio input and output devices, it’s possible to switch between audio devices quickly with upper right corner system tray menu.

It’s a common situation that users have more than one audio devices connected to the computer. GNOME, the default Ubuntu Desktop Environment, provides Sound settings to choose which input and/or output device to use.

To make life easier, a Gnome extension is available to integrate the settings into system tray status menu under volume control slider. So users can quickly choose a speaker, HMDI, microphone or other input device via few clicks.

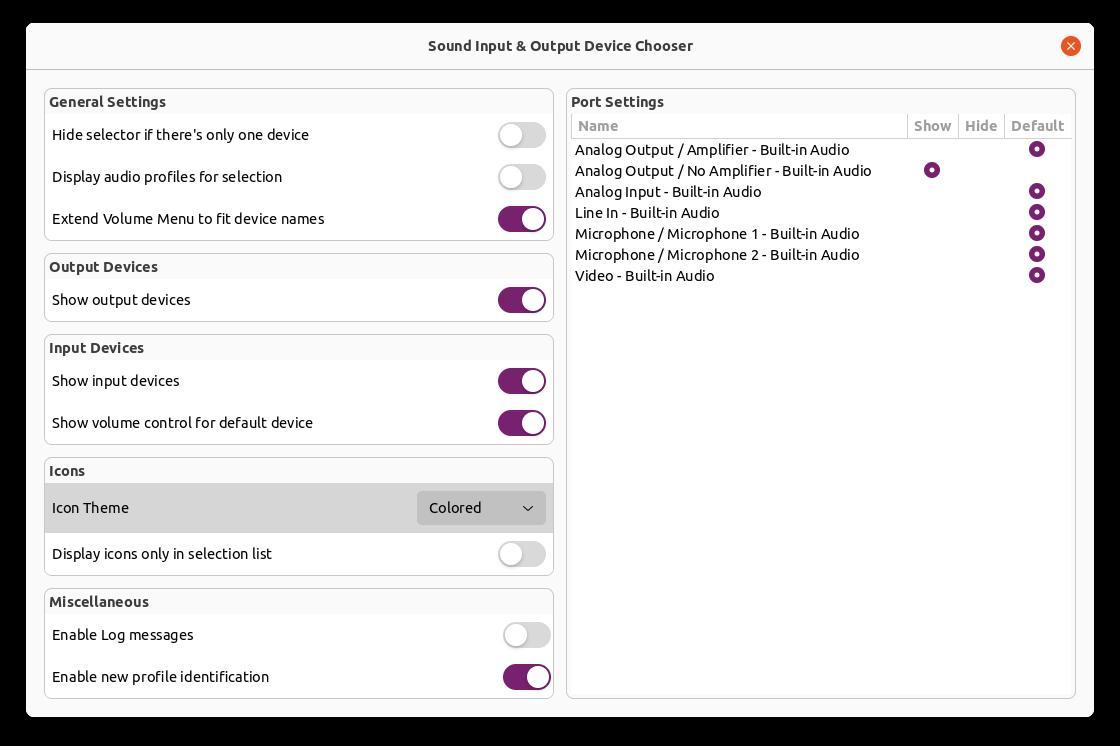
The extension offers a setting dialog allows to select which device, e.g., HDMI , Speakers, microphone etc, you would like to display or hide in menu. It’s possible to hide the menu when there’s only one choice, or manually toggle visible of either menu, as well as audio profiles.

Install the audio device chooser extension:

The extension supports up to GNOME 40, it works on Ubuntu 18.04, Ubuntu 20.04, Ubuntu 21.04, and next Ubuntu 21.10. As well, all recent GNOME based Linux distros, e.g., Debian 11, Fedora 34, CentOS 8, and Manjaro are supported.

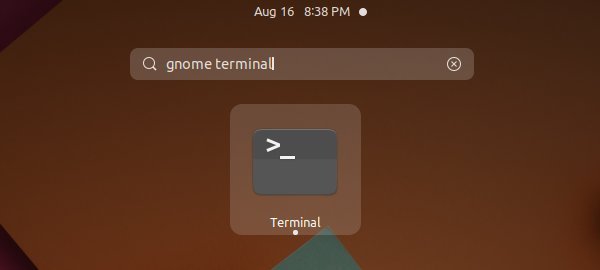
1.) Firstly, open terminal by either searching from activities overview or pressing Ctrl+Alt+T on keyboard.

2.) When terminal opens, run command to install the chrome-gnome-shell package which allows to install Gnome extensions using your web browser. Also install gnome-shell-extension-prefs (Gnome Extensions app) package, the tool to manage all installed extensions.

sudo apt install chrome-gnome-shell gnome-shell-extension-prefs

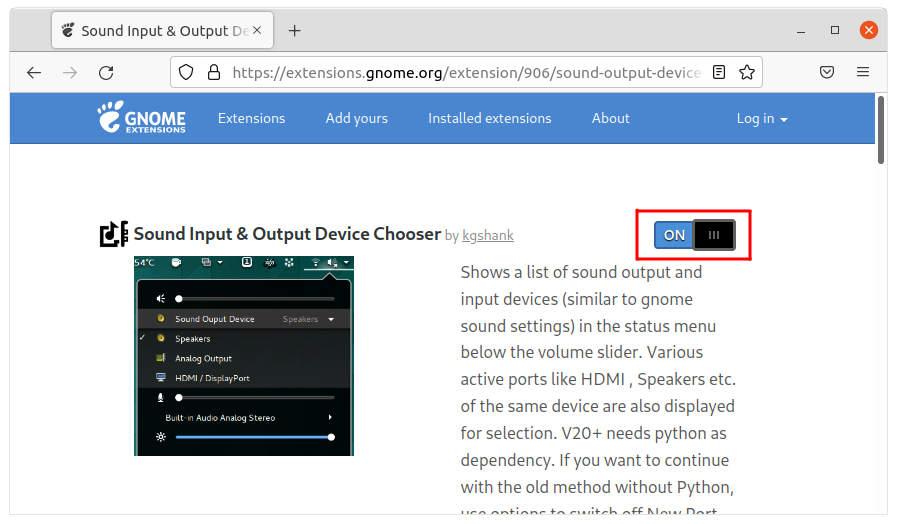
3.) Finally, go to the link button below and turn on the slider icon to install the extension.

Don’t worry if you don’t see the toggle icon, install the browser extension via ‘Click here to install the browser extension’ link and refresh the web page will make it visible.

After installation, search for and open “Gnome Extensions” from the overview screen. Then click on the gear button for this extension to configure the audio device chooser menu.

That’s all. Enjoy!

After half a year of development, the GNOME project announced version 41 of its popular Linux desktop environment.

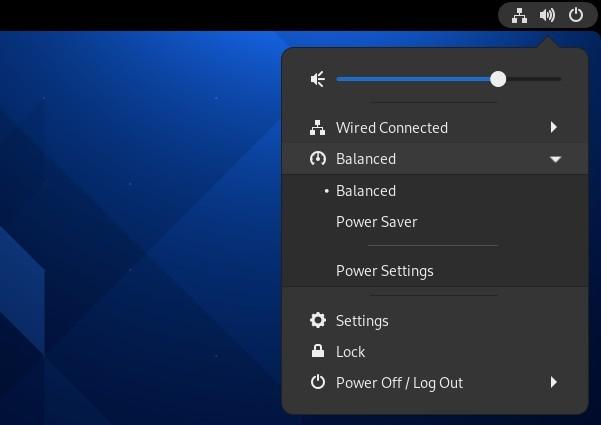
GNOME 41 comes with some exciting new features. The upper right corner system tray menu now includes option to make it easy to switch Power Mode between “Balanced” and “Power Saver”. It’s said that “Performance mode” is only visible on hardware that supports this feature, though I don’t understand which hardware required, may be a dedicated graphics card.

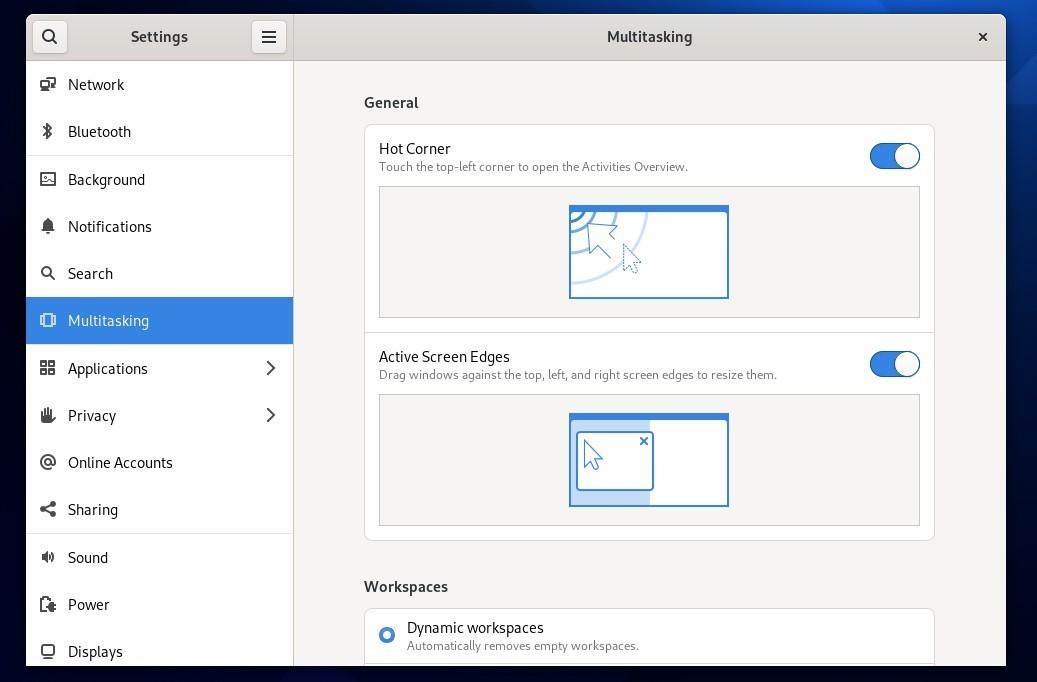
The GNOME Settings panel introduced two new items in the left pane: Multitasking and Mobile Network.

The “Multitasking” pane offers options to toggle top-left hot-corner to open Activities overview, app window auto-resizing function when dragging against screen edges; set dynamic or fixed number of workspaces; show workspace on primary only or all displays; super + tab switching for apps on all workspaces or current workspace only.

The “Mobile Network” pane is only visible when a supported modem is present, e.g., 2G, 3G, 4G, and GSM/LTE. It allows to set the network type, whether to use mobile data and data roaming. And it supports multiple SIMs and modems, allows to easy switching network modes.

Other changes in Gnome 41 include:

  • New “Connections” remote desktop app with VNC and RDP support.
  • Overhaul Gnome Software.
  • Redesigned Gnome Music.
  • Faster response to keyboard & pointer input on Wayland.
  • New default GL renderer for GTK4.
  • Create encrypted .zip archives in Files.
  • Import events to Calendar from .ics files.
  • Code cleanup in Mutter, and more.

How to Get Gnome 41:

Usually, the newest GNOME desktop will be first made into Fedora and Arch Linux. Users are recommended to wait your Linux distribution to include the desktop environment.

For testing and development purpose, you can try the GNOME OS either in virtual machine or real computer. Or download the iso image from the link button below:

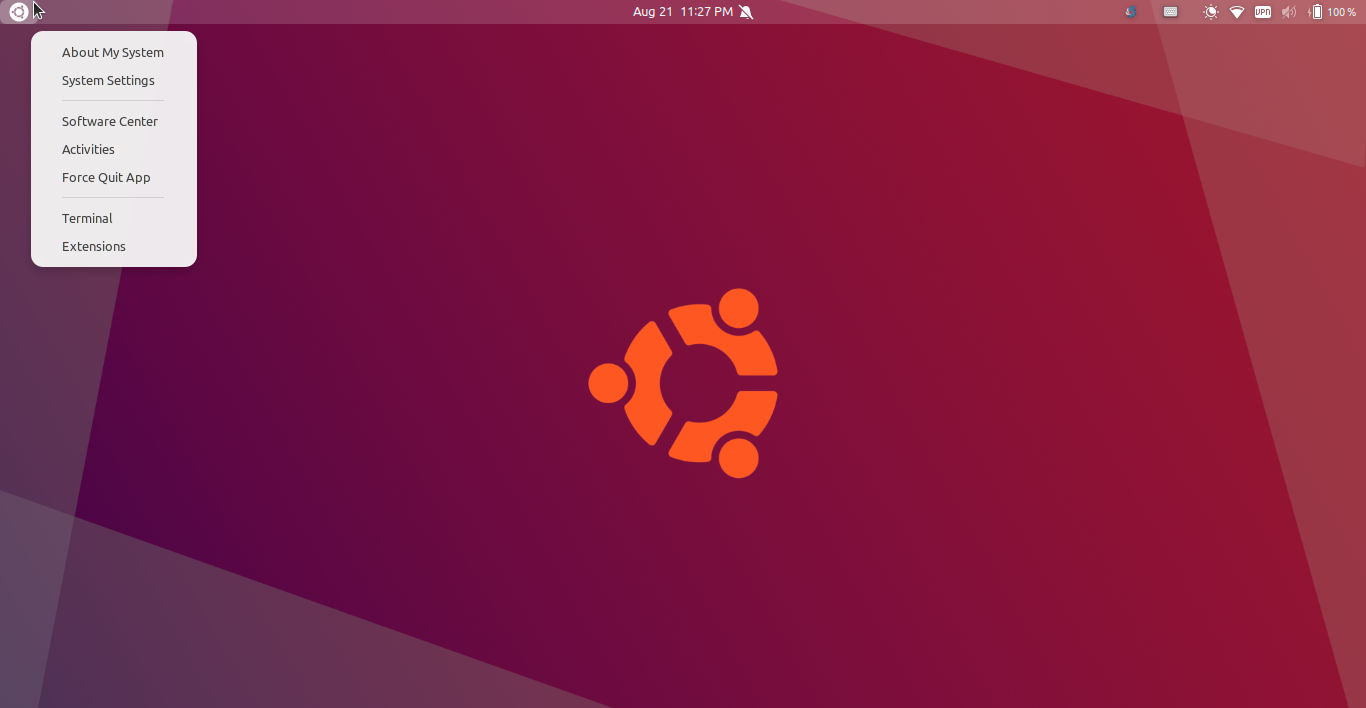
For users switching from macOS, there’s a GNOME Extension to replace the top-left corner ‘Activities‘ with system logo menu.

So the top-left corner will display your selected logo icon instead of the ‘Activities’ button. When you click on it, a drop-down menu opens with options to quick access:

  • About system page.
  • System Settings.
  • Software Center.
  • Activities.
  • Force Quit App – it runs xkill so mouse pointer turns to a fork icon. Click any app window will kill it! Or right-click to cancel.
  • Terminal.
  • Gnome Extensions App.

This will make one more click to access the ‘Activities’ overview screen. You can however press Win/Super key instead, or enable “Activities Overview Hot Corner” (hit top-left corner via cursor) in Gnome Tweaks under ‘Top Bar’ settings.

Install the Logo Menu Extension:

The extension works on all recent Gnome releases shipped in Ubuntu 20.04, Ubuntu 21.04, Ubuntu 21.10, Debian 11, Fedora 34, CentOS 8, Arch Linux, and more.

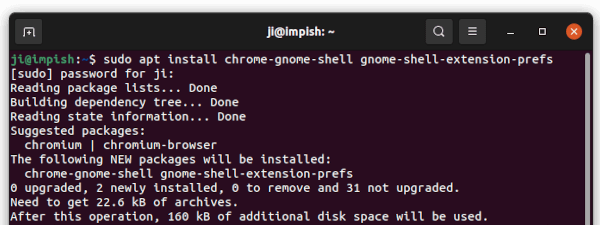
For Ubuntu, firstly open terminal (Ctrl+Alt+T) and run command to install the browser integration package for installing Gnome Shell extensions via your web browser. As well, install the Gnome Extensions App to manage them.

sudo apt install chrome-gnome-shell gnome-shell-extension-prefs

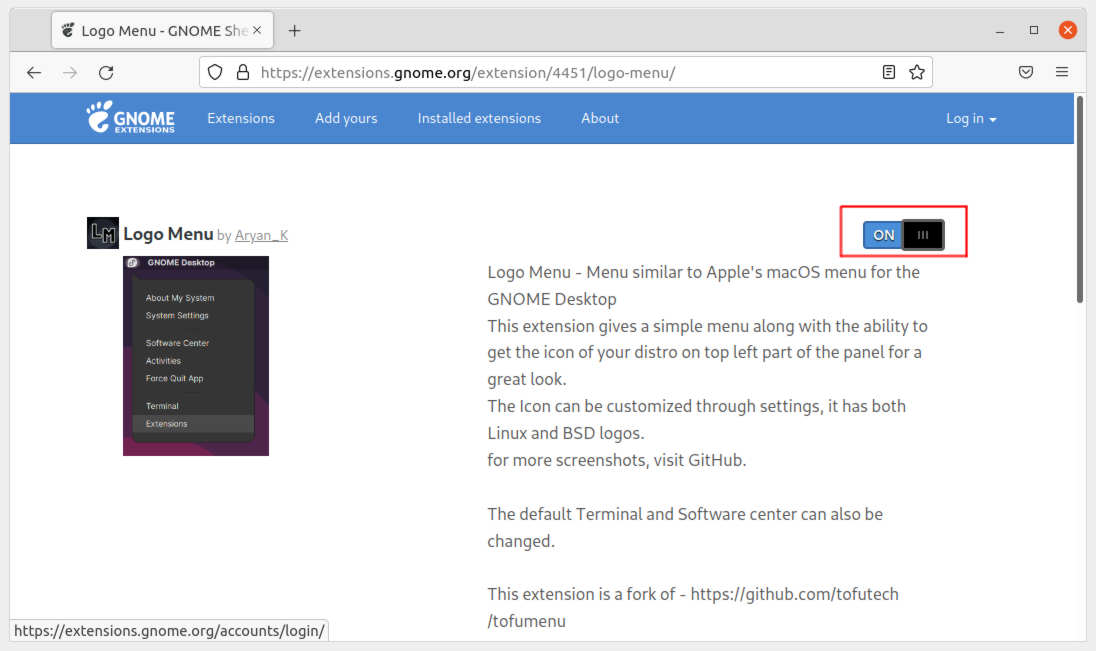
Next go to the extension page via the link button below, turn on the slider icon to install it:

If you don’t see the toggle icon, install the browser extension via ‘click here to install browser extension’ link and refresh the web page.

Restart Gnome Shell if the ‘Activities‘ button does not change. To do so, either press Alt+F2, type r, and hit Enter, or log out and back in.

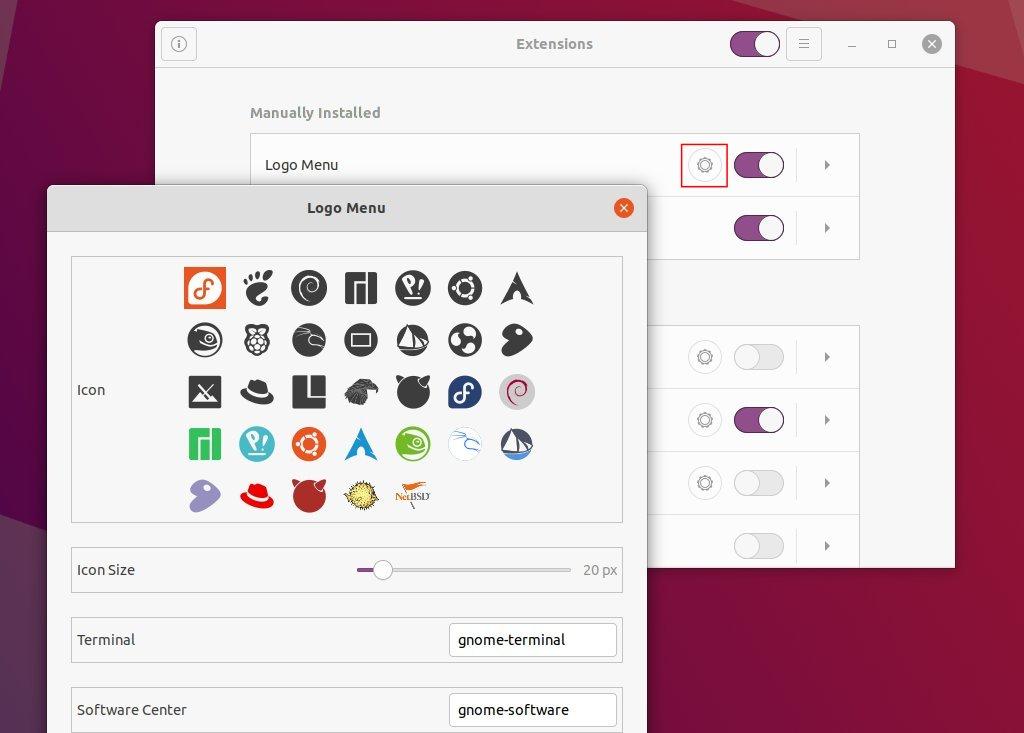
And finally press Win/Super key on keyboard, search for and open ‘Gnome Extensions App‘. Then click on the gear button to configure the extension:

  • choose desired icon, since it defaults to Fedora logo.
  • adjust the icon size.
  • specify executable for terminal and software center (For Ubuntu, it’s snap-store by default).

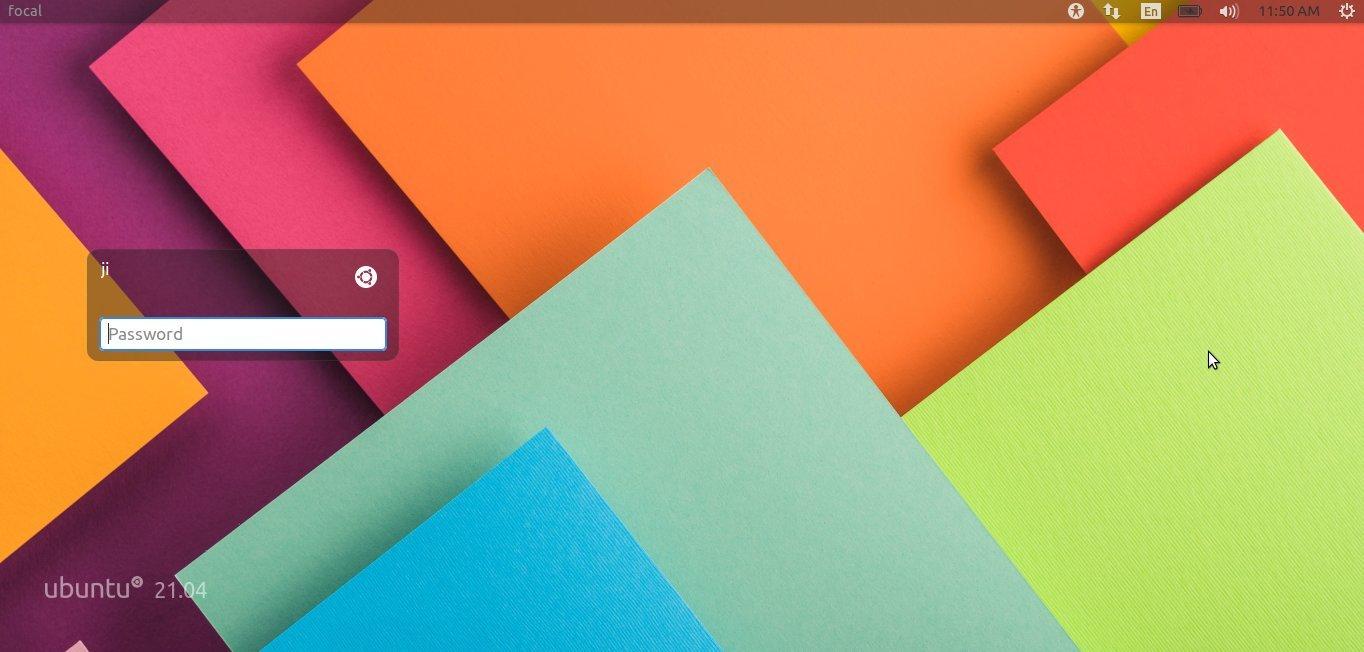
Missing the old Ubuntu Unity style login screen? It’s easy to get it back in Ubuntu 18.04, Ubuntu 20.04 and higher.

LightDM, stands for Light Display Manager, is a free open-source project by Canonical, the company behind Ubuntu. Ubuntu up to version 16.04 LTS uses it as the default display manager. And it’s present in Linux Mint 20 and some Ubuntu flavors.

For those prefer the LightDM style login screen, it’s available in Ubuntu universe repositories:

How to Install LightDM in Ubuntu 20.04 & Higher:

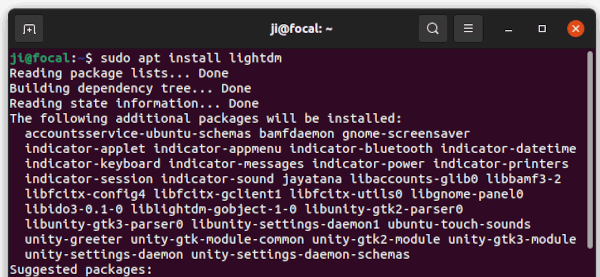
Press Ctrl+Alt+T on keyboard to open a terminal window. When it opens, paste the command below and hit enter:

sudo apt install lightdm unity-greeter

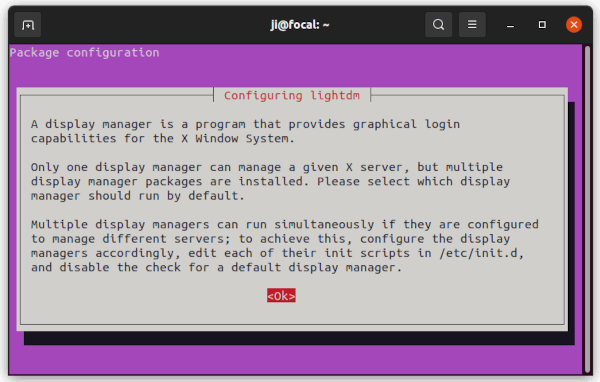
While the installing process, it will prompt to configure the display manager. Just hit Enter on the screen.

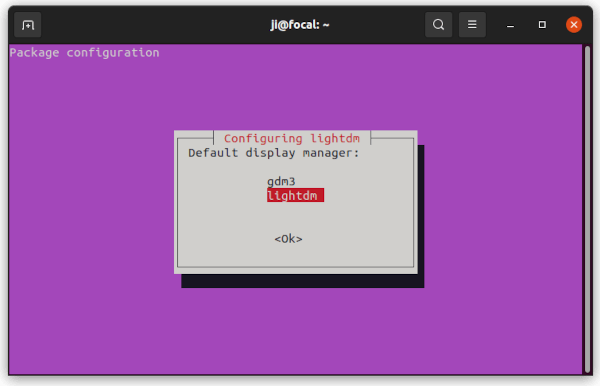
At the next screen, use up/down arrow key to choose “lightdm” and hit Enter to apply.

Once installed, restart your computer and you’ll see the new login screen!

Configure LightDM login screen:

Uses are mostly want to remove the white dots and change the login background wallpaper.

To do so, open terminal (Ctrl+Alt+T) and run command to install dconf-editor if you don’t have it:

sudo apt install dconf-editor

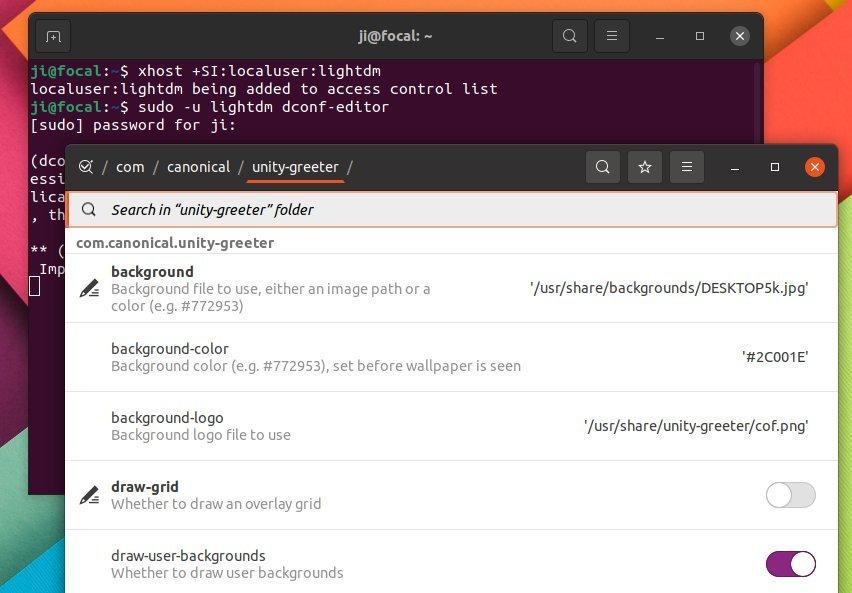
Next, run command to grant lightdm user privilege to access control list:

xhost +SI:localuser:lightdm

Finally launch dconf editor via lightdm:

sudo -u lightdm dconf-editor

When it opens, navigate to “com/canonical/unity-greeter“. Then turn off ‘draw-grid’, and change background image as you want.

For more settings, see the Ubuntu Wiki.

How to Restore Gnome Login Screen:

To revert back the original GDM display manager. Firstly, open terminal and run command to disable LightDM:

sudo systemctl disable lightdm.service

Then launch the configure screen by running the command below:

sudo dpkg-reconfigure lightdm

This time choose ‘gdm3’ to handle the login screen and hit Enter.

Finally, remove lightdm as well as its dependency packages via command:

sudo apt remove --autoremove lightdm unity-greeter

That’s all. Enjoy!