Archives For Howtos

How to Install / Upgrade Kernel 3.12.5 in Ubuntu Linux Mint

Published: December 12, 2013 — Last updated: December 14, 2013

Linux Kernel 3.12.5

The fifth maintenance release of the Linux kernel 3.12 is available now. Linux Kernel 3.12.5 contains various updated drivers (networking, SCSI, USB, Xen), a couple of sound updates, and several ARM improvements. See the changelog for details.

All users of the 3.12 kernel series are urged to upgrade as soon as possible. Here’s how to do it in Ubuntu 13.10, Ubuntu 13.04, Ubuntu 12.04, Linux Mint and their derivatives.

Install / Upgrade Linux Kernel 3.12.5:

1. Press Ctrl+Alt+T on keyboard to open terminal. When it opens, run commands below to download DEBs from Ubuntu Kernel page.

For 32 bit system:

cd ~/Downloads/

wget http://kernel.ubuntu.com/~kernel-ppa/mainline/v3.12.5-trusty/linux-headers-3.12.5-031205-generic_3.12.5-031205.201312120254_i386.deb

wget http://kernel.ubuntu.com/~kernel-ppa/mainline/v3.12.5-trusty/linux-headers-3.12.5-031205_3.12.5-031205.201312120254_all.deb

wget http://kernel.ubuntu.com/~kernel-ppa/mainline/v3.12.5-trusty/linux-image-3.12.5-031205-generic_3.12.5-031205.201312120254_i386.deb

For 64 bit system:

cd ~/Downloads/

wget http://kernel.ubuntu.com/~kernel-ppa/mainline/v3.12.5-trusty/linux-headers-3.12.5-031205-generic_3.12.5-031205.201312120254_amd64.deb

wget http://kernel.ubuntu.com/~kernel-ppa/mainline/v3.12.5-trusty/linux-headers-3.12.5-031205_3.12.5-031205.201312120254_all.deb

wget http://kernel.ubuntu.com/~kernel-ppa/mainline/v3.12.5-trusty/linux-image-3.12.5-031205-generic_3.12.5-031205.201312120254_amd64.deb

2 Install this kernel:

cd ~/Downloads/ && sudo dpkg -i linux-headers-3.12.5-*.deb linux-image-3.12.5-*.deb

If you’re using an proprietary driver, you may need to rebuild or even re-install it to make it work with the new kernel. Once done, restart your computer.

If for some reason this kernel release does not work properly for you. Reboot into previous kernel (Grub -> Advance -> select previous kernel) and run command below to remove Linux Kernel 3.12.5:

sudo apt-get remove linux-headers-3.12.5-* linux-image-3.12.5-*

Linux Kernel 3.10.24 LTS

Linux Kernel 3.10 LTS now is at version 3.10.24, which brings various fixes (ARM, USB, SCSI, ALSA) and updated drivers, see the changelog for details.

Greg Kroah-Hartman announced this release a few minutes ago. All users of Kernel 3.10 series are urged to upgrade as soon as possible.

Install / Upgrade Kernel 3.10.24:

1. Press Ctrl+Alt+T on keyboard to open terminal. When it opens, run commands below one by one to download the DEBs. (You can also download them at this page):

For 32 bit system:

cd ~/Downloads/

wget http://kernel.ubuntu.com/~kernel-ppa/mainline/v3.10.24-saucy/linux-headers-3.10.24-031024-generic_3.10.24-031024.201312120235_i386.deb

wget http://kernel.ubuntu.com/~kernel-ppa/mainline/v3.10.24-saucy/linux-headers-3.10.24-031024_3.10.24-031024.201312120235_all.deb

wget http://kernel.ubuntu.com/~kernel-ppa/mainline/v3.10.24-saucy/linux-image-3.10.24-031024-generic_3.10.24-031024.201312120235_i386.deb

For 64 bit system:

cd ~/Downloads/

wget http://kernel.ubuntu.com/~kernel-ppa/mainline/v3.10.24-saucy/linux-headers-3.10.24-031024-generic_3.10.24-031024.201312120235_amd64.deb

wget http://kernel.ubuntu.com/~kernel-ppa/mainline/v3.10.24-saucy/linux-headers-3.10.24-031024_3.10.24-031024.201312120235_all.deb

wget http://kernel.ubuntu.com/~kernel-ppa/mainline/v3.10.24-saucy/linux-image-3.10.24-031024-generic_3.10.24-031024.201312120235_amd64.deb

2. Install this kernel:

cd ~/Downloads/ && sudo dpkg -i linux-headers-3.10.24-*.deb linux-image-3.10.24-*.deb

Once done, restart your computer.

If for some reason this kernel release does not work properly for you, reboot into the previous kernel (Grub -> Advanced -> select previous kernel) and run commands to remove Linux Kernel 3.10.24:

sudo apt-get purge linux-headers-3.10.24-* linux-image-3.10.24-*

How to Install GParted 0.17.0 in Ubuntu 13.10, 12.04

Published: December 11, 2013 — Last updated: April 4, 2019

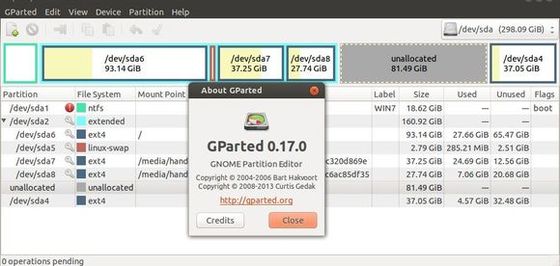
Gparted 0.17.0 online resize

GParted partition editor 0.17.0 was released recently. Now it supports online resize and recognize Linux Swap Suspend and Software RAID partitions. Also included are bug fixes and language translation updates.

Key changes include:

  • Add support for online resizeIf you wish to build this release with online resize support then the following is required:
    • A version of libparted that includes the online resize patch. At time of writing (November 2013), this patch was only included in Debian and derived distros with parted package version 2.3-14 or higher.
    • Linux kernel version 3.6 or higher.
    • Enable with the --enable-online-resize flag. E.g., ./configure –enable-online-resize
  • Recognize Linux Swap Suspend and Software RAID partitions
  • Fix busy detection for Linux Software RAID and extended partitions
  • Fix systemctl runtime mask to prevent automounting partitions

Bug Fixes

  • Add support for online resize (#694622)
  • Fix usage of swap space is not reported (#708107)
  • Turn on resize2fs progress bar (#709276)
  • Fix systemctl runtime mask to prevent automounting partitions (#708378)
  • Stop using deprecated method free_colors() (part of #652044)
  • Stop using deprecated widget alignment enumerators (part of #652044)
  • Recognize Linux Swap Suspend and Software RAID partitions (#709640)
    • Prevent GParted starting stopped Linux Software RAID arrays
  • Fix busy detection for Linux Software RAID and extended partitions (#712633)
  • Make partition information dialog warnings selectable (#705596)
  • Change default file system to ext4 with fall back to ext3/2 (#711114)
  • Add an AppData file (#709164)
    • Thanks to Piotr Drąg for making the AppData file translatable

Install GParted 0.17.0:

This release has been made into Getdeb repository for Ubuntu 13.10, Ubuntu 12.04 and their derivatives. But I think the online resize feature is not included in this build.

To get started:

1. Enable Getdeb repository:

For Ubuntu users, download and install this deb will properly add GetDeb repository.

For Linux Mint users, go to Software Sources -> Additional repositories, check the box where it says “archive.getdeb .net …”

2. Install Gparted from Ubuntu Software Center after checking for updates. You can also run commands (Ctrl+Alt+T) below instead:

sudo apt-get update; sudo apt-get install gparted

gparted 0.17.0 ubuntu

Install Terminology, Excellent Terminal Emulator in Ubuntu

Published: December 10, 2013 — Last updated: July 25, 2014

beautiful terminal emulator


Terminology is a new terminal emulator designed by Enlightenment team. Terminology is probably the most beautiful terminal emulator because it comes with below features:

  • Most escapes supported by xterm, rxvt etc.
  • Xterm 256 color escapes work
  • Background wallpaper (bitmap, scalable/vector, animated gif, videos)
  • Transparency
  • Bitmap and scalable fonts supported
  • Themes for the layout and design
  • URL, file path and email address detection and link-handling
  • Inline display of link content
  • Multiple copy and paste selections and buffer support
  • Works in X11
  • Works in Wayland
  • Works directly in the linux framebuffer (fbcon)
  • Can be finger/touch controlled
  • Scan scale by UI scaling factors
  • Can render using OpenGL or OpenGL-ES2 (not a requirement – just an option)
  • Can display inlined media content (images, video, documents)
  • Can do multiple “tabs”
  • Can do splitting into multiple panes
  • Block text selection
  • Drag and drop of text selections and links
  • Can stream media from URLs
  • Tab switcher has live thumbnail content
  • Single process, multiple windows/terminals support
  • Fast (gives urxvt a run for its money)
  • Themable visual bell
  • Compress backscroll
  • Text reflow on resize
  • More…

Install Terminology in Ubuntu Linux Mint

This terminal emulator depends on the core Enlightenment foundation libraries. We can install it as well as the dependencies on Ubuntu 14.04, Ubuntu 13.10, Ubuntu 13.04, Ubuntu 12.10, Ubuntu 12.04 and Linux Mint via PPA.

To get started, press Ctrl+Alt+T on keyboard to open terminal. When it opens, run commands below one by one:

sudo add-apt-repository ppa:enlightenment-git/ppa

sudo apt-get update

sudo apt-get install terminology

Once installed open it from Unity Dash or Menu.

Remember that this project is still in early development stage, so it may have bugs and not all the above features will work, use it at your own risk!

CopyQ 2.0.0

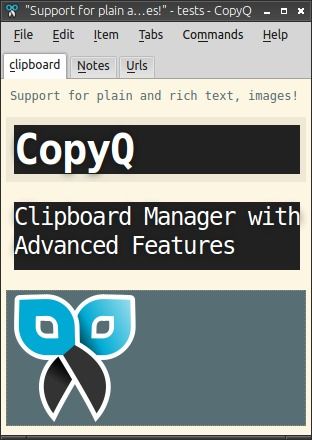
CopyQ is an advanced clipboard manager with searchable and editable history, and with support for text, HTML, images and any other custom format.

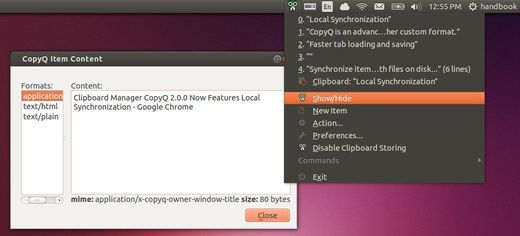
CopyQ 2.0.0 was release recently, it features local synchronization, faster tab loading and saving, and more. See the changelog:

  • Synchronize items with files on disk
  • Faster tab loading and saving (data format was changed; only backward compatible)
  • User can limit size of text items
  • Opening external image editor fixed on Windows
  • New logo and website
  • Lot of other fixes

copyq local synchronization

copyq edit history

Install CopyQ in Ubuntu and Other Linux

The installers for Ubuntu 13.10, Ubuntu 13.04, Ubuntu 12.10, Ubuntu 12.04, Debian, OpenSUSE, Fedora now are available in sourceforge.net.

Download the package for your OS and double click to install CopyQ. Once installed, open it from Dash or Menu.

CopyQ website: http://hluk.github.io/CopyQ/

HotShots 2.0 released with new features, Install in Ubuntu via PPA

Published: December 9, 2013 — Last updated: December 18, 2013

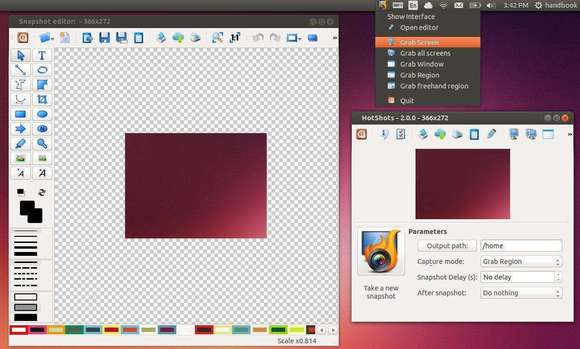
HotShots


HotShots, a Qt screenshot tool with some editing features now is at version 2.0.0 with many new features added and bug fixes. I’ve create a PPA and you can easily install it in Ubuntu 13.10, Ubuntu 13.04, Ubuntu 12.10, Ubuntu 12.04 via 3 commands in terminal.

What’s New in HotShots 2.0.0:

Features:

  • Autostart on linux
  • Add Portuguese translation. Thanks to Vinícius “A. Jorge”.
  • Add German translation. Thanks to dbr.
  • Change default location of translation file on linux (“/share/hotshots/locale” instead of “/share/locale”)
  • Change some icons (best visual consistency)
  • Add launch editor action in systray menu
  • Editor: ability to set background color for some item type (rectangle, ellipse, text)
  • Editor: add a palette of last used of foreground/background color pair
  • Editor: add last saved/loaded file
  • Editor: add “bring to top/bottom” for selected elements
  • Editor: add “autorepeat” on font size buttons
  • Add MacOSX target

Bugs:

  • Editor: add margin to render pixmap (incorrect crop)
  • Editor: correct layout problem on font preview
  • Editor: correct focus problem on text item
  • Editor: correct saved shadow state on some items
  • Editor: correct invalid proposed name for “save as” function
  • Editor: correct text cursor move with keyboard if text item is selected
  • correct a problem with automatic naming of exported image

hotshots 2.0 in ubuntu 13.10

Install HotShots via PPA:

Press Ctrl+Alt+T on keyboard to open terminal. When it opens, run commands below one by one to add the PPA and install the tool:

sudo add-apt-repository -y ppa:ubuntuhandbook1/apps

sudo apt-get update

sudo apt-get install hotshots

Once installed, open it from Dash or Menu.

Linux Kernel 3.10.23 LTS

The latest Kernel Long Term Support now is at 3.10.23, which brings many updated drivers (Radeon, Ethernet, HID), several IPv4 and IPv6 fixes, as well as other changes. See the changlog for details.

Linux kernel 3.10.23 is quite big release and users of Kernel 3.10 series are urged to upgrade as soon as possible. Here’s how to do it in Ubuntu, Linux Mint and their derivatives.

Install / Upgrade Kernel 3.10.23:

1. Download the DEBs:

Press Ctrl+Alt+T on keyboard to open terminal. When it opens, run commands below one by one to download Kernel DEB packages (available in Ubuntu Kernel page):

For 32 bit system:

cd ~/Downloads/

wget http://kernel.ubuntu.com/~kernel-ppa/mainline/v3.10.23-saucy/linux-headers-3.10.23-031023-generic_3.10.23-031023.201312081135_i386.deb

wget http://kernel.ubuntu.com/~kernel-ppa/mainline/v3.10.23-saucy/linux-headers-3.10.23-031023_3.10.23-031023.201312081135_all.deb

wget http://kernel.ubuntu.com/~kernel-ppa/mainline/v3.10.23-saucy/linux-image-3.10.23-031023-generic_3.10.23-031023.201312081135_i386.deb

For 64 bit system:

cd ~/Downloads/

wget http://kernel.ubuntu.com/~kernel-ppa/mainline/v3.10.23-saucy/linux-headers-3.10.23-031023-generic_3.10.23-031023.201312081135_amd64.deb

wget http://kernel.ubuntu.com/~kernel-ppa/mainline/v3.10.23-saucy/linux-headers-3.10.23-031023_3.10.23-031023.201312081135_all.deb

wget http://kernel.ubuntu.com/~kernel-ppa/mainline/v3.10.23-saucy/linux-image-3.10.23-031023-generic_3.10.23-031023.201312081135_amd64.deb

2. Install the Kernel:

cd ~/Downloads/ && sudo dpkg -i linux-headers-3.10.23-*.deb linux-image-3.10.23-*.deb

Once installed restart computer and done.

NOTE: If you’re using proprietary drivers, you may need to rebuild or re-install it after upgraded to new kernel version.

If for some reason this kernel does not work properly for you, restart and boot into Grub -> Advanced -> select previous kernel. Then remove Linux Kernel 3.10.24 via commands below:

sudo apt-get purge linux-headers-3.10.23-* linux-image-3.10.23-*

Linux Kernel 3.11.4

Linux Kernel 3.12.4 was released recently. It brings many updated drivers (HID, ISDN, Radeon, Ethernet, Wireless), several IPv4 and IPv6 fixes, as well as multiple networking improvements. See the changelog for details.

Linux Kernel 3.12.4 is quite big release and all users of this Kernel series are urged to upgrade as soon as possible. Here’s how to do it in Ubuntu 13.10, Ubuntu 13.04, Ubuntu 12.10, Ubuntu 12.04, Linux Mint and their derivatives.

Install / Upgrade Kernel 3.12.4

1. Download the DEBs

The DEB packages has been made into Ubuntu Kernel page, you can download them at this page. Or press Ctrl+Alt+T on keyboard to open terminal, and run commands below one by one:

For 32 bit system:

cd ~/Downloads/

wget http://kernel.ubuntu.com/~kernel-ppa/mainline/v3.12.4-trusty/linux-headers-3.12.4-031204-generic_3.12.4-031204.201312081207_i386.deb

wget http://kernel.ubuntu.com/~kernel-ppa/mainline/v3.12.4-trusty/linux-headers-3.12.4-031204_3.12.4-031204.201312081207_all.deb

wget http://kernel.ubuntu.com/~kernel-ppa/mainline/v3.12.4-trusty/linux-image-3.12.4-031204-generic_3.12.4-031204.201312081207_i386.deb

For 64 bit system:

cd ~/Downloads/

wget http://kernel.ubuntu.com/~kernel-ppa/mainline/v3.12.4-trusty/linux-headers-3.12.4-031204-generic_3.12.4-031204.201312081207_amd64.deb

wget http://kernel.ubuntu.com/~kernel-ppa/mainline/v3.12.4-trusty/linux-headers-3.12.4-031204_3.12.4-031204.201312081207_all.deb

wget http://kernel.ubuntu.com/~kernel-ppa/mainline/v3.12.4-trusty/linux-image-3.12.4-031204-generic_3.12.4-031204.201312081207_amd64.deb

2. Install the Kernel

cd ~/Downloads/ && sudo dpkg -i linux-headers-3.12.4-*.deb linux-image-3.12.4-*.deb

Once installed, restart your computer and done.

NOTE: Any drivers not part of the main kernel tree (which of course includes proprietary drivers) must be rebuilt for new kernel versions as internal kernel interfaces may have changed.

If for some reason this kernel does not work properly for you, restart and boot into Grub -> Advanced -> select previous kernel. Then remove Linux Kernel 3.12.4 via commands below:

sudo apt-get purge linux-headers-3.12.4-* linux-image-3.12.4-*

Tor repository

This tutorial shows how to install Tor – a free software for enabling online anonymity – via its official repository in Ubuntu 13.10, Ubuntu 13.04, Ubuntu 12.04, Ubuntu 12.10, Ubuntu 10.04

It’s not recommended to use the default Tor packages in Ubuntu’s universe repository because have not reliably been updated in the past, which means you could be missing stability and security fixes.

NOTE: What follows is going to show how to install Tor (standalone), you’ll need to manually configure your apps to use Tor.

If you just want to use Tor for anonymous web browsing, please use the Tor Browser Bundle. It comes with readily configured Tor and a browser patched for better anonymity.

To get started, press Ctrl+Alt+T on keyboard to open terminal. When it opens, follow below steps:

1. Paste command below and hit enter to add Tor repository:

sudo sh -c 'echo "deb http://deb.torproject.org/torproject.org $(lsb_release -sc) main" >> /etc/apt/sources.list.d/tor.list'

2. Download and install the key:

gpg --keyserver keys.gnupg.net --recv 886DDD89

gpg --export A3C4F0F979CAA22CDBA8F512EE8CBC9E886DDD89 | sudo apt-key add -

3. Now refresh your sources and install deb to keep the signing key current:

sudo apt-get update

sudo apt-get install deb.torproject.org-keyring

Finally, the latest stable Tor is available in Ubuntu Software Center.

See the Wiki page for more

How to Enable TRIM on SSD in Ubuntu Linux

Published: December 8, 2013 — Last updated: April 17, 2014

enable TRIM on SSD

Trim command (TRIM) helps keep your solid-state drive (SSD) at its full speed. If you find your SSD slowed down after a while of using, TRIM may help you make SSD always fast.

Because low-level operation of SSDs differs significantly from hard drives, the typical way in which operating systems handle operations like deletes and formats resulted in unanticipated progressive performance degradation of write operations on SSDs. Trimming enables the SSD to handle garbage collection overhead, which would otherwise significantly slow down future write operations to the involved blocks, in advance.

See more about TRIM on the Wiki page

UPDATE: Ubuntu 14.04 Trusty will have TRIM enabled by default.

To get started, press Ctrl+Alt+T on keyboard to open terminal. When it opens, follow steps below:

1. Check out if you have an SSD:

cat /sys/block/sda/queue/rotational

If you got 0 it’s a SSD. If the output was 1 it’s a HDD.

2. Even if you have an SSD not all of them support TRIM. To find out if yours does run:

sudo hdparm -I /dev/sda | grep "TRIM supported"

If what you get back is this:

Data Set Management TRIM supported

Then you are all good to go. If there’s no output, your SSD doesn’t support TRIM.

3. Next run:

sudo fstrim -v /

You should see an output that looks something like this:

/: 87781376 bytes were trimmed

4. If everything went OK it’s time to make a CRON job so fstrim run’s once a day.

To do this run:

gksudo gedit /etc/cron.daily/trim

Copy and paste below lines and save it.

#!/bin/sh
LOG=/var/log/trim.log
echo “*** $(date -R) ***” >> $LOG
fstrim -v / >> $LOG
fstrim -v /home >> $LOG

Finally make it executable:

sudo chmod +x /etc/cron.daily/trim

That’s it. You now have TRIM enabled.

via: pinguyos forum