Archives For Howtos

frostwire logo

The free and open-source FrostWire BitTorrent client has released 5.6.5, it fixed a real nasty bug that will affect many of you who like to select multiple files from the same set of search results when those files happen to belong to the same torrent.

It also updated the SoundCloud meta search and integrated fully to the new SoundCloud.com’s search interface.
If you are a musician and you have a SoundCloud account, remember that if you mark your songs as “Downloadable” they will become available to the millions of FrostWire users worldwide, both on desktop and mobile.

Changelog:

frostwire (5.6.5) stable; urgency=high

  • Upgrades Soundcloud search, download, streaming.
  • Fixes issue when starting downloads made of multiple single files
    that belong to the same .torrent.
  • When opening finished transfers on the library with a double click
    FrostWire will no longer type the name of the file on the library
    search box.

It’s highly recommended to upgrade to FrostWire 5.6.5, here’s the link for Ubuntu and Linux Mint package:

FrostWire 5.6.5 Deb

For other systems, go to the official download page

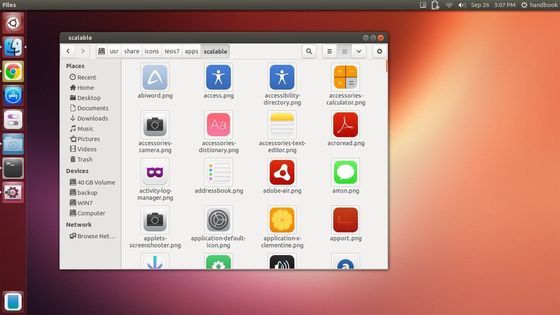
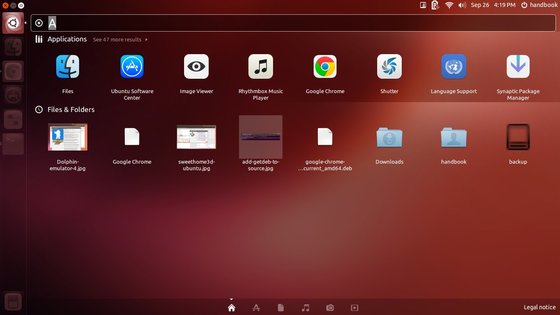
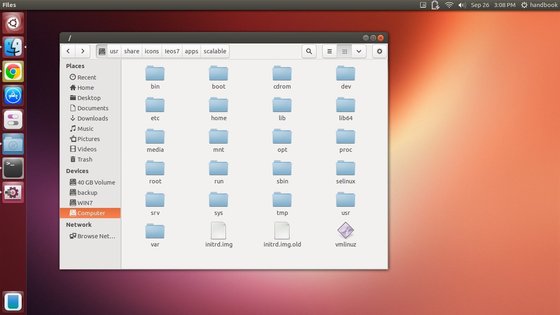
This tutorial is going to show you an icon theme called ieos7, which is based on Mac Mountain Lion.

This theme is created for Elementary OS Luna. I’ve tested it on Ubuntu 13.04 Raring Unity, and it works.

ios 7 style icons ubuntu

ios 7 style icons

ios 7 style icon theme

For Ubuntu 12.04 Precise and Elementary OS Luna, you can install this icons by running below 3 commands one by one in terminal (Ctrl+Alt+T):

sudo add-apt-repository ppa:elementary-br/projects

sudo apt-get update

sudo apt-get install ieos7-icons

For other Ubuntu editions, directly download and install the ieos7-icons DEB package from launchpad.net

Once installed, use Unity Tweak Tool, Gnome Tweak Tool or other system tools to apply the theme.

Enjoy!

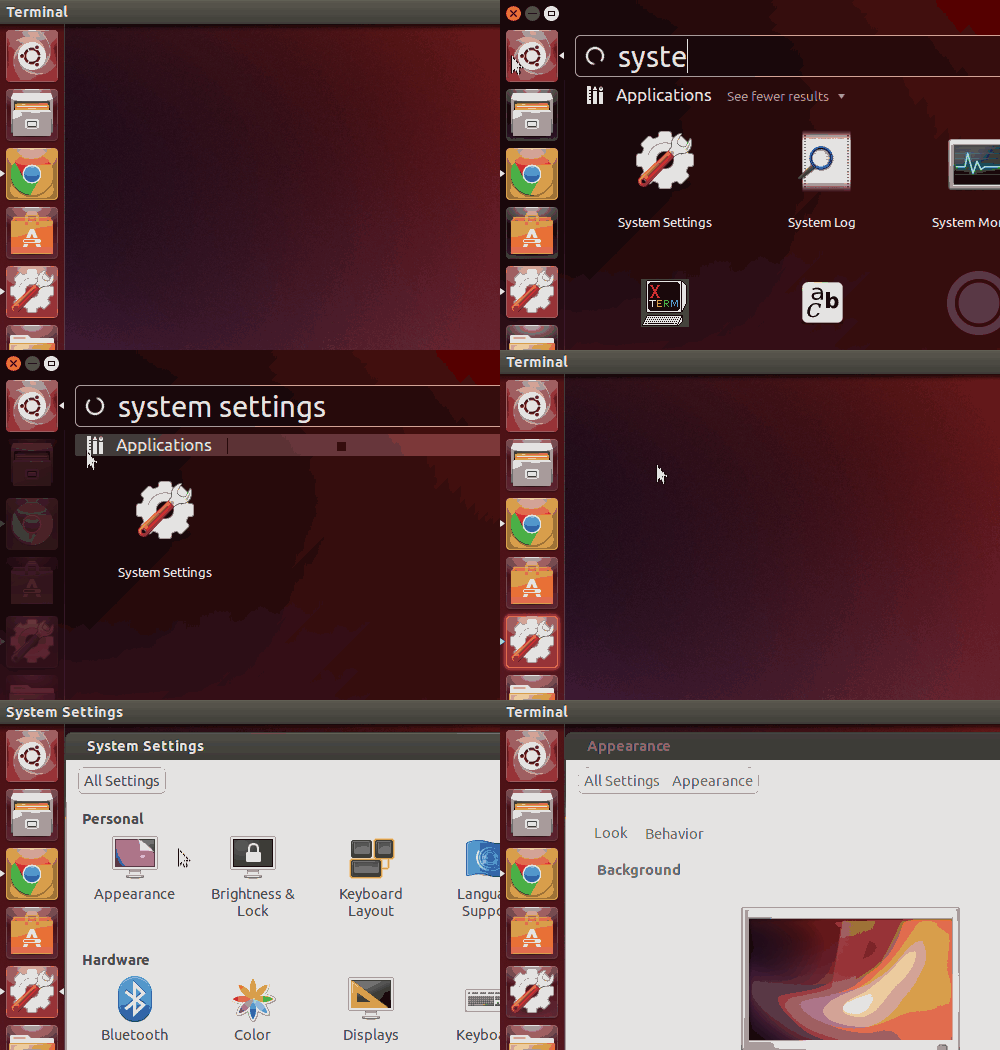
Want to make screencasts as animated GIFs on Ubuntu? Well, byzanz is the best choice I ever found.

Byzanz is a small and efficient screencast creator. It records your desktop session or parts of it to an animated GIF, OGG Theora or Flash.

Below is an animated GIF created by byzanz:

animated gif

It is said that byzanz does not screencast Unity-3D. However, I’ve been using it in Unity for a period of time since I was in Ubuntu 12.10 Quantal.

To install byzanz in Ubuntu 13.10, Ubuntu 13.04, Ubuntu 12.04, Ubuntu 12.10, press Ctrl+Alt+T on your keyboard to open terminal. When it opens, run below commands one by one:

sudo add-apt-repository ppa:fossfreedom/byzanz

sudo apt-get update

sudo apt-get install byzanz

This is an example I did just now:

byzanz-record --duration=15 --x=0 --y=0 --width=500 --height=350 output.gif

For more options, run:

man byzanz-record

Enjoy!

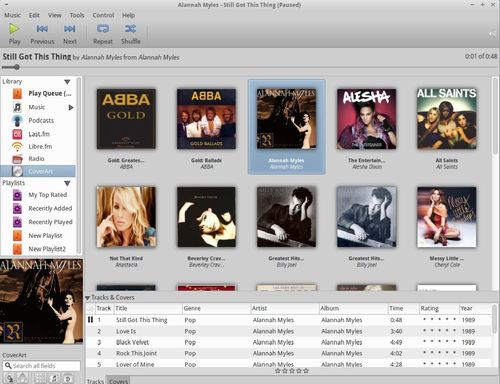
Cover Art Browser is a plugin gives a visually slick way to browse your music collection in Rhythmbox v2.96-v3.0.

It adds a new CoverArt button to the left pane; Albums are displayed as clickable buttons containing their album cover; Right click menu allows to play, queue & search for coverart for an album.

rhythmbox cover art browser

As well as simply displaying a grid full of album art for browsing, you can:

  • Drag & Drop cover art on to the browser
  • Fetch/search for missing album art
  • Display Album & Artist name under the cover
  • Double click playing of albums
  • Sort covers by album name and artist
  • Adjust cover art size
  • Multiple user-configurable options to tailor what you see and use.
  • Examine and change properties for an album/tracks
  • Set ‘CoverArt Browser’ to Rhythmbox’s default view

To install this plugin, press Ctrl+Alt+T on your keyboard to open terminal. When it opens, run below commands one by one:

sudo add-apt-repository ppa:fossfreedom/rhythmbox-plugins

sudo apt-get update

sudo apt-get install rhythmbox-plugin-coverart-browser

The PPA supports for Ubuntu 13.10, Ubuntu 13.04, Ubuntu 12.04, Ubuntu 12.10 and their derivatives such as Linux Mint and Elementary OS.

After installation, enable the plugin by running below command:

gsettings set org.gnome.rhythmbox.plugins.coverart_browser webkit-support false

Enjoy!

Install gtk-gnutella 1.0.0 in Ubuntu 13.10/13.04/12.04/10.04

Published: September 24, 2013 — Last updated: September 24, 2013

gnutella logo

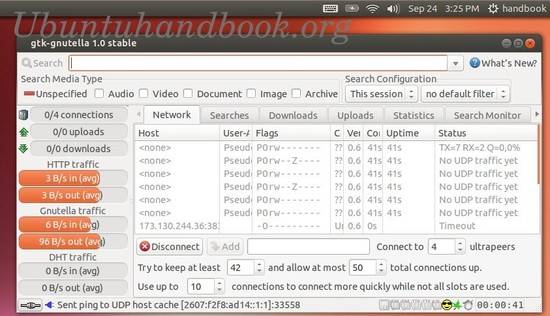
Gtk-gnutella is the graphical Unix Gnutella client, efficient, reliable and fast, written in C. It has been optimized for speed and scalability, with low-memory consumption. It is meant to be left running 24×7, using little CPU and only the configured bandwidth.

Gtk-gnutella 1.0.0 is a major release correcting a few bugs and adding small but interesting features such as the ability to limit dropping of received UDP messages, making the DHT keys and values persistent across sessions, SDBM file auto-compaction at startup, and last but not least, rarest-chunk downloading to optimize download efficiency when facing partial sources.

gtk gnutella client

New Feature:

  • Let users define a maximum lease time for UPnP and NAT-PMP mappings.
  • Made DHT keys and values persistent across sessions.
  • When there are partial sources for a file, download the rarest chunks first.

Improvements:

  • [GTK1] Optimize massive updating of the download source list.
  • [GTK] Dynamically update the list of available chunks in the file (blue line).
  • Files used to persist information across sessions are now auto-compacted.
  • The UPnP layer can now monitor more types of Internet Gateway Devices.
  • After unclean shutdown, rename existing core file in crash directory.
  • Detect servers that choke when receiving pipelined HTTP requests.
  • Added the Mersenne Twister Pseudo-Random Number Generator.
  • Remember when user requests an auto-restart, to keep the same session going.
  • Increased maximum download buffer size to 1 MiB and default to 128 KiB.

Install gtk-gnutella 1.0.0 via PPA:

The Sourceforge provides the Deb packages for gtk-gnutella, but I can’t install it on my machine due to dependency problem. Fortunately there’s a PPA repository makes it easy to install it in Ubuntu and its derivatives.

To get started, press Ctrl+Alt+T on your keyboard to open terminal. When it opens, run below command to add the ppa:

sudo add-apt-repository -y ppa:zapman/gtkg

Then update package lists and install the package via:

sudo apt-get update; sudo apt-get install gtk-gnutella

Enjoy!

How to easily kill a frozen / locked-up app or window in Ubuntu

Published: September 23, 2013 — Last updated: September 23, 2013

This tutorial shows you how to easily kill / force quit an application or window that freezes or stops responding using xkill & shortcut key.

Xkill is a utility for forcing the X server to close connections to clients. This program is very dangerous, but is useful for aborting programs that have displayed undesired windows on a user’s screen. It works on Ubuntu, Linux Mint, Elementary OS, and other Linux systems.

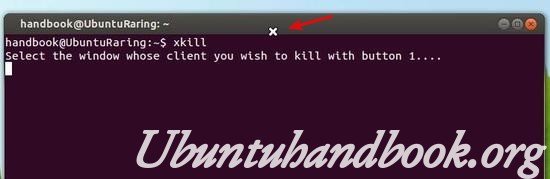
You can run Xkill from terminal, Alt+F2 run command box or even via a keyboard shortcut. When it runs, your cursor becomes a cross (‘X’). Click on any window will kill it instantly.

Kill frozen window

Warning: Don’t click on Desktop and Panel when running xkill, it will also kill them and break your desktop and you need to restart to restore.

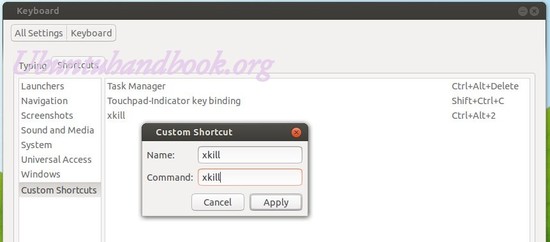
To create a shortcut key for xkill, go to System Settings -> Keyboard -> Shortcut -> Custom shortcuts. Click add to create the shortcut and give a key combination.

Add xkill shortcut

After that, press the key combination and then click on the window you want to kill.

Enjoy!

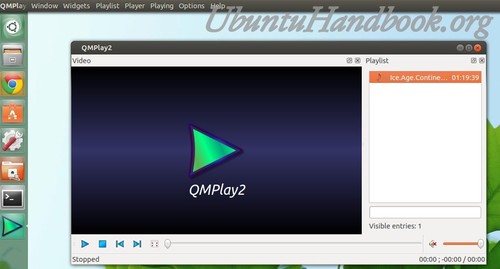
Qmplay2 is a Qt-based Media Video Player for Ubuntu Linux and Windows. It plays all formats and stream supported by ffmpeg and libmodplug (including J2B). It has integrated Youtube browser.

This simple and brief tutorial is going to show you how to install Qmplay2 in Ubuntu 13.10 Saucy, Ubuntu 13.04 Raring, Ubuntu 12.04 Precise, Ubuntu 12.10 Quantal, Linux Mint and Elementary OS via the PPA repository

Qmplay2

To get started, press Ctrl+Alt+T on your keyboard to open terminal. When it opens, run below command to add the PPA:

sudo add-apt-repository -y ppa:samrog131/ppa

Update the package lists:

sudo apt-get update

Install the player:

sudo apt-get install qmplay2

install qmplay2 via ppa

That’s it. Enjoy!

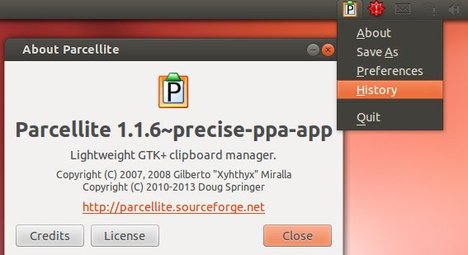
Parcellite is a lightweight GTK+ clipboard manager for Ubuntu Linux. The latest version has reached 1.1.6 with updates and bug fixes. Here’s how to install it in Ubuntu 13.10 Saucy, Ubuntu 13.04 Raring, Ubuntu 12.04 Precise, Ubuntu 12.10 Quantal and Linux Mint as well as the indicator on Unity Desktop.

Changes in version 1.1.6:

  • Fixed Bug #99, Broken CLI functionality. Now looks at XDG_SESSION_COOKIE, XDG_SEAT, and DISPLAY, introduced by multi-user fix.
  • Fixed bug where if fifo are not found in client mode, parcellite segfaults.
  • Apply patch for typo in German translation, patch #30.
  • Updated parcellite.pot (./extract_strings.sh).
  • Changed name of history file from hist.test to history (debug escape). To restore the history, Quit Parcellite, then cd to $HOME/.local/share/parcellite mv hist.test history
  • Added script to generate parcellite.pot & check in file, and gets run before each release from rel.sh.
  • Updated Brazilian Portuguese translation.
  • parcellite-indicator

    Install / Upgrade Parcellite 1.1.6:

    You can get the latest packages from the PPA. Press Ctrl+Alt+T on your keyboard to open terminal. When it opens, run below command to add the Parcellite PPA:

    sudo add-apt-repository ppa:rickyrockrat/parcellite-appindicator

    Then update package lists and install the tool as well as the indicator:

    sudo apt-get update; sudo apt-get install parcellite

    Source code and Debs are also available: source code, non-unity debs: 32-bit | 64-bit, unity debs (libappindicator): 32-bit | 64-bit

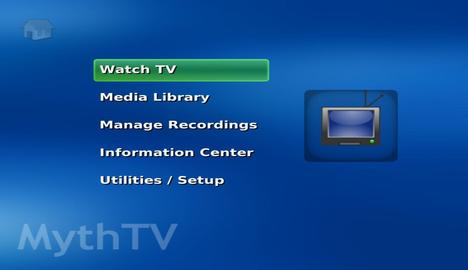
    MythTV, the Digital Video Recorder and home media center has reached a new stable release 0.27. Now it features Airplay photo sharing. This tutorial shows what’s new and how to get it in Ubuntu 13.04 Raring, Ubuntu 12.04 Precise and Ubuntu 13.10 Saucy.

    Mythfrontend

    Highlights of MythTV 0.27:

    • Support has been added for streaming music stations in mythmusic
    • Airplay photo sharing is now available
    • Airtunes OSD has been implemented
    • The Interactive TV support has been improved for the users in UK and Ireland
    • The recording scheduling interface has received a number of important improvements

    Other changes:

    • Remove the Timeslot and Weekslot recording rule types.
    • Remove the Channel Record recording rule type. Add a This channel filter to maintain that functionality. Automatically convert existing Channel Record rules to All Record rules with the This channel filter enabled.
    • Provide accurate position/duration/seeking with non-constant frame rates. Note that to get the benefit of these changes for preexisting recordings, it may be necessary to run “mythcommflag –rebuild” on affected recordings.
    • Remove the AutoRecPriority feature.
    • Remove redundant “All Programs – ” text in Watch Recordings screen.
    • Improve the group filter display on the Watch Recordings screen.
    • Default to local time for mythshutdown --setwakeup, use --utc if required.
    • As promised in the 0.26 Release Notes, the legacy CEA-608 teletext (not closed-captioning) support has been removed.
    • The Set Recording Priorities screen has been removed (use the “Manage Recording Rules” screen.)
    • The Reschedule higher priorities setting has been removed. The scheduler now always does this.
    • Use recording rule priority as the primary scheduling priority.
    • The Delete Recordings screen has been removed.
    • Change the ADJUSTSTRETCH action to also support toggling.
    • In mythtv-setup/Capture cards, some Card type: names have been changed/corrected. The list was also reordered.

    Card type name changes

    Old 0.27
    HDHomeRun DTV tuner box HDHomeRun networked tuner
    DVB DTV capture card (v3.x) DVB-T/S/C, ATSC or ISDB-T tuner card
    Analog V4L capture card Analog capture card
    MJPEG capture card (Matrox G200, DC10) Analog to MJPEG encoder card (Matrox G200, DC10, etc
    MPEG-2 encoder card Analog to MPEG-2 encoder card (PVR-150/250/350, etc)
    H.264 encoder card (HD-PVR) HD-PVR H.264 encoder
    USB MPEG-4 encoder box (Plextor ConvertX, etc) Analog to MPEG-4 encoder (Plextor ConvertX USB, etc)

    Install MythTV 0.27 via PPA:

    The new release is available in Ubuntu Software Center for Ubuntu 13.10 Saucy. For Ubuntu 13.04 Raring and Ubuntu 12.04 Precise, press Ctrl+Alt+T to open terminal. WHen it opens, run below commands to add the PPA:

    sudo add-apt-repository ppa:mythbuntu/0.27
    
    sudo apt-get update

    After that, you can read this Ubuntu Document to install / setup MythTV on your system.

    MythTV 0.27 release note: http://www.mythtv.org/wiki/Release_Notes_-_0.27

    Install / Upgrade Gparted 0.16.2 in Ubuntu 13.04, 12.04

    Published: September 21, 2013 — Last updated: September 21, 2013

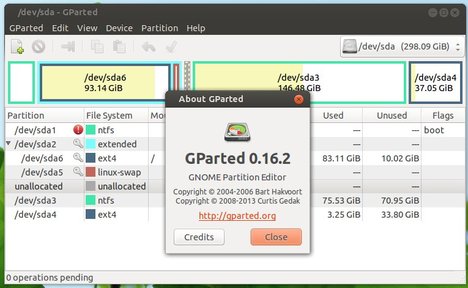
    Gparted 0.16.2 has been released with important bug fixes and language translation updates. Here’s how to install or upgrade in Ubuntu 13.04 Raring, Ubuntu 12.04 Precise and Linux Mint 13 Maya, 15 Olivia.

    gparted ubuntu

    Key changes include:

    • Fix crash if click apply before pending operations fully displayed
    • Fix FAT16/32 labels are sometimes shown corrupted
    • Fix regression which broke linux-swap resize
    • Fix to not hide the progress of the tools used (e.g., ntfsresize)

    GParted is a GTK+ front-end to GNU Parted and the official GNOME Partition Editor application besides Disks. It’s available in Ubuntu Software Center, but old. The GetDeb repository contains the latest packages for Ubuntu 13.04 Raring, Ubuntu 12.04 Precise and their derivatives.

    Install / Upgrade Gparted:

    First click the link below to download the getdeb package, then double-click to install it via pop-up Ubuntu Software Center. It will add getdeb repository to your system.

    Download GetDeb package

    Then, run below command in terminal to update and install it. Or you can use Synaptic Package Manager to upgrade the Gparted if you have it installed.

    sudo apt-get update; sudo apt-get install gparted