Archives For Ubuntu 12.04

How to Install / Upgrade Kernel 3.10.9 in Ubuntu 13.04, 12.04, 12.10

Published: August 21, 2013 — Last updated: August 21, 2013

The latest Linux Kernel 3.10.9 has been released. All users of the 3.10 kernel series are urged to upgrade as soon as possible. Here’s how to install / upgrade in Ubuntu 13.04 Raring, 12.04 Precise and 12.10 Quantal.

Linux Kernel 3.10.9 Ubuntu

Linux kernel 3.10.8 has a problem on networking, so the Kernel 3.10.9 was announced few hours later with a fix. See the official announcement.

Install / Upgrade Kernel 3.10.9

The mainline kernel PPA has updated Debs packages for Debian / Ubuntu based users. Press Ctrl+Alt+T on your keyboard to open terminal. Then download and install the Debs.

for 32-bit system:

wget http://kernel.ubuntu.com/~kernel-ppa/mainline/v3.10.9-saucy/linux-headers-3.10.9-031009-generic_3.10.9-031009.201308201935_i386.deb

wget http://kernel.ubuntu.com/~kernel-ppa/mainline/v3.10.9-saucy/linux-headers-3.10.9-031009_3.10.9-031009.201308201935_all.deb

wget http://kernel.ubuntu.com/~kernel-ppa/mainline/v3.10.9-saucy/linux-image-3.10.9-031009-generic_3.10.9-031009.201308201935_i386.deb

for 64-bit system:

wget http://kernel.ubuntu.com/~kernel-ppa/mainline/v3.10.9-saucy/linux-headers-3.10.9-031009-generic_3.10.9-031009.201308201935_amd64.deb

wget http://kernel.ubuntu.com/~kernel-ppa/mainline/v3.10.9-saucy/linux-headers-3.10.9-031009_3.10.9-031009.201308201935_all.deb

wget http://kernel.ubuntu.com/~kernel-ppa/mainline/v3.10.9-saucy/linux-image-3.10.9-031009-generic_3.10.9-031009.201308201935_amd64.deb

After that, both 32-bit and 64-bit run below command to install the kernel

sudo dpkg -i linux-headers-3.10.9-*.deb linux-image-3.10.9*.deb

Finally apply changes to grub boot loader:

sudo update-grub

You can remove the downloaded packages after the kernel is properly installed.

Nvidia DriverNvidia has announced driver 325.05.03 for Linux provides beta support for OpenGL 4.4 and GLSL 4.40 on capable hardware. You will need any one of the following Fermi or Kepler based GPUs to get access to all the OpenGL 4.4 and GLSL 4.40 functionality:

  • Quadro Series:K600, K5000, K4000, K2000D, K2000, 6000, 600, 5000, 410, 4000, 400, 2000D, 2000
  • GeForce 700 Series:GTX TITAN, GTX 780, GTX 770, GTX 760
  • GeForce 600 Series:GTX 690, GTX 680, GTX 670, GTX 660 Ti, GTX 660, GTX 650 Ti BOOST, GTX 650 Ti, GTX 650, GT 645, GT 640, GT 630, GT 620, GT 610, 605
  • GeForce 500 Series:GTX 590, GTX 580, GTX 570, GTX 560 Ti, GTX 560 SE, GTX 560, GTX 555, GTX 550 Ti, GT 545, GT 530, GT 520, 510
  • GeForce 400 Series:GTX 480, GTX 470, GTX 465, GTX 460 v2, GTX 460 SE v2, GTX 460 SE, GTX 460, GTS 450, GT 440, GT 430, GT 420, 405
  • Check out the official announcement for a complete list of fixes and improvements.

    It’s easy to install this driver in Ubuntu and its derivatives, such as Linux Mint and Elementary OS. Just close the graphical session and run the installer in command line. To do so, follow the below steps:

    1.) Download the Driver 325.05.03 by the links below. You may check your system type (32-bit or 64-bit) by System Settings -> Details.

    Download for Linux 32-bit

    Download for Linux 64-bit

    2.) You have to switch to command console by pressing Ctrl+Alt+F1, login via your username and password. Then stop the graphical session. For the default Ubuntu Unity, run the below command:

    sudo stop lightdm

    For Linux Mint, run this instead:

    sudo service mdm stop

    3.) Give executable permission to the downloaded file:

    chmod a+x ~/Downloads/NVIDIA-Linux-*-325.05.03.run

    4.) Now run the installer and follow the on screen prompts to start installing Nvidia Driver:

    sudo sh ~/Downloads/NVIDIA-Linux-*-325.05.03.run

    When done, restart your machine via:

    sudo reboot

    (Optional) To remove this driver, re-run the step 2), and then run:

    sudo ~/Downloads/NVIDIA-Linux-*-325.05.03.run --uninstall

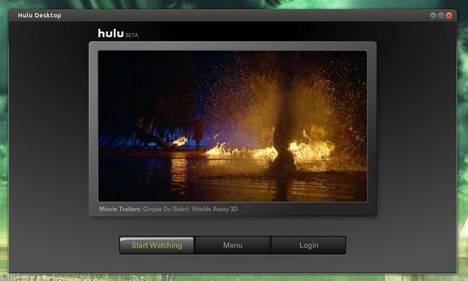
    This simple and brief tutorial shows you how to install Hulu Desktop client in Ubuntu 13.04, Ubuntu 12.04, Linux Mint and Elementary OS.

    hulu desktop in ubuntu

    It’s easy to install Hulu Desktop App in Debian / Ubuntu based systems, because the official website provides the DEB package for downloading.

    Before gettings started, you may check your system type (32-bit or 64-bit) by System Settings -> Details.

    Press Ctrl+ALt+T on your keyboard to open terminal. When it opens, run command to download Hulu Desktop client:

  • 64-bit Systems
    wget http://download.hulu.com/huludesktop_amd64.deb
  • 32-bit systems:
    wget http://download.hulu.com/huludesktop_i386.deb
  • Now, install the deb package:

    sudo dpkg -i huludesktop_*.deb

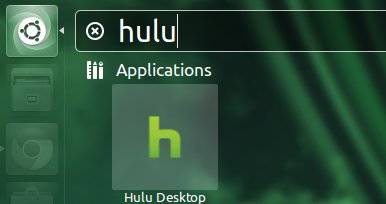
    hulu desktop in uninty

    Ubuntu boot Nvidia logoAfter properly installed Nvidia drives in Ubuntu, you may get the Nvidia Logo while booting up your machine. If you find it’s annoying to have this screen, this tutorial will show you how to easily disable it by two ways.

    One command to disable Nvidia logo

    The easiest way to do this is running below command in terminal (press Ctrl+Alt+T):

    sudo nvidia-xconfig --no-logo

    After that, you won’t see the logo in bootup any longer.

    The other way is to manually edit the Nvidia config file. Edit the /etc/X11/xorg.conf by running below command:

    sudo gedit /etc/X11/xorg.conf

    add Option “NoLogo” to Section “Device”, make it look like this:

    Section “Device”
    Identifier “Device0”
    Driver “nvidia”
    Option “NoLogo”
    VendorName “NVIDIA Corporation”
    BoardName “GeForce 9600 GT”
    EndSection

    After that, save the file and reboot.

    Install Latest XnView 0.61 in Ubuntu and Linux Mint

    Published: August 18, 2013 — Last updated: September 1, 2013

    XnView UbuntuXnView MP has reached version 0.61. Since the default is version 0.51 in Ubuntu Software Center, the latest XnView brings a lot of bug fixes and improvements. With this tutorial, you can always get the latest version of XnView in Ubuntu and Linux Mint.

    Changes since XnView MP 0.51:

  • Batch convert: Watermark, stretch image
  • remember item selection in information panel
  • 8bf 64bits plugin can be used with XnViewMP 64bits version
  • XMP-photoshop:Location not more written
  • JPEG arithmetic decoding support
  • Change timestamp can create EXIF date
  • Show always selection information
  • JPEG2000 Export
  • Print in view mode
  • Clean DB can remove files with categories
  • Database has been improved, PLEASE make an backup of it before to install this version
  • Linux, better way to delete files/folders
  • Fix XMP/IPTC import problem
  • Download & Install XnView MP:

    First you may check OS type 32-bit or 64-bit by System Settings -> Details.

    Then press Ctrl+Alt+T to open terminal:

    For 32-bit system, download and install XnView via below 2 commands:

    wget http://download.xnview.com/XnViewMP-linux.deb
    
    sudo dpkg -i XnViewMP-linux.deb; sudo apt-get -f install

    For 64-bit system, run blow commands instead:

    wget http://download.xnview.com/XnViewMP-linux-x64.deb
    
    sudo dpkg -i XnViewMP-linux-x64.deb; sudo apt-get -f install

    Vuze Bittorrent ClientThe Vuze Bittorrent Client 5.1 has been released. Here I’ll show you how to install it in Ubuntu 13.04, Ubuntu 12.04, Ubuntu 12.10 and create a launcher for Unity.

    Vuze 5.1 includes a number of updates to the client, providing an improved user interface (UI) with enhanced usability and efficiency, improved performance and some critical bug fixes (for example elimination of some deadlock conditions). Read the official release note.

    Install Vuze in Ubuntu Linux

    1.) Vuze depends on Java, so first install OpenJDK from Ubuntu Software Center, or install Oracle Java via PPA

    2.) Download Vuze 5.1 from the official website. Below is the link:

    VuzeInstaller.bar.bz2

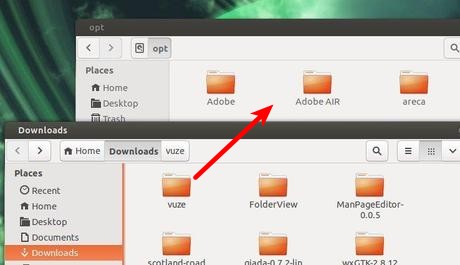
    3.) Open file browser, extract the downloaded package. Then move the result folder to /opt/. You’ll need to press Alt+F2 and type in gksudo nautilus to open file browser with root privilege.

    Move Vuze to Opt

    4.) Now you can launch Vuze via below command (Press Ctrl+Alt+T to open terminal):

    sudo /opt/vuze/azureus

    Create Launcher for Vuze

    Install the required package by running below command in terminal:

    sudo apt-get install gnome-panel --no-install-recommends

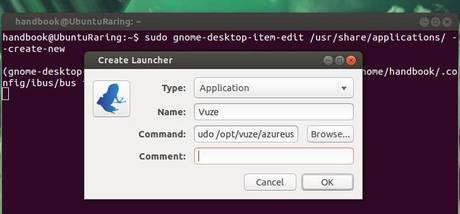
    Now run command to bring up Create Launcher dialog.

    sudo gnome-desktop-item-edit /usr/share/applications/ --create-new

    Type in:

    name: Vuze
    command: gksudo /opt/vuze/azureus
    choose icon from /opt/vuze/ folder

    Create Vuze Launcher

    Now you’re able to launch Vuze from Unity Dash. Enjoy!

    Linux Kernel 3.10.7 has been released. All users of the 3.10 kernel series must upgrade. Here’s how to install / upgrade in Ubuntu 13.04 Raring, Ubuntu 12.04 Precise, Ubuntu 12.10 Quantal, and Linux Mint.

    Linux Kernel 3.10.7 Ubuntu

    Linux kernel 3.10.7 is a pretty big release that brings PowerPC enhancements, updated drivers (including DRM ones), as well as improvements to the EXT4, CIFS, ReiserFS and Btrfs filesystems. See official release announcement.

    Install / Upgrade Kernel 3.10.7

    Press Ctrl+Alt+T on your keyboard to open terminal. When it opens, run below commands to download the DEBs:

  • For 32-bit system, run below 3 commands:
    wget http://kernel.ubuntu.com/~kernel-ppa/mainline/v3.10.7-saucy/linux-headers-3.10.7-031007-generic_3.10.7-031007.201308150319_i386.deb
    
    wget http://kernel.ubuntu.com/~kernel-ppa/mainline/v3.10.7-saucy/linux-headers-3.10.7-031007_3.10.7-031007.201308150319_all.deb
    
    wget http://kernel.ubuntu.com/~kernel-ppa/mainline/v3.10.7-saucy/linux-image-3.10.7-031007-generic_3.10.7-031007.201308150319_i386.deb
  • For 64-bit:
    wget http://kernel.ubuntu.com/~kernel-ppa/mainline/v3.10.7-saucy/linux-headers-3.10.7-031007-generic_3.10.7-031007.201308150319_amd64.deb
    
    wget http://kernel.ubuntu.com/~kernel-ppa/mainline/v3.10.7-saucy/linux-headers-3.10.7-031007_3.10.7-031007.201308150319_all.deb
    
    wget http://kernel.ubuntu.com/~kernel-ppa/mainline/v3.10.7-saucy/linux-image-3.10.7-031007-generic_3.10.7-031007.201308150319_amd64.deb
  • After downloading the packages, both 32-bit & 64-bit can run below commands to install them:

    sudo dpkg -i linux-headers-3.10.7*.deb linux-image-3.10.7*.deb

    Once installed, update grub to apply changes and you’re done!

    sudo update-grub

    (Optional) To remove Linux Kernel 3.10.7, run this command in terminal:

    sudo apt-get purge linux-image-3.10.7*

    The latest stable Linux Kernel 3.10.6 has been released. All users of the 3.10 kernel series must upgrade. Here’s how to install / upgrade in Ubuntu 13.04 Raring, 12.04 Precise and 12.10 Quantal.

    Kernel 3.10.6 in Ubuntu

    The Linux Kernel 3.10.6 comes with lots of fixes and improvements, such as updated Radeon, i915 vedio drivers, update RAID, Wireless, drivers and so forth. See the announcement.

    Install / Upgrade Kernel 3.10.6

    Press Ctrl+Alt+T on your keyboard to open terminal. When it opens, run below commands to download the DEBs:

  • For 32-bit system:
    wget http://kernel.ubuntu.com/~kernel-ppa/mainline/v3.10.6-saucy/linux-headers-3.10.6-031006-generic_3.10.6-031006.201308112316_i386.deb 
    
    wget http://kernel.ubuntu.com/~kernel-ppa/mainline/v3.10.6-saucy/linux-headers-3.10.6-031006_3.10.6-031006.201308112316_all.deb
    
    wget http://kernel.ubuntu.com/~kernel-ppa/mainline/v3.10.6-saucy/linux-image-3.10.6-031006-generic_3.10.6-031006.201308112316_i386.deb
  • For 64-bit system:
    wget http://kernel.ubuntu.com/~kernel-ppa/mainline/v3.10.6-saucy/linux-headers-3.10.6-031006-generic_3.10.6-031006.201308112316_amd64.deb
    
    wget http://kernel.ubuntu.com/~kernel-ppa/mainline/v3.10.6-saucy/linux-headers-3.10.6-031006_3.10.6-031006.201308112316_all.deb
    
    wget http://kernel.ubuntu.com/~kernel-ppa/mainline/v3.10.6-saucy/linux-image-3.10.6-031006-generic_3.10.6-031006.201308112316_amd64.deb
  • After downloading the packages, both 32-bit & 64-bit can run below commands to install them:

    sudo dpkg -i linux-headers-3.10.6*.deb linux-image-3.10.6*.deb

    Once installed, update grub to apply changes and you’re done!

    sudo update-grub

    (Optional) To remove Linux Kernel 3.10.6, run this command in terminal:

    sudo apt-get purge linux-image-3.10.6*

    Install / Update Intel Graphics Driver From Official Repository

    Published: August 10, 2013 — Last updated: August 11, 2013

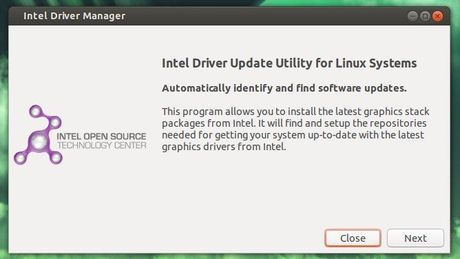
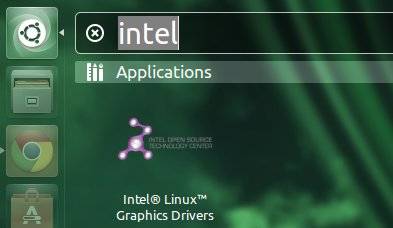
    As you may know, Intel has released intel driver update utility for Linux and it’s available for Ubuntu 13.04, Ubuntu 12.04, Ubuntu 12.10 and Linux Mint from Intel Repository.

    intel driver update utility

    To add Intel Repository to Ubuntu, press Ctrl+Alt+T to open terminal. When it opens, run below commands:

  • For Ubuntu 12.04 Precise and Linux Mint 13 Maya:
    sudo sh -c 'echo "deb https://download.01.org/gfx/ubuntu/12.04/main Ubuntu 12.04" >> /etc/apt/sources.list.d/intel-graphics.list'
  • For Ubuntu 12.10 Quantal and Linux Mint 14 Nadia:
    sudo sh -c 'echo "deb https://download.01.org/gfx/ubuntu/12.10/main Ubuntu 12.10" >> /etc/apt/sources.list.d/intel-graphics.list'
  • For Ubuntu 13.04 Raring and Linux Mint 15 Olivia:
    sudo sh -c 'echo "deb https://download.01.org/gfx/ubuntu/13.04/main Ubuntu 13.04" >> /etc/apt/sources.list.d/intel-graphics.list'
  • Then download and install the GPG key via 2 commands:

    wget https://download.01.org/gfx/RPM-GPG-KEY-ilg -O - | sudo apt-key add -
    wget https://download.01.org/gfx/RPM-GPG-KEY-ilg-2 -O - | sudo apt-key add -

    Finally, install Intel Graphics Driver update utility via below command. Or update it to the latest via your favorite package manager.

    sudo apt-get update; sudo apt-get install intel-linux-graphics-installer

    intel driver update utility unity

    Install / Upgrade Nvidia Driver 325.15 in Ubuntu and Linux Mint

    Published: August 9, 2013 — Last updated: August 9, 2013

    Nvidia DriverNvidia has released the new display driver 325.15 (certified) for Linux. It’s easy to install or upgrade in Ubuntu 13.04 Raring, Ubuntu 12.04 Precise, Ubuntu 12.10 Quantal and Linux Mint.

    Nvidia driver 325.15 supports new GPUs: GRID K340, GRID K350, NVS 315, Quadro K500M (full list of supported GPUs). It brings a lots of bug fixes and some improvements.

  • Changed the default PCIe interrupt delivery method from virtual-wire to MSI. Note that if the NVIDIA Linux driver fails to initialize with an error indicating that it is not receiving interrupts, MSI can be disabled by setting the module parameter “NVreg_EnableMSI=0” when loading the NVIDIA kernel module.
  • Removed support for Linux 2.4 kernels. The NVIDIA Linux driver now requires Linux 2.6.9 or later.
  • Improved the rendering performance of complex gradients.
  • Added support for configuring SLI Mosaic and Base Mosaic in the “X Server Display Configuration” page of nvidia-settings.
  • Updated nvidia-installer to look for the following files:
    /usr/lib/nvidia/alternate-install-available
    /usr/lib/nvidia/alternate-install-present

    These files may be provided by NVIDIA driver installers other than the official .run package maintained by NVIDIA, to alert nvidia-installer to the presence or availability of an alternative installation method. See the nvidia-installer(1) manual page for more information.
  • Generate a BadMatch error when applications attempt to create GLX pixmaps using glXCreatePixmap() or glXCreateGLXPixmapWithConfigSGIX() and the pixmap’s depth doesn’t match that of the specified GLXFBConfig.
  • Updated nvidia-settings to explicitly specify the direction of rotation for configuring per-display rotation configuration
  • Honor a GPU UUID as the GPU qualifier for X configuration options that allow GPU qualifiers (e.g. “MetaModes”).
  • Report GPU UUIDs in the X log when verbose logging is enabled in the X server.
  • Enabled conformant glBlitFrameBuffer() scissor test behavior by default. A driver-provided application profile enables the previous non-conformant behavior for applications that load libcogl, to work around a bug in older versions of libcogl.
  • Install Nvidia Driver 325.15:

    NOTE: Ubuntu by default uses the open source video driver Nouveau for your NVIDIA graphics card, you can enable it from Software & Updates -> Additional Drivers. This may interact better, and you may want to use this rather than NVIDIA’s official package.

    To get started, first download the driver from the Nvidia website. Here’s the link:

    Download Nvidia 325.15 for 32-bit Linux

    Download Nvidia 325.15 for 64-bit Linux

    You may check you system type (32-bit or 64-bit) by System Settings -> Details.

    To install it, you have to press Ctrl+Alt+F1 to switch to command console. Login with your username and password. When you’re in, follow below steps:
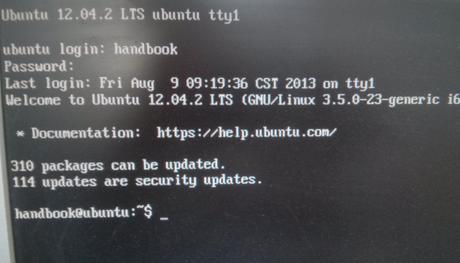
    Command Console

    1.) Stop graphical session:

    sudo stop lightdm

    2.) Give executable permission for your downloaded package:

    chmod a+x ~/Downloads/NVIDIA-Linux-*-325.15.run

    3.) Run the installer and follow the on screen prompts to start installing Nvidia Driver:

    sudo sh ~/Downloads/NVIDIA-Linux-*-325.15.run

    4.) Restart your computer via below command:

    sudo restart

    If for some reason the new drivers do not work properly, run below commands in Ctrl+Alt+F1 command console to remove Nvidia Driver:

    sudo stop lightdm
    
    sudo ~/Downloads/NVIDIA-Linux-*-325.15.run --uninstall
    
    sudo restart

    Enjoy!