Archives For Ubuntu 13.10

android emulator ubuntu

Want to emulate Nexus, Galaxy, or other Android Phone/Tablet on Ubuntu Desktop? Well, you may already know the handy tool Genymotion.

Genymotion is a complete set of tools that provides a virtual environment for Android. It can be very useful for developers, testers, salesman or even gamers. Genymotion is free for personal use. For full features, you need to buy a license.

Features:

  • OpenGL acceleration to achieve the best 3D performance
  • Enable full screen option and improve your experience
  • Be precise in your UI development with the “pixel perfect” functionality
  • Start multiple virtual device at the same time
  • Override virtual device identifiers
  • Directly command virtual devices sensors with Genymotion Shell
  • Fully compatible with ADB. You can control your virtual device from the host
  • Manage sensors: Battery level / status, GPS, Rotation, Camera

Since 2.1:

  • supports copy/paste from the host to the virtual device, or from the virtual device to the host using Android builtin copy/paste feature.
  • Android 4.4 support

Screenshots:

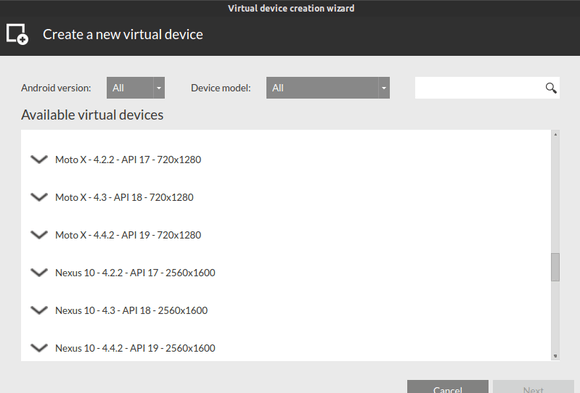
Create a new virtual device

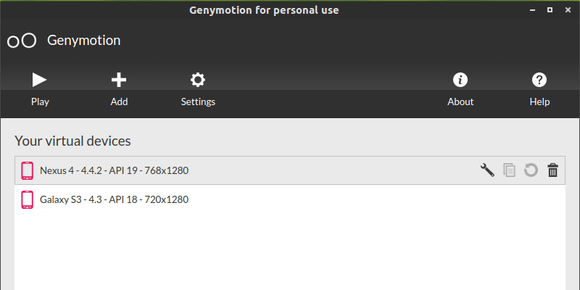
list of installed devices

 
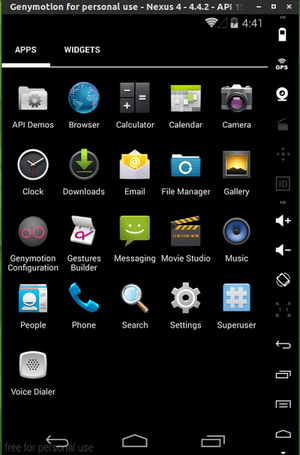
Nexus 4 4.4.2 emulator

Install Genymotion:

1. This Android Emulator requires Virtualbox, so first search for and install virtualbox in Ubuntu Software Center.

2. Register https://cloud.genymotion.com/ (free).

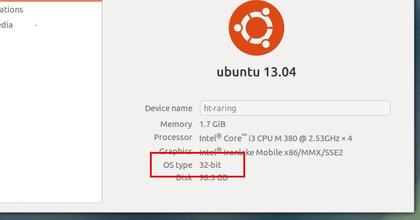
3. Download the installer after your login the website. Not sure Linux 32 bits or 64 bits? Go to System Settings -> Details and you’ll see the OS type:
System-type-32bit-64-bit

4. If you save the installer in the default Downloads folder, press Ctrl+Alt+T to open terminal. When it opens, run below commands one by one:

cd ~/Downloads/

chmod +x genymotion-2.1.0_x64.bin

./genymotion-2.1.0_x64.bin

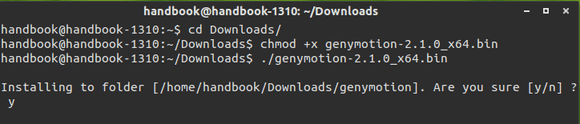
It first navigate to Downloads folder, then give executable permission, and finally start the installer. Of course you need to change the file-name to yours.
install genymotion android emulator

5. According to the previous picture genymotion has been installed to “/home/handbook/Downloads/genymotion”.

So run below command to start it:

/home/handbook/Downloads/genymotion/genymotion

How to Upgrade From Ubuntu 13.10 Saucy To Ubuntu 14.04 Trusty Tahr

Published: January 22, 2014 — Last updated: January 28, 2014

Upgrade From Ubuntu 13.10 to Ubuntu 14.04

This simple tutorial shows how to upgrade your system from Ubuntu 13.10 Saucy to Ubuntu 14.04 Trusty Tahr for both Desktop and Server editions.

Ubuntu 14.04 Trusty is scheduled to be released on April 17th. At the moment of writing this article, the alpha release is available to upgrade in Saucy’s updater for testing purpose.

Important: Production machines please wait until the Ubuntu 14.04 final is released. By then, we can follow below steps to upgrade our systems.

Before starting any upgrades, you need to:

  • Backup important files, documents, bookmarks and other data.
  • If you’ve manually installed proprietary drivers directly from the manufacturer’s website, then before upgrading I recommend removing these drivers first and reverting to the open-source drivers
  • Open Software & Updates utility from Unity Dash. Disable all third-party repositories under Other Software tab.

Desktop Upgrade:

Press Ctrl+Alt+T on keyboard to open the terminal. When it opens, run the commands below to update your system:

sudo apt-get update; sudo apt-get dist-upgrade

Now start the updater via -d option:

sudo update-manager -d

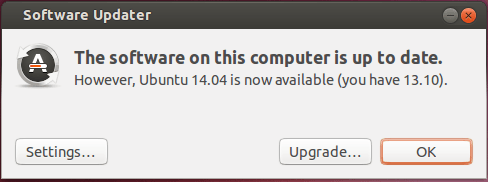
The Software Updater will open and tell you your system is up to date and a new release Ubuntu 14.04 is available.

upgrade from Ubuntu 13.10 to Ubuntu 14.04

Click on the Upgrade button and confirm again in next window. Software Updater will fetch and install the files and prompt you to remove unnecessary applications.

Finally you’ll be asked to restart your computer to finish the upgrade. That’s it.

Upgrade Ubuntu Server:

NOTE: Please backup your configuration files if you’re running any services on Ubuntu server.

For Ubuntu Server edition, we need to install the update-manager-core first by executing the command below:

sudo apt-get install update-manager-core

Then edit the config file:

sudo vi /etc/update-manager/release-upgrades

Make sure there’s a line that says “Prompt=normal” or “Prompt=lts”.

Start the upgrade process by:

sudo do-release-upgrade -d

Follow the on-screen prompts and you’re done!.

Qupzilla browser Ubuntu

QtWebKit browser QupZilla 1.6.0 has been released a few days ago. Here’s how to install it via PPA in Ubuntu 13.10, Ubuntu 13.04, Ubuntu 12.10, Ubuntu 12.04, Linux Mint and their derivatives.

This release comes with new TabBar implementation that supports scrolling through all tabs when tabs don’t fit at all into TabBar. So it means, no more overflowing of tabs!

LocationBar received new completion feature – inline completion. You can now write only first letter and the most used domain will be completed. Once you see the completion, you can just press Enter and load the site.

qupzilla inline completion

For details, see the changelog:

  • added support for Proxy Auto-Config (PAC)
  • added option to open another private window from private window
  • added option to detach tabs from window
  • added delete action in edit context menu on page
  • added possibility to remove EasyList from AdBlock
  • added inline domain completion to urlbar
  • added KWallet password backend plugin
  • added Gnome-Keyring password backend plugin
  • added StatusBar Icons plugin that adds extra icons to statusbar
  • added support for POST method in search engines manager
  • added context menu for translating webpage
  • added possibility to export bookmarks to html file
  • great performance improvement for matching basic rules in AdBlock
  • themes can now be loaded from profile directories
  • pagescreen can now save output into number of formats, including PDF
  • proxy exceptions now supports wildcards (*, ?)
  • cancel upload when trying to upload non-readable files
  • select previous / next engines with ctrl+up/down in websearchbar
  • ask user first before closing all but the current tab from tabbar
  • last 2 sessions are now backuped in profile directory
  • always show tab previews after a small delay
  • GreaseMonkey: added icon in statusbar
  • GreaseMonkey: added support for GM_Settings
  • GreaseMonkey: fixed userscripts when first loading plugin
  • GreaseMonkey: run userscripts in all frames on page
  • oxygen: set rounded corners for tooltips
  • oxygen: workaround for transparent background of tooltips
  • X11: Set correct WM_CLASS property to windows
  • fixed: size of preferences dialog on low-res screens
  • fixed: loading plugins with relative paths in portable build
  • fixed: displaying a lot of RSS feeds in RSS widget in locationbar
  • fixed: enabling disabled rules in AdBlock now works everytime
  • fixed: parsing OpenSearch files with XML declaration
  • fixed: don’t show urls multiple times in url completer
  • fixed: drag & drop moving folders under bookmarks toolbar
  • fixed: files with relative paths can now be opened from command line
  • fixed: issues with overflowing tabs, it is now possible scroll through all tabs

Install QupZilla Browser:

Press Ctrl+Alt+T on keyboard to open terminal. When it opens, run commands below one by one:

sudo add-apt-repository ppa:nowrep/qupzilla

sudo apt-get update

sudo apt-get install qupzilla

For Ubuntu 14.04 Trusty, the latest version is available in Ubuntu Software Center.

latest gmusicbrowser ubuntu

Gmusicbrowser is an open-source jukebox for large collections of mp3/ogg/flac/mpc/ape files. This tutorial will show you how to install the latest version, so far it’s gmusicbrowser 1.1.11, in Ubuntu via PPA.

Gmusicbrowser 1.1.11 was released a few days ago, and here’s the changelog:

  • improve search responsiveness (improve responsiveness of SimpleSearch)
  • add auto-update mode that keeps browser lists sorted and filtered (on by default, can be disabled in the songlist/songtree option menu)
  • picture finder plugin: update google image, add bing and yahoo, various small changes
  • albuminfo plugin: update and fix parsing of Allmusic’s pages
  • various improvements to song properties and mass-tagging dialogs
  • gstreamer : add option to monitor pulseaudio’s volume, off by default as it is unstable due to thread problems with the libraries
  • close-to-tray option no longer depends on the use-tray option
  • various improvements and small fixes to error dialogs asking to retry
  • fix default filters “added today” and “played today” doing the opposite of what they say (only fixed for new users, if you were affected you have to edit them to fix it)
  • add a new-page button on TabbedLists/Context/NB (can be disabled with newbutton=0)
  • better handling of vertical scripts in vertical tabs
  • fix combo boxes for setting artist options in the misc tab of preferences
  • fix dialog for selecting label icons up-scaling small icons
  • dbus API: make CurrentSong output more fields
  • songtree: add $discname group variable
  • translation updates: Chinese(Taiwan), Finnish, German, Korean, Russian, Spanish

Install gmusicbrowser in Ubuntu:

Press Ctrl+Alt+T on keyboard to open terminal. When it opens, run below commands one by one. It will always install the latest packages from launchpad PPA:

sudo add-apt-repository ppa:andreas-boettger/gmusicbrowser-daily

sudo apt-get update

sudo apt-get install gmusicbrowser

Currently the PPA supports Ubuntu 13.10, Ubuntu 13.04, Ubuntu 12.10, Ubuntu 12.04, Linux Mint and their derivatives.

If you don’t like PPAs, download & install the .deb package from launchpad page

manage flickr image in Ubuntu

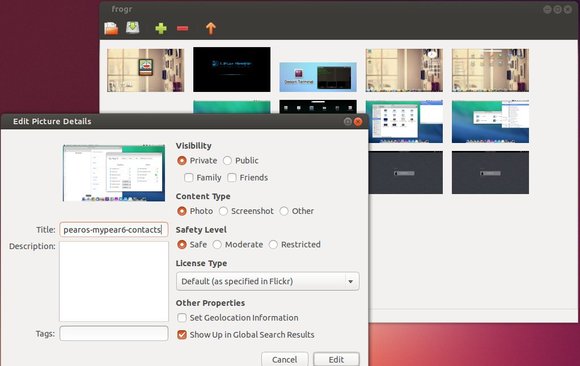
Frogr is a Gnome app allows to manage your accounts in the Flickr image hosting website. It supports all the basic Flickr features, including uploading pictures, adding descriptions, setting tags and managing sets and groups pools.

flickr management Ubuntu

You see, the GUI is simple and very easy to use. Right click on an image file allows you to edit the picture details.

How to Install Frogr:

Frogr is available in Ubuntu Software Center by default, but the default versions are old. To install the latest version, press Ctrl+Alt+T to open terminal. When it opens, run below commands one by one:

sudo add-apt-repository ppa:mariospr/frogr 

sudo apt-get update

sudo apt-get install frogr

This will install the app from its official PPA. So far, it supports Ubuntu 13.10, Ubuntu 13.04, Ubuntu 12.10, Ubuntu 12.04, Linux Mint, Elementary OS Luna.

How to Install qBittorrent 3.1.5 in Ubuntu 13.10/13.04/12.10/12.04

Published: January 18, 2014 — Last updated: January 23, 2015

qbittorrent 3.1.5

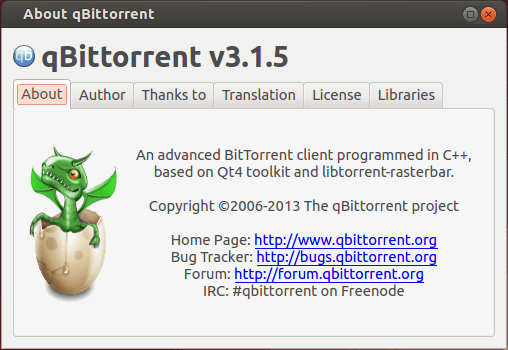
The free and open source bittorrent client qBittorrent 3.1.5 has been release a few hours ago. Let’s see what’s new and how to install or upgrade to new version in Ubuntu 13.10, Ubuntu 13.04, Ubuntu 12.10, Ubuntu 12.04, Linux Mint and their derivatives.

qbittorrent 3.1.5

qBittorrent 3.1.5 Mainly Fixed below bugs:

  • Fix compilation with Qt 4.7. Closes #1215.
  • Third attempt at fixing saving settings on OS shutdown.
  • Preview now correctly uses the selected file.
  • Allow to resize the columns in Add New Torrent dialog.
  • Ensure that at least one column in the tranferlist is always visible.
  • Ensure that the options window will always be placed onscreen.
  • Delete temporary files after they aren’t needed.
  • Correctly detect libtorrent version.
  • Various code cppcheck fixes
  • Remove isohunt search engine and update thepiratebay url
  • Fix rss settings corruption when checking regexp and going to other rule.
  • Don’t count paused torrents for the autoshutdown.
  • LINUX: Fix notifications with xfce4-notifyd.
  • OSX: Added basic retina support. Closes #1251. (Sébastien Lavoie)
  • OTHER: Sync translations from Transifex.

Install qBittorrent 3.1.5 in Ubuntu:

Press Ctrl+Alt+T on keyboard to open terminal. When it open, run below commands one by one will install qBittorrent from its official PPA repository:

sudo add-apt-repository ppa:qbittorrent-team/qbittorrent-stable

sudo apt-get update

sudo apt-get install qbittorrent

If you don’t like the PPAs, download & install the .deb packages from launchpad page

remove keyboard indicator


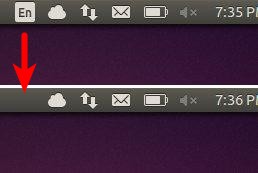
Since Ubuntu 13.10, there’s an indicator applet on top panel which allows to quickly switch between keyboard layouts for various languages.

If you find that the keyboard indicator is useless, you can easily remove the applet from top panel by following the steps below:

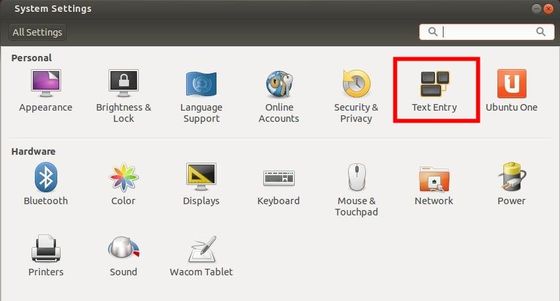
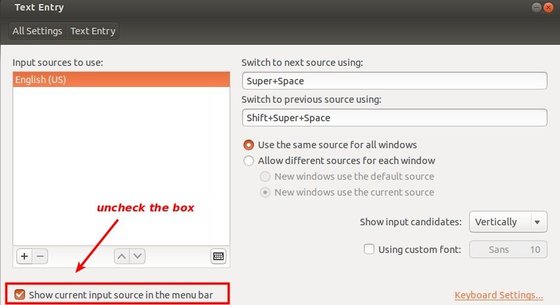
1. Open System Settings from Unity Launcher or from top-right corner shutdown menu. Then click on Text Entry

System Settings Text Entry

2. In the bottom of the window you’ll see “Show current input source in the menu bar” which is enabled by default. Uncheck the box and the indicator applet will disappear instantly.

remove keyboard indicator

That’s it. Enjoy!

How to Install Brightness Indicator in Ubuntu 13.10 Saucy

Published: November 29, 2013 — Last updated: January 22, 2014

save ubuntu backlight settings

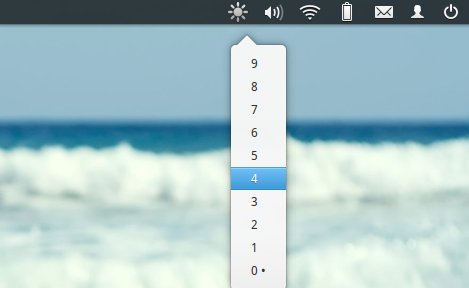
Want to control screen brightness through an indicator applet on panel? Well, you may want this app if your Fn key does not work properly.

Brightness indicator allows to change screen brightness by using the indicator menu or the scroll wheel of your mouse over the indicator icon. It’s inspired by the original Gnome brightness applet.

brightness control indicator

UPDATE: PPA has updated for Ubuntu 13.10, and Ubuntu 14.04. Run below commands one by one in terminal:

sudo add-apt-repository ppa:indicator-brightness/ppa

sudo apt-get update

sudo apt-get install indicator-brightness

The PPA does not update the packages for Ubuntu 13.10 Saucy, but we can use the one for old releases. To get started installing this applet, follow the steps below:

1. Press Ctrl+Alt+T on keyboard to open terminal. When it opens, run command below to download DEB for raring:

wget https://launchpad.net/~indicator-brightness/+archive/ppa/+files/indicator-brightness_0.4~bzr11~raring1_all.deb

2. Then install the deb as well as the dependencies:

sudo dpkg -i ndicator-brightness_0.4~bzr11~raring1_all.deb; sudo apt-get -f install

Alternatively, download the package from launchpad page. Install the required package python-appindicator from Ubuntu Software Center and then double-click to install the brightness indicator package.

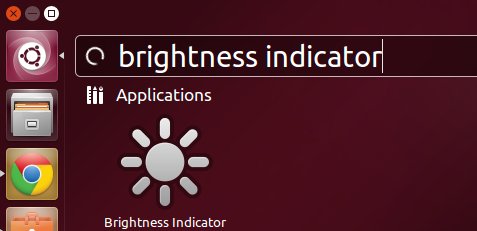
install brightness indicator ubuntu 13.10

Mate gnome 2 desktop

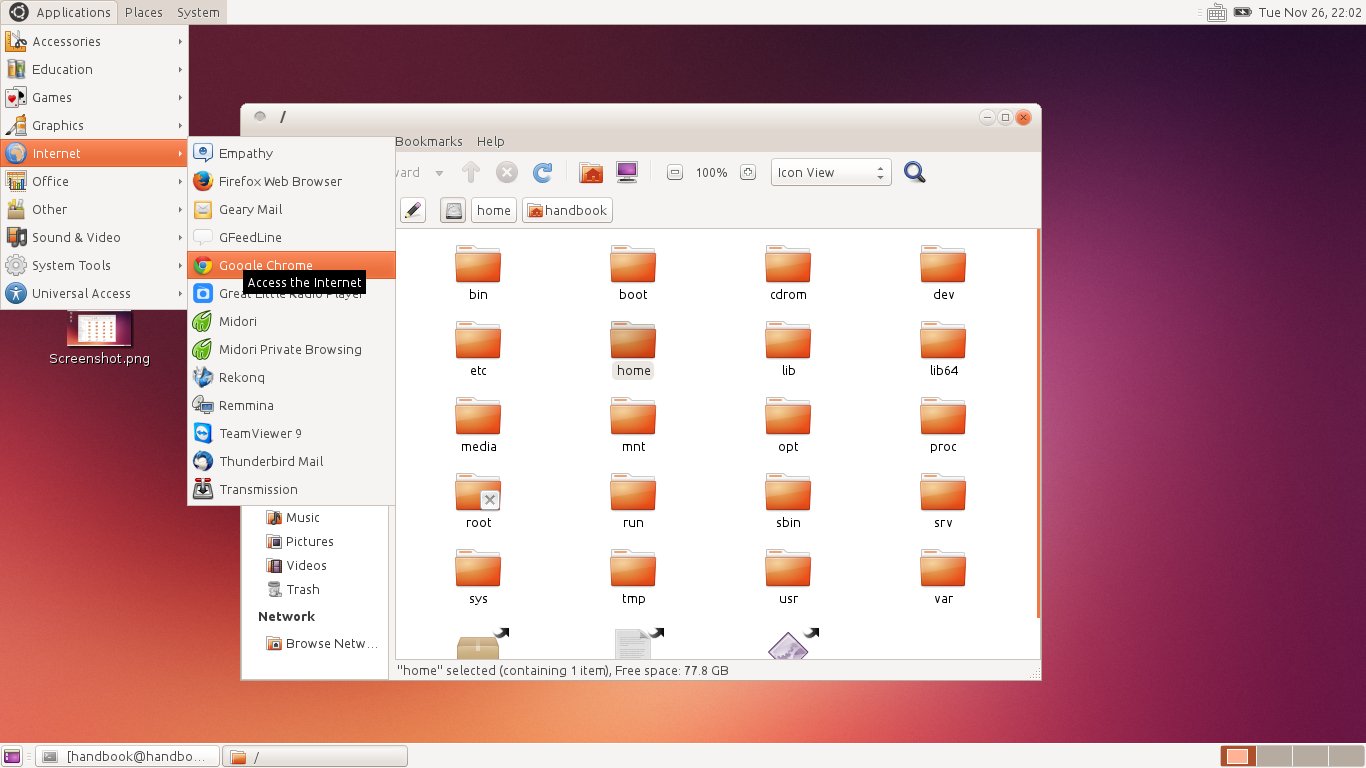
Gnome 2 Desktop was the default in Ubuntu (10.04 Lucid and earlier). If you would like to install this classic DE in Ubuntu 13.10 Saucy, try MATE, which is a fork of GNOME 2, aims to preserve the classic desktop metaphor.

NOTE: If you just want a classic Gnome style panel and app menu, search for and install gnome-session-fallback in Ubuntu Software Center and log out and back in with Gnome Flashback session.

First take a look at MATE 1.6:

MATE calssic gnome 2 menu

MATE calssic gnome 2 menu

MATE gnome 2 panel items

MATE gnome 2 panel items

To install MATE desktop environments in Ubuntu 13.10, follow the steps below:

1. Press Ctrl+Alt+T on keyboard to open terminal. When it opens, run commands to add MATE repository:

sudo add-apt-repository "deb http://packages.mate-desktop.org/repo/ubuntu saucy main"

2. Update package lists and get the keyring:

sudo apt-get update; sudo apt-get install mate-archive-keyring

3. Update and install the DE:

sudo apt-get update; sudo apt-get install mate-core mate-desktop-environment

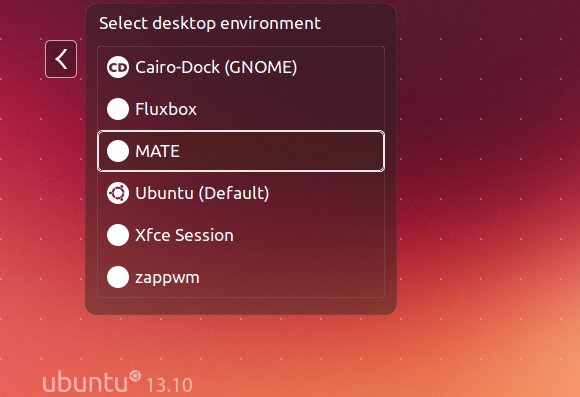
Once installed, log out current session and choose to login with MATE from LightDM:

MATE login in ubuntu 13.10

minecraft ubuntu 13.10

This simple tutorial shows you how to easily install minecraft sandbox indie game in Ubuntu 13.10 or Linux Mint 16 via PPA.

The package in this unofficial PPA is only a script that automatically connects to Mojang’s servers and downloads the files.

Pay attention on the PPA description before getting started:

If your computer has issues running Minecraft with OpenJDK 7, then it will have issues running this. Because that’s what this is. I’ve tested this on multiple machines and it’s worked fine, but your mileage may vary. That said, one of the main black screen issues I’ve seen is people not running it with OpenJDK 7. ;)

To get started, press Ctrl+Alt+T on keyboard to open terminal. When it opens, run commands below one by one:

sudo add-apt-repository ppa:minecraft-installer-peeps/minecraft-installer

sudo apt-get update

sudo apt-get install minecraft-installer

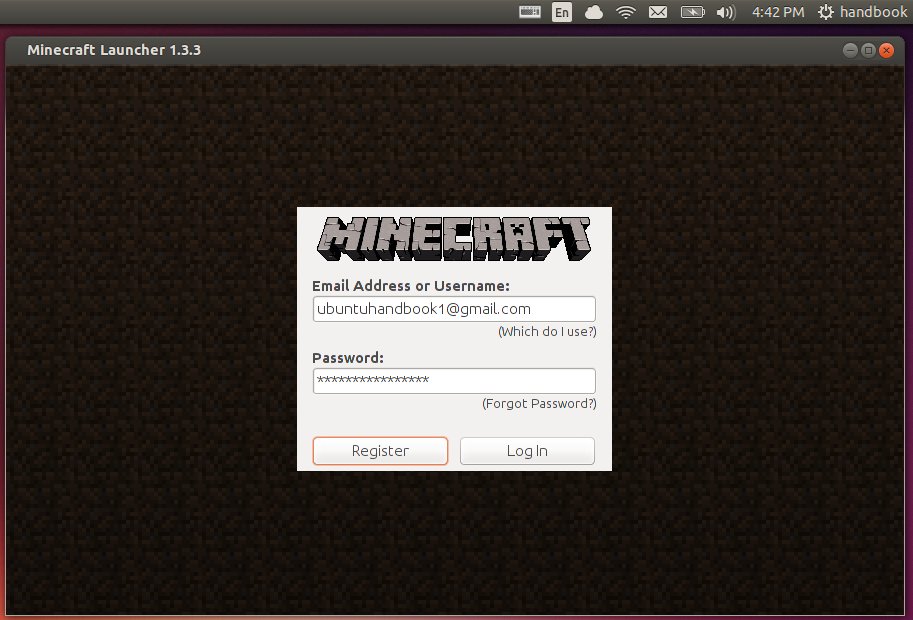
Once installed, open MineCraft from Unity Dash, login with your Minecraft account and the installation should start automatically.

minecraft login

minecraft login

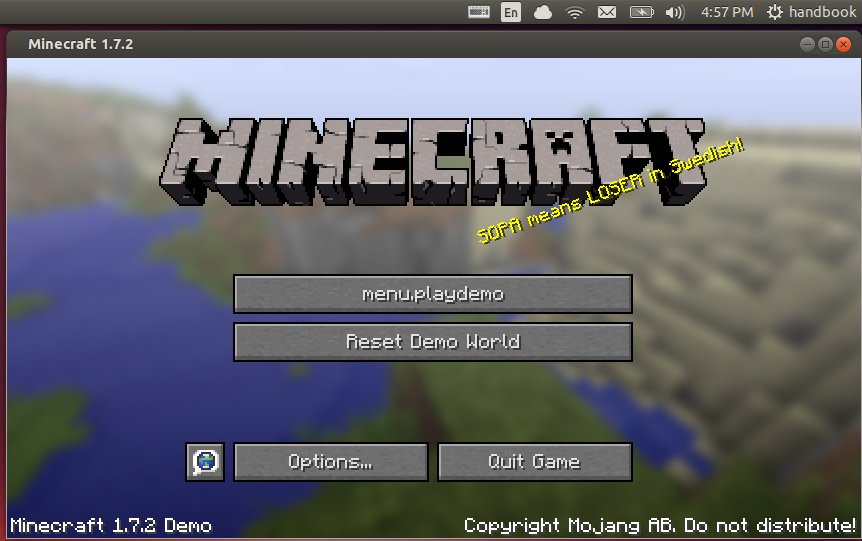
minecraft updates

minecraft game window